Jenkins UI tutorials
Installation, freestyle chaining, pipelines, Blue Ocean, parameters, CLI, and REST walkthroughs
This document contains step-by-step UI tutorials and walkthroughs for basic Jenkins operations. It was compiled from the original Jenkins-For-Beginners notes.
Demo Jenkins Installation
This guide details the installation of Jenkins on an Ubuntu virtual machine, covering downloading, prerequisites, configuration, and initial setup steps.
In this guide, we walk you through installing Jenkins on an Ubuntu virtual machine. This article details every step—from downloading Jenkins and installing its prerequisites to configuring Java and completing the initial setup. Follow along to get Jenkins up and running quickly.
1. Downloading Jenkins
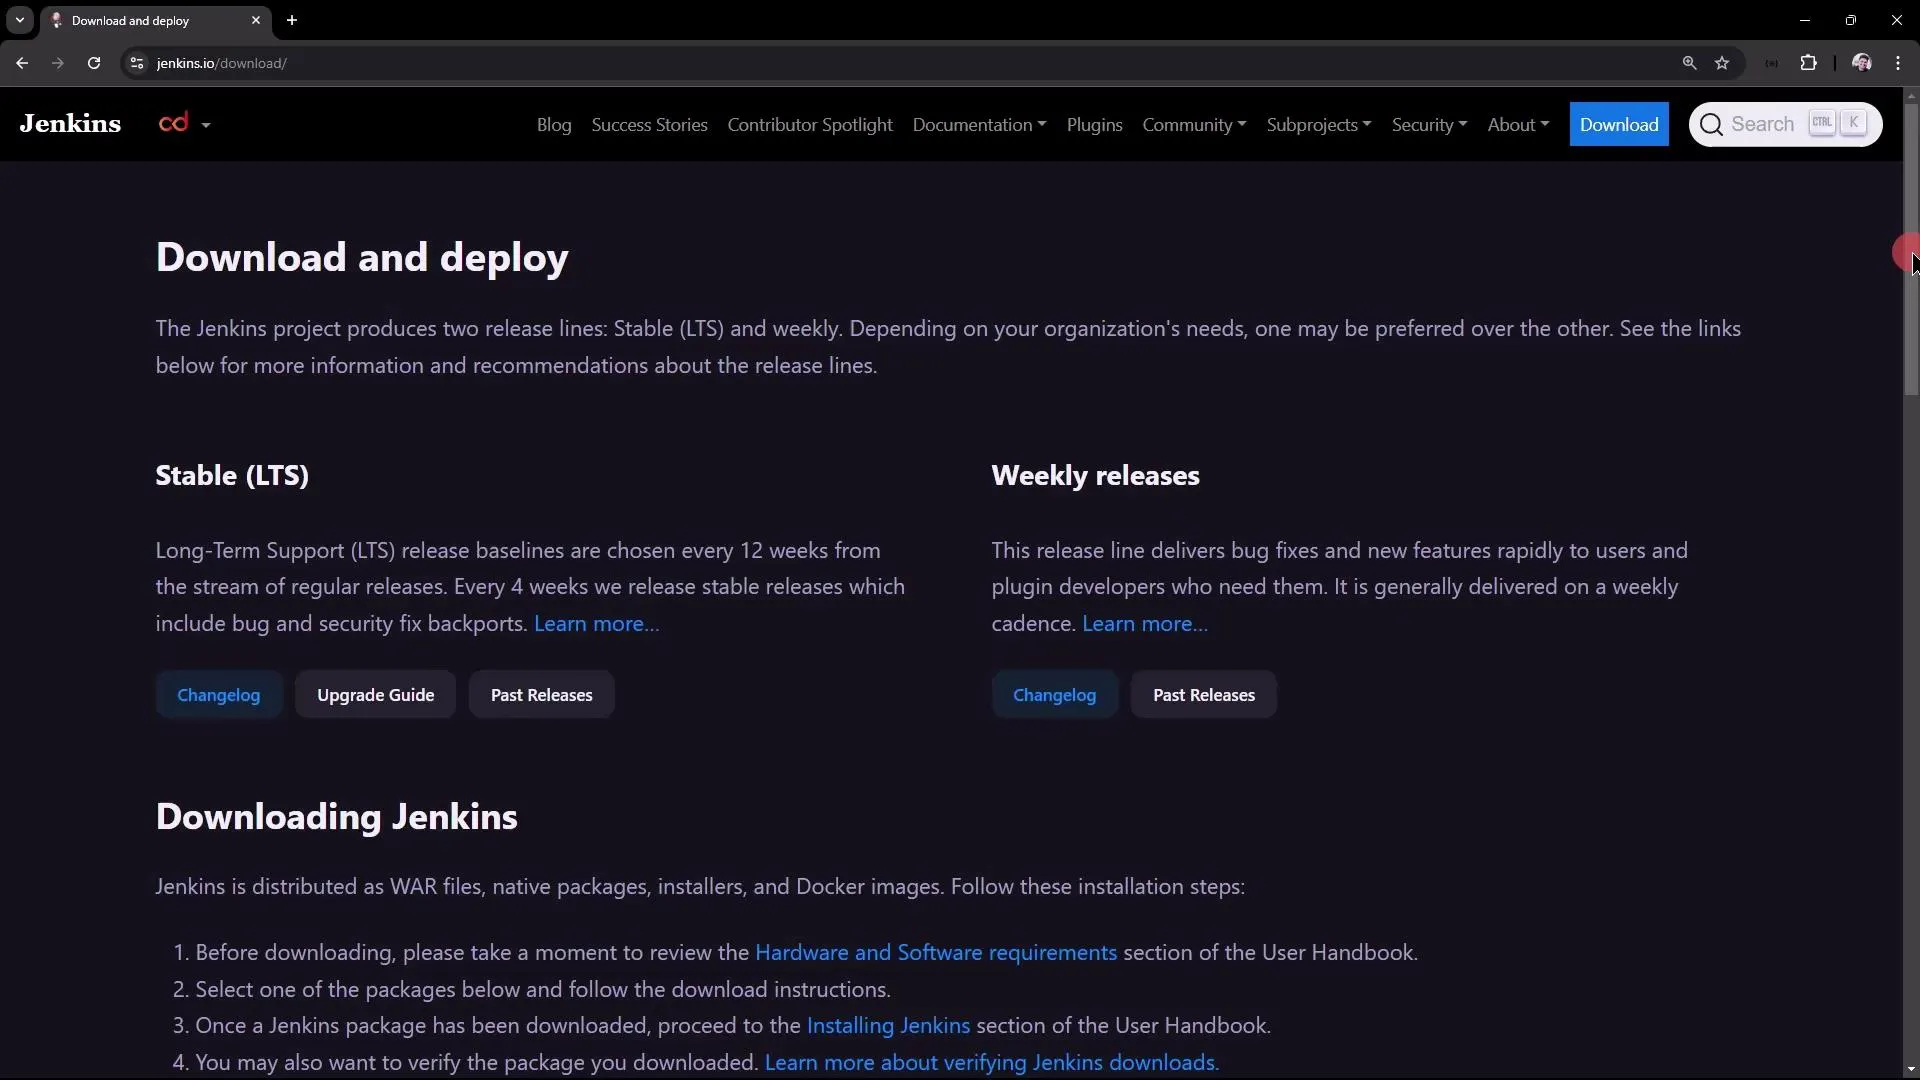
Begin by searching for “Jenkins download” in your browser. On the Jenkins website, you will encounter two main release types:
-
Stable LTS (Long-Term Support): Prioritizes stability and security by offering extended support with bug fixes and security updates.
-
Weekly Releases: Provides the latest features and fixes, although they might be less stable.
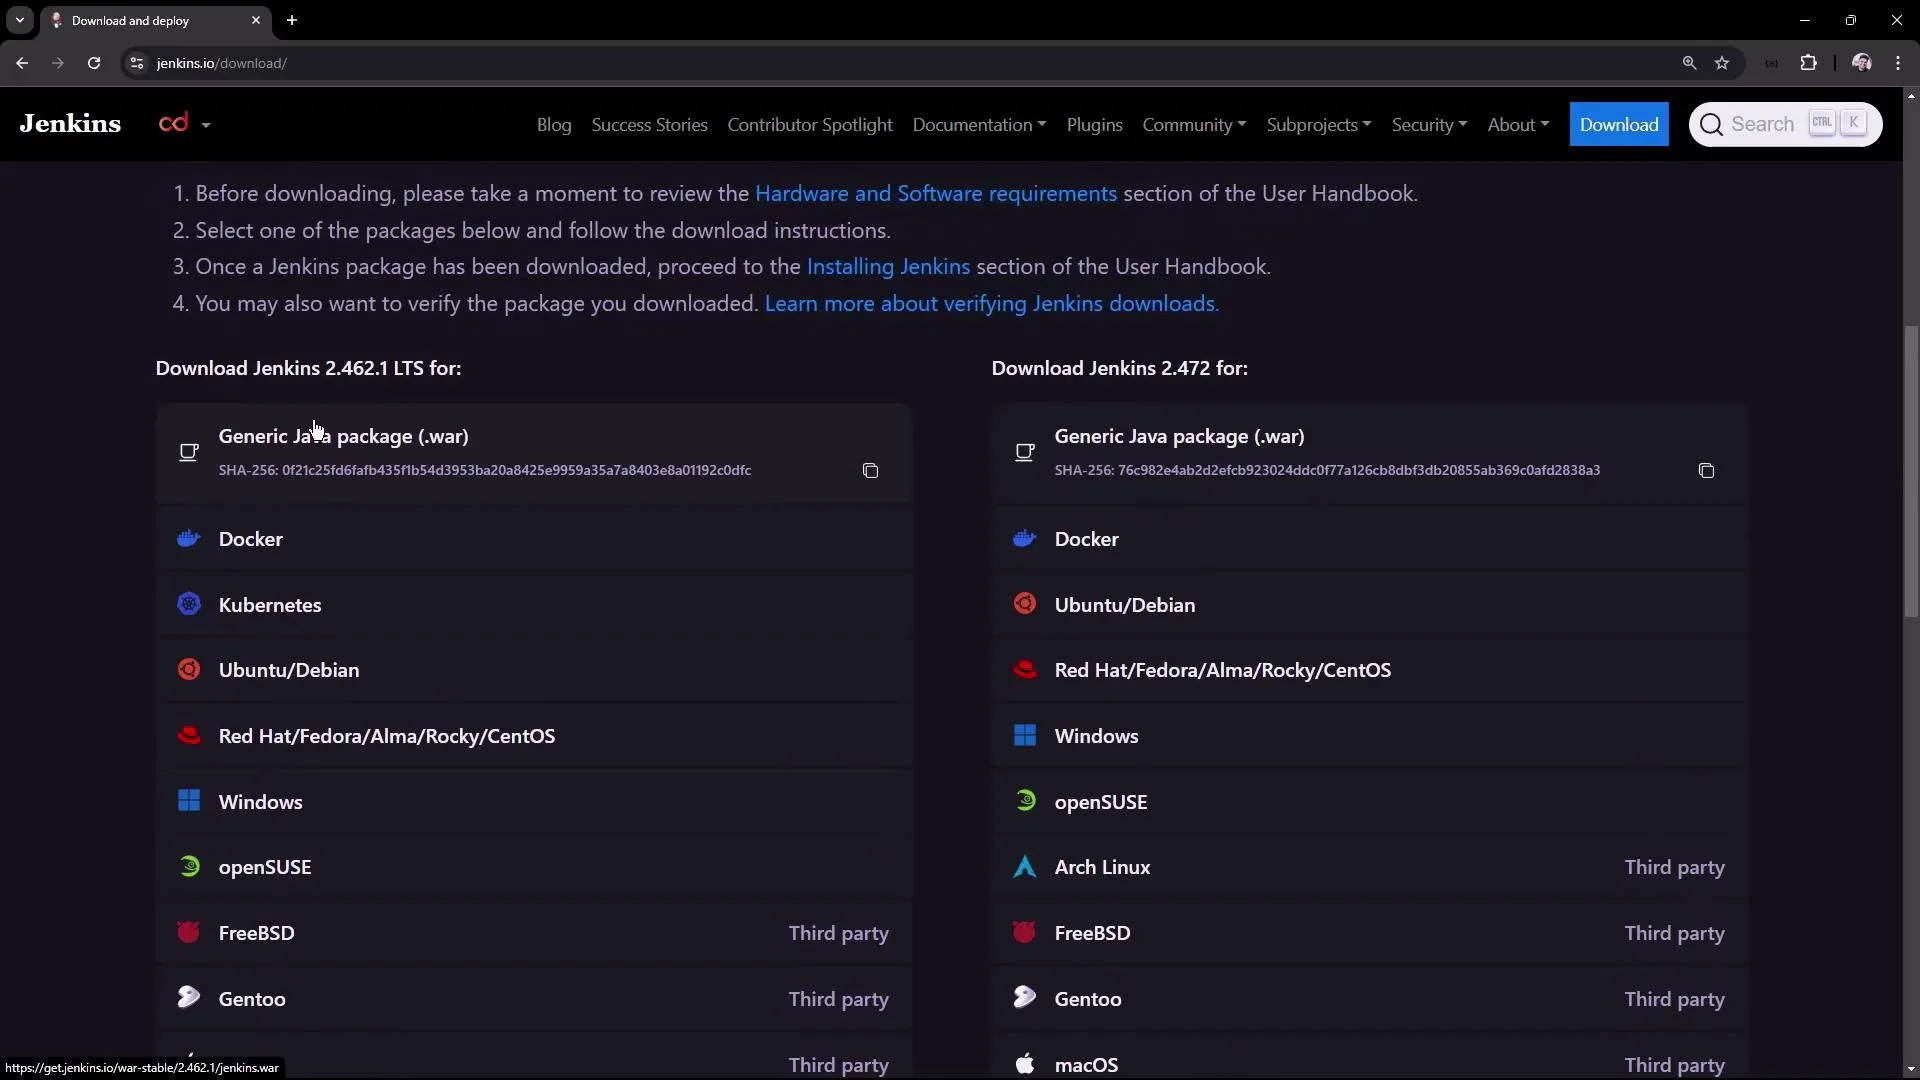
Scroll down to review the available download options. At the time of writing, the LTS version is 2.462.1, while the weekly version is 2.472.
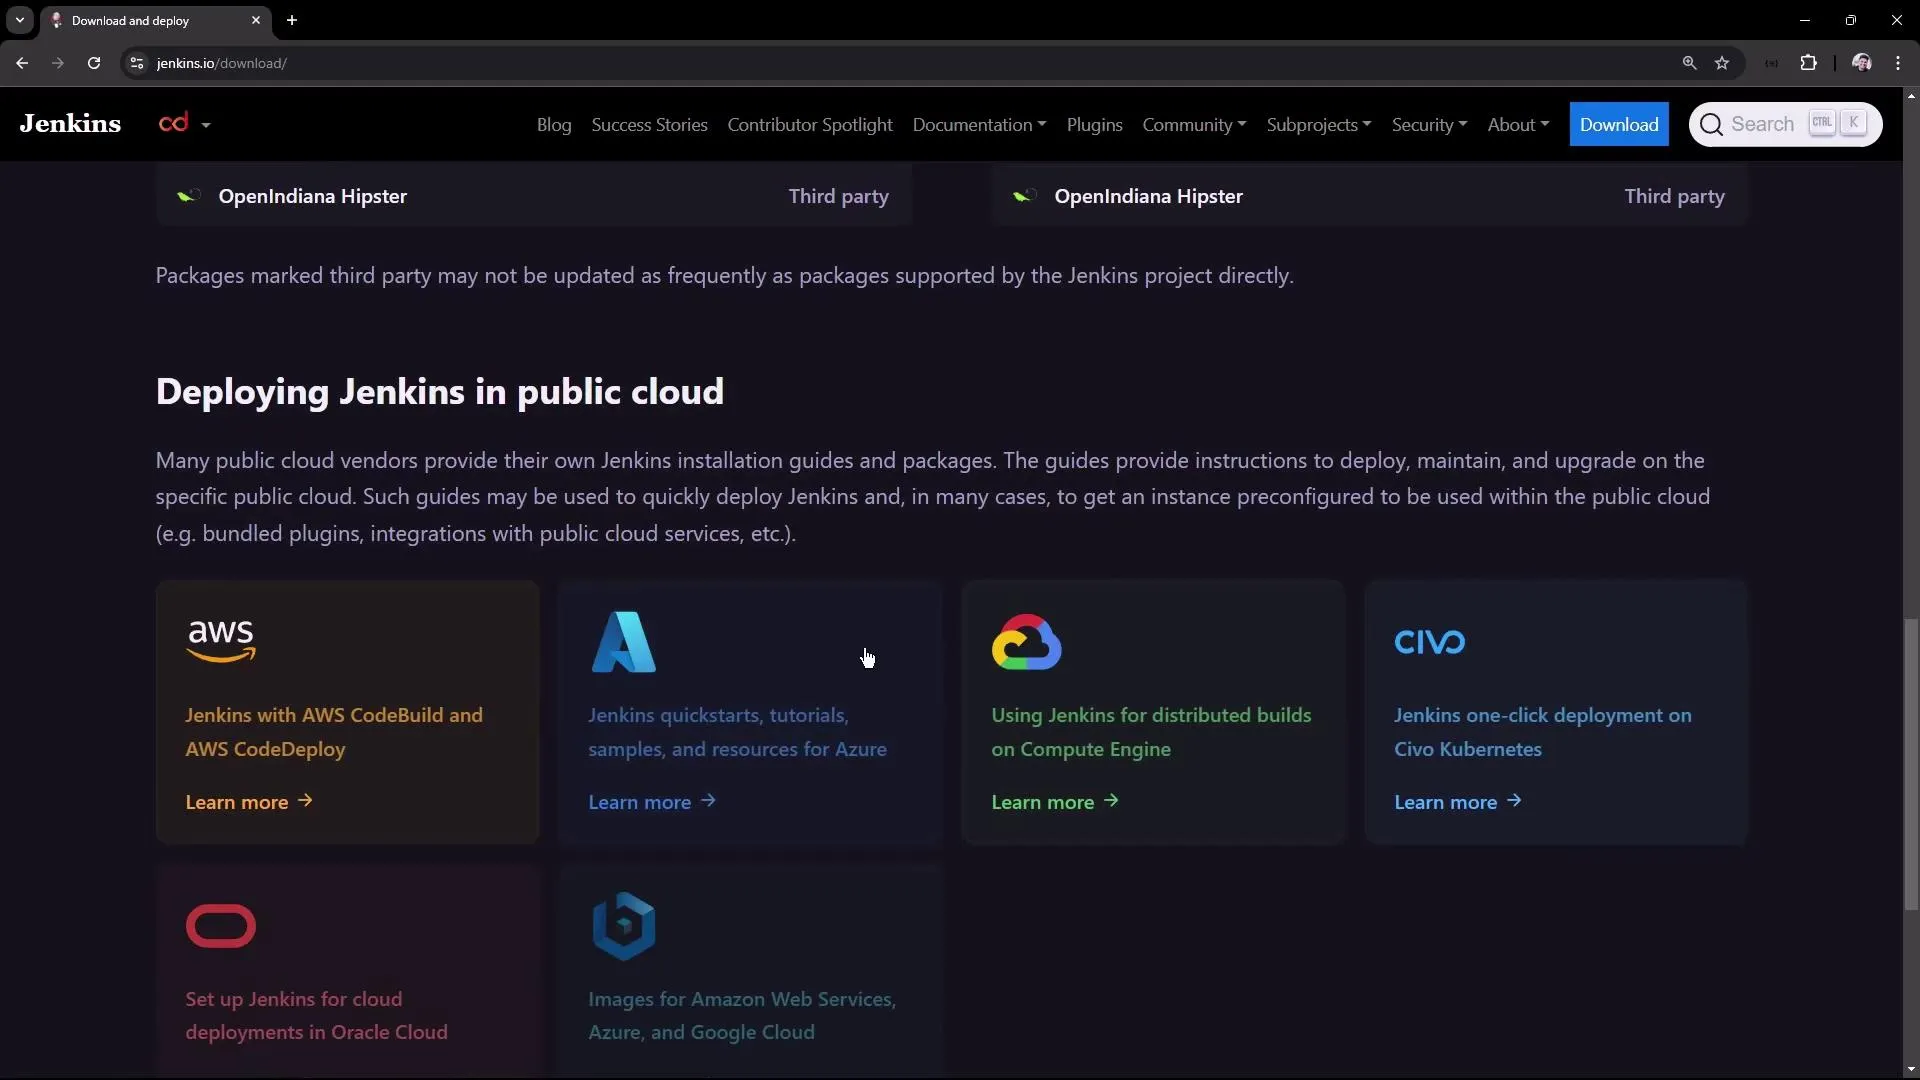
Jenkins also provides detailed deployment instructions for public cloud platforms such as Azure, AWS, Oracle, and Google.
2. Installing Jenkins on Ubuntu
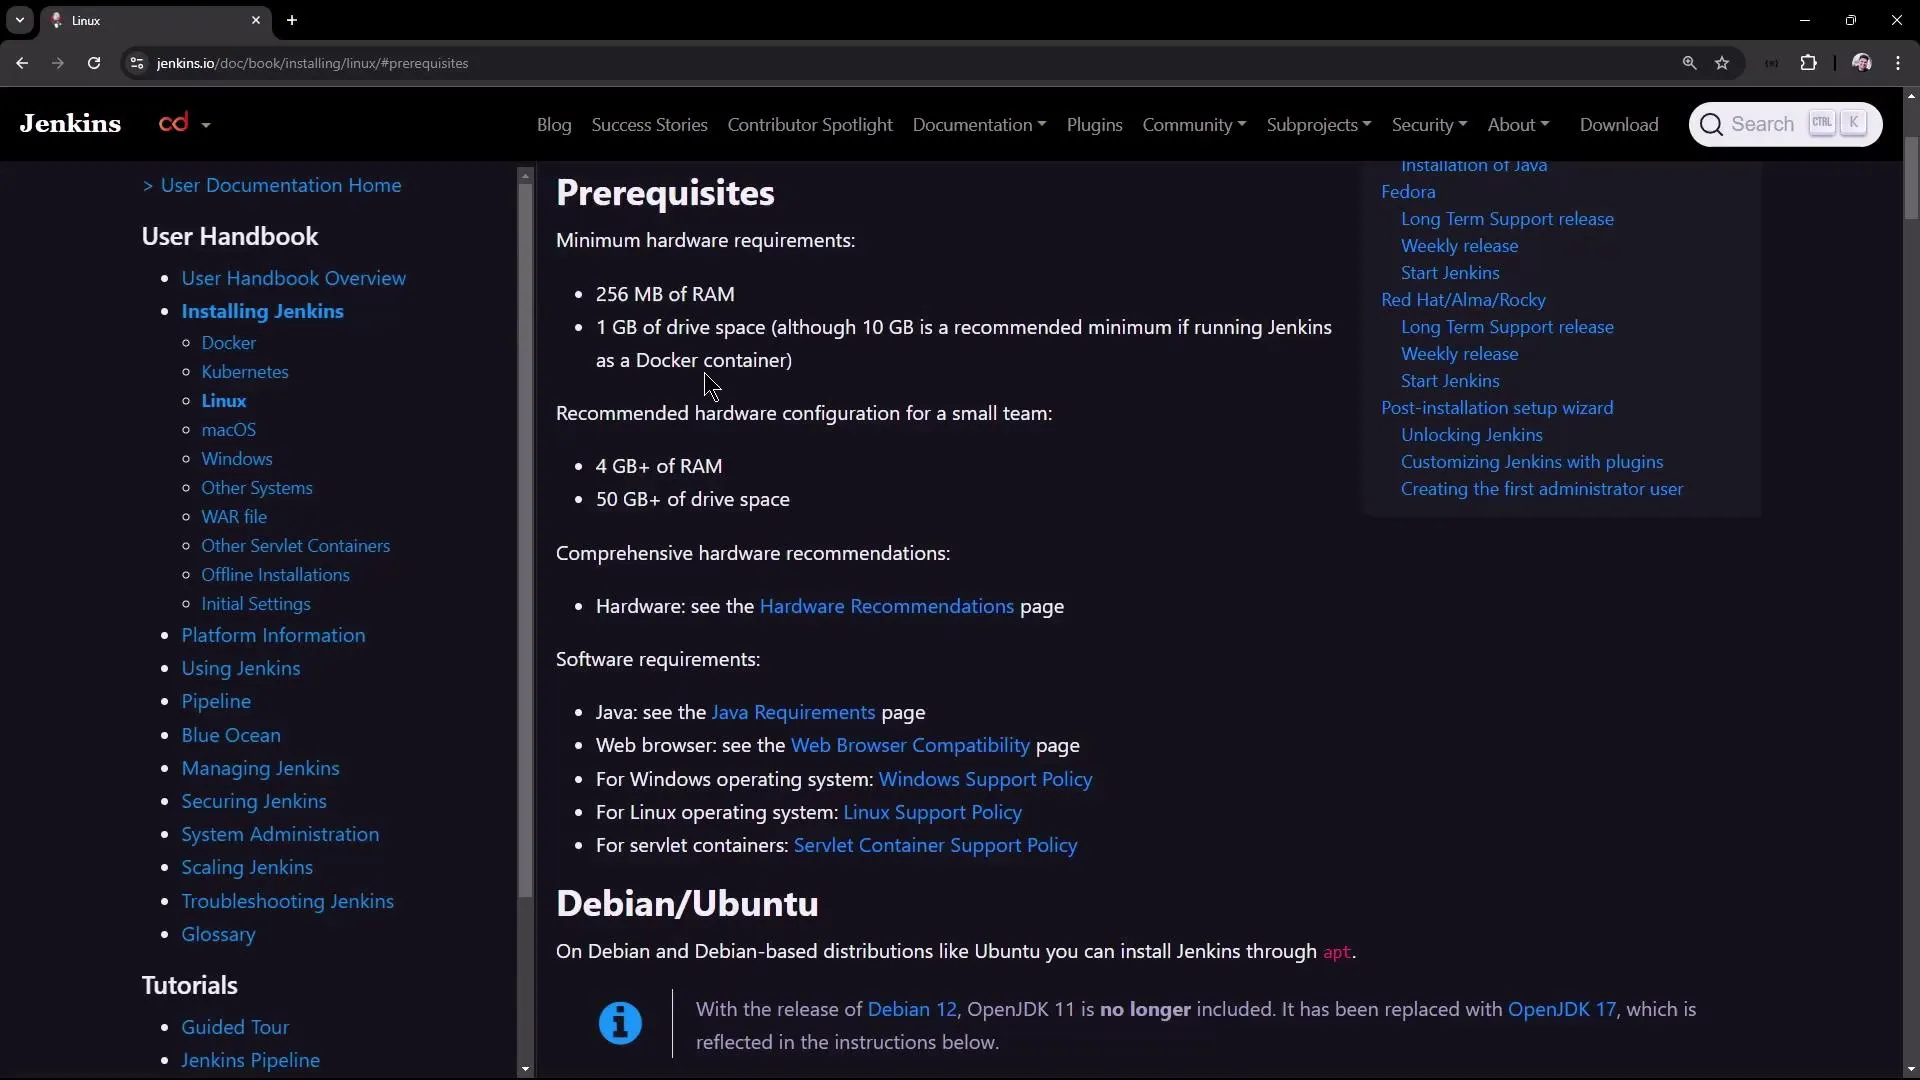
In this section, we install the LTS version of Jenkins on an Ubuntu virtual machine. Before you begin, ensure that your machine meets the basic hardware requirements. For training and testing purposes, 4 GB of RAM with two CPU cores is sufficient.
2.1 Adding the Jenkins Repository and Installing Jenkins
Execute the following commands to add the Jenkins repository key, configure your repository, update your package list, and install Jenkins:
sudo wget -O /usr/share/keyrings/jenkins-keyring.asc \ https://pkg.jenkins.io/debian-stable/jenkins.io-2023.keyecho "deb [signed-by=/usr/share/keyrings/jenkins-keyring.asc] \ https://pkg.jenkins.io/debian-stable binary/" | sudo tee \ /etc/apt/sources.list.d/jenkins.list > /dev/nullsudo apt-get updatesudo apt-get install jenkins -yThese commands perform the following actions:
- Download the Jenkins public key.
- Verify and add the repository key.
- Update your system’s package lists.
- Install Jenkins.
The installation process typically takes around 20 seconds.
3. Verifying the Jenkins Service Status
After the installation completes, check that the Jenkins service is running by executing:
systemctl status jenkinsIf the service reports as failed, review the system logs to diagnose the problem:
journalctl -u jenkinsYou might see log entries similar to:
Aug 19 07:58:24 jenkins-controller-1 systemd[1]: Starting jenkins.service - Jenkins Continuous Integration Server...Aug 19 07:58:24 jenkins-controller-1 jenkins[31418]: jenkins: failed to find a valid Java installation...Aug 19 07:58:25 jenkins-controller-1 systemd[1]: Failed to start jenkins.service - Jenkins Continuous Integration Server.These logs indicate that Jenkins cannot locate a valid Java installation.
4. Installing Java
Jenkins requires Java to operate correctly. Begin by checking your current Java version:
java -versionIf Java isn’t installed, you may encounter a message like:
Command 'java' not found, but can be installed with:apt install default-jre # version 2:1.17-75, orapt install openjdk-17-jre-headless # version 17.0.12+7-1ubuntu2~24.04...Since OpenJDK 17 is supported by Jenkins, install it using the following commands:
sudo apt updatesudo apt install fontconfig openjdk-17-jre -yjava -versionThe output should now display details for OpenJDK 17, similar to:
openjdk version "17.0.12" 2024-07-16OpenJDK Runtime Environment (build 17.0.12+7-Ubuntu-1ubuntu224.04)OpenJDK 64-Bit Server VM (build 17.0.12+7-Ubuntu-1ubuntu224.04, mixed mode, sharing)5. Restarting the Jenkins Service
With Java installed, restart the Jenkins service using:
sudo systemctl restart jenkinsVerify its status again with:
systemctl status jenkinsIf the Jenkins service continues to fail or repeatedly restart, review the logs with:
journalctl -u jenkinsOnce Jenkins starts successfully, you should see a log entry prompting the initial setup:
Jenkins initial setup is required. An admin user has been created and a password has been generated.Please use the following password to proceed to installation:<initialAdminPassword>This may also be found at: /var/lib/jenkins/secrets/initialAdminPassword6. Completing the Jenkins Initial Setup
6.1 Accessing the Jenkins UI
Jenkins runs on port 8080 by default. Open your browser and navigate to:
http://<your-vm-public-ip>:8080You will be presented with the Jenkins unlock screen where you must enter the initial admin password.
6.2 Retrieving the Initial Admin Password
To retrieve the admin password, run the following command on your virtual machine:
cat /var/lib/jenkins/secrets/initialAdminPasswordThe command should output a string like:
201869b1bc8f4b48a721a65d589318a1You can also inspect the Jenkins home directory to verify its structure:
ls -l /var/lib/jenkinsThis directory includes important files and folders such as config.xml, jobs, plugins, secrets, and updates.
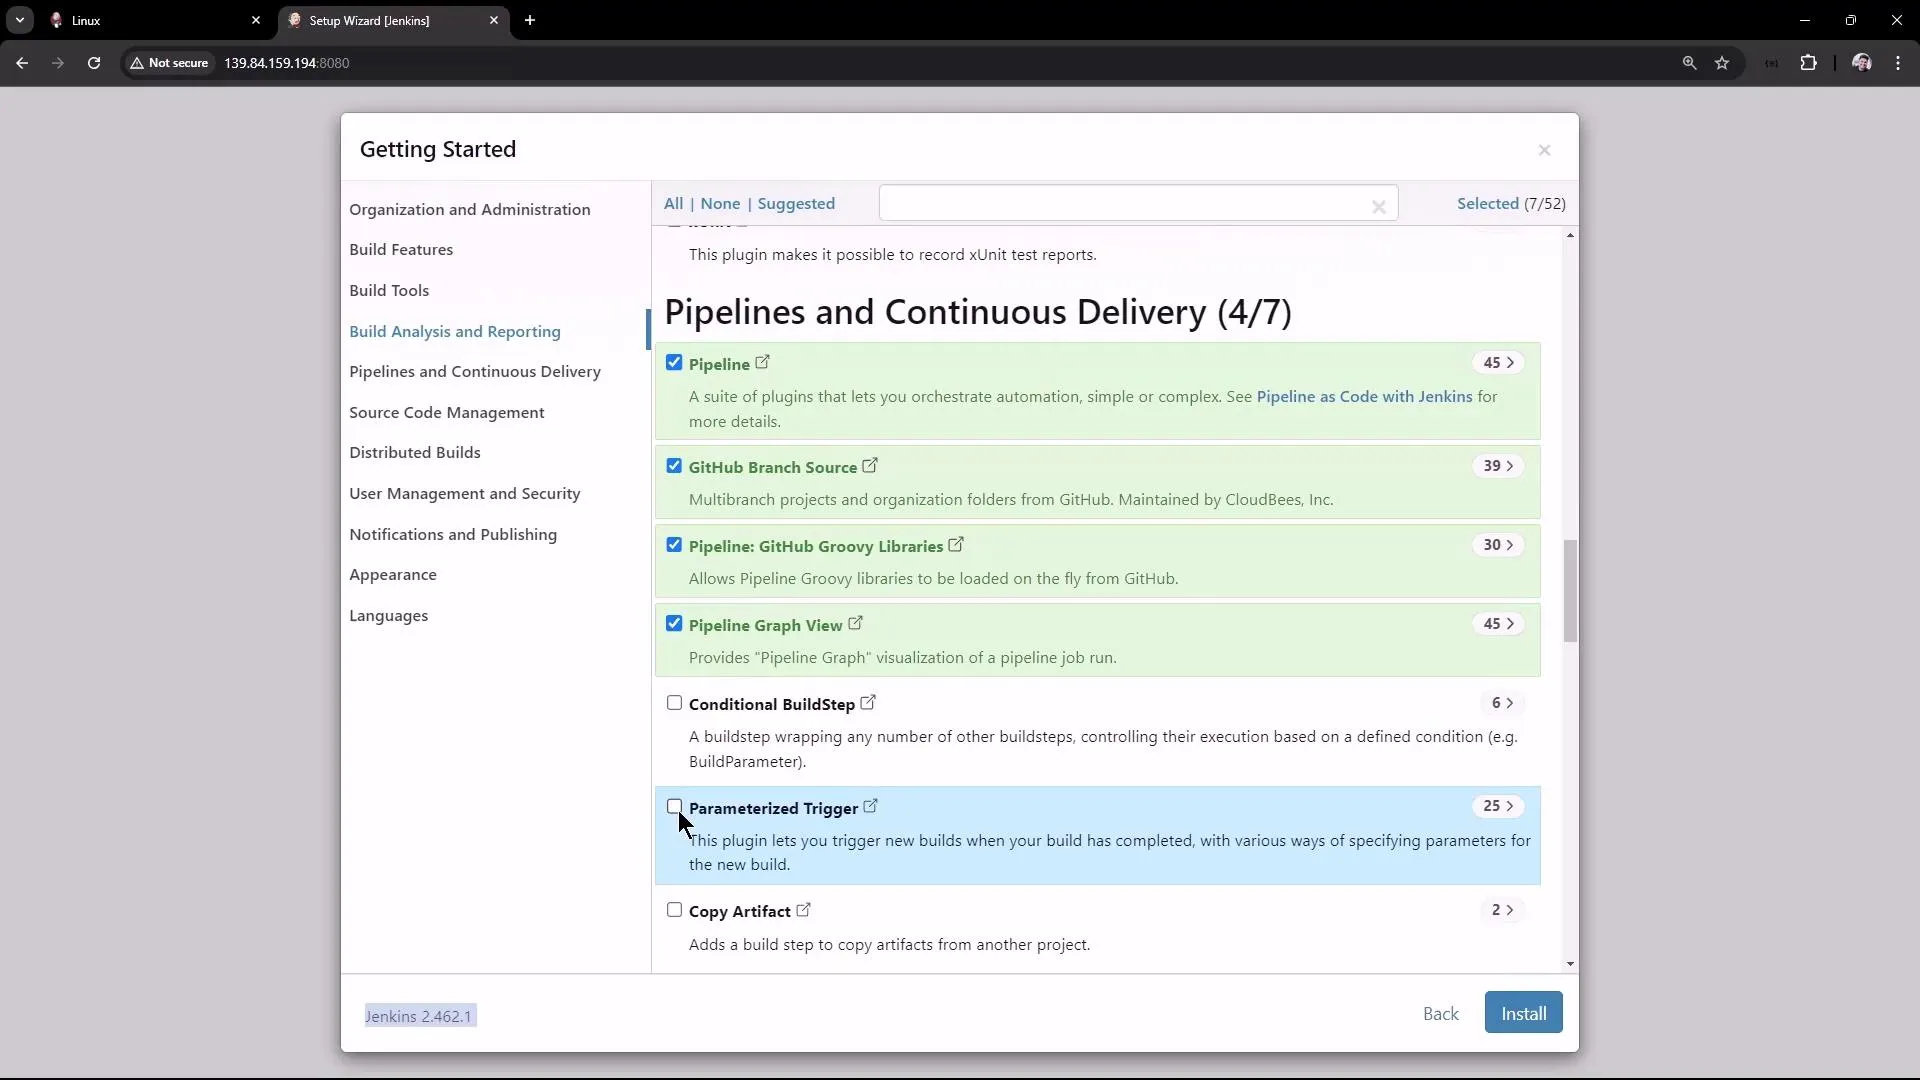
6.3 Installing Plugins and Creating an Admin User
After unlocking Jenkins with the initial admin password, the setup wizard appears. You can choose to install the suggested plugins or select the ones you need. For this demonstration, consider installing these key plugins:
-
Credential Binding
-
Timestamper
-
Various Pipeline plugins (e.g., pipeline graph view, GitHub branch source, pipeline Groovy libraries)
-
Git (for Source Control Management)
-
Docker Theme (for enhanced UI appearance)
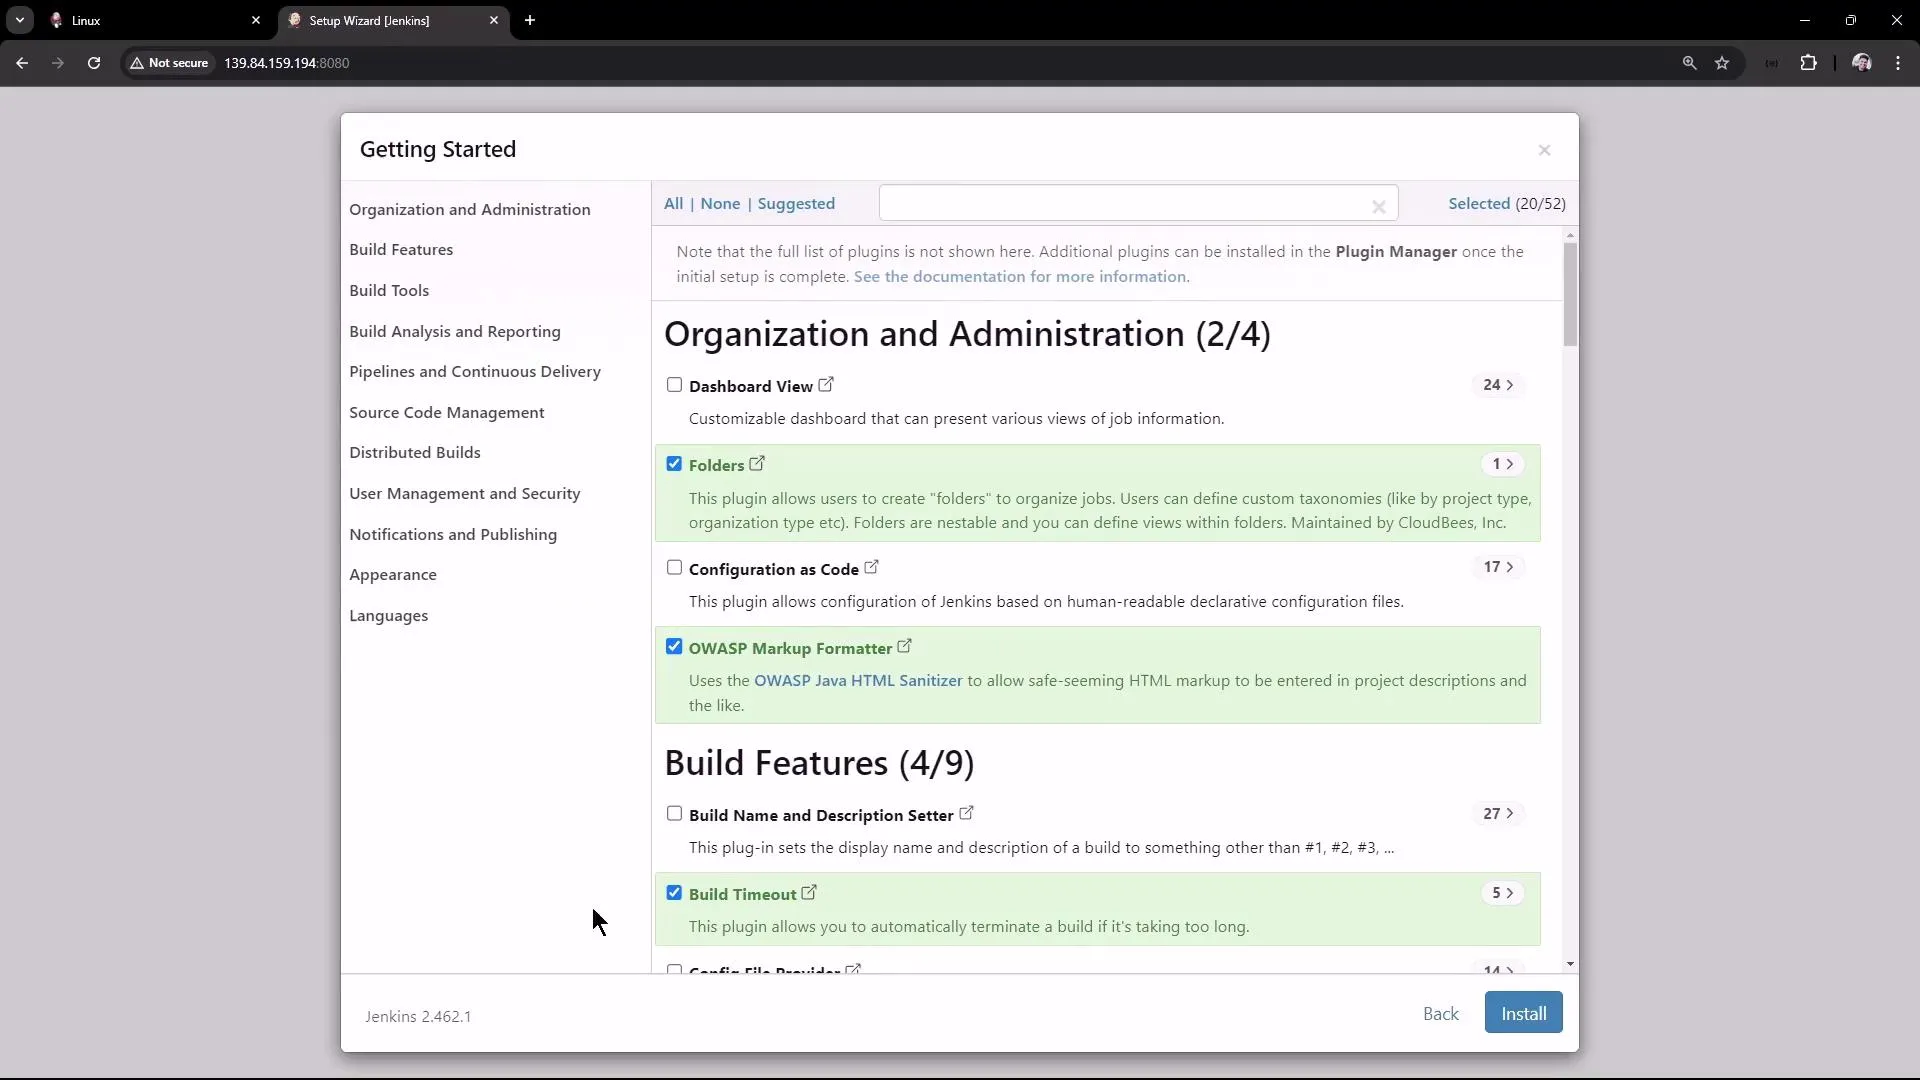
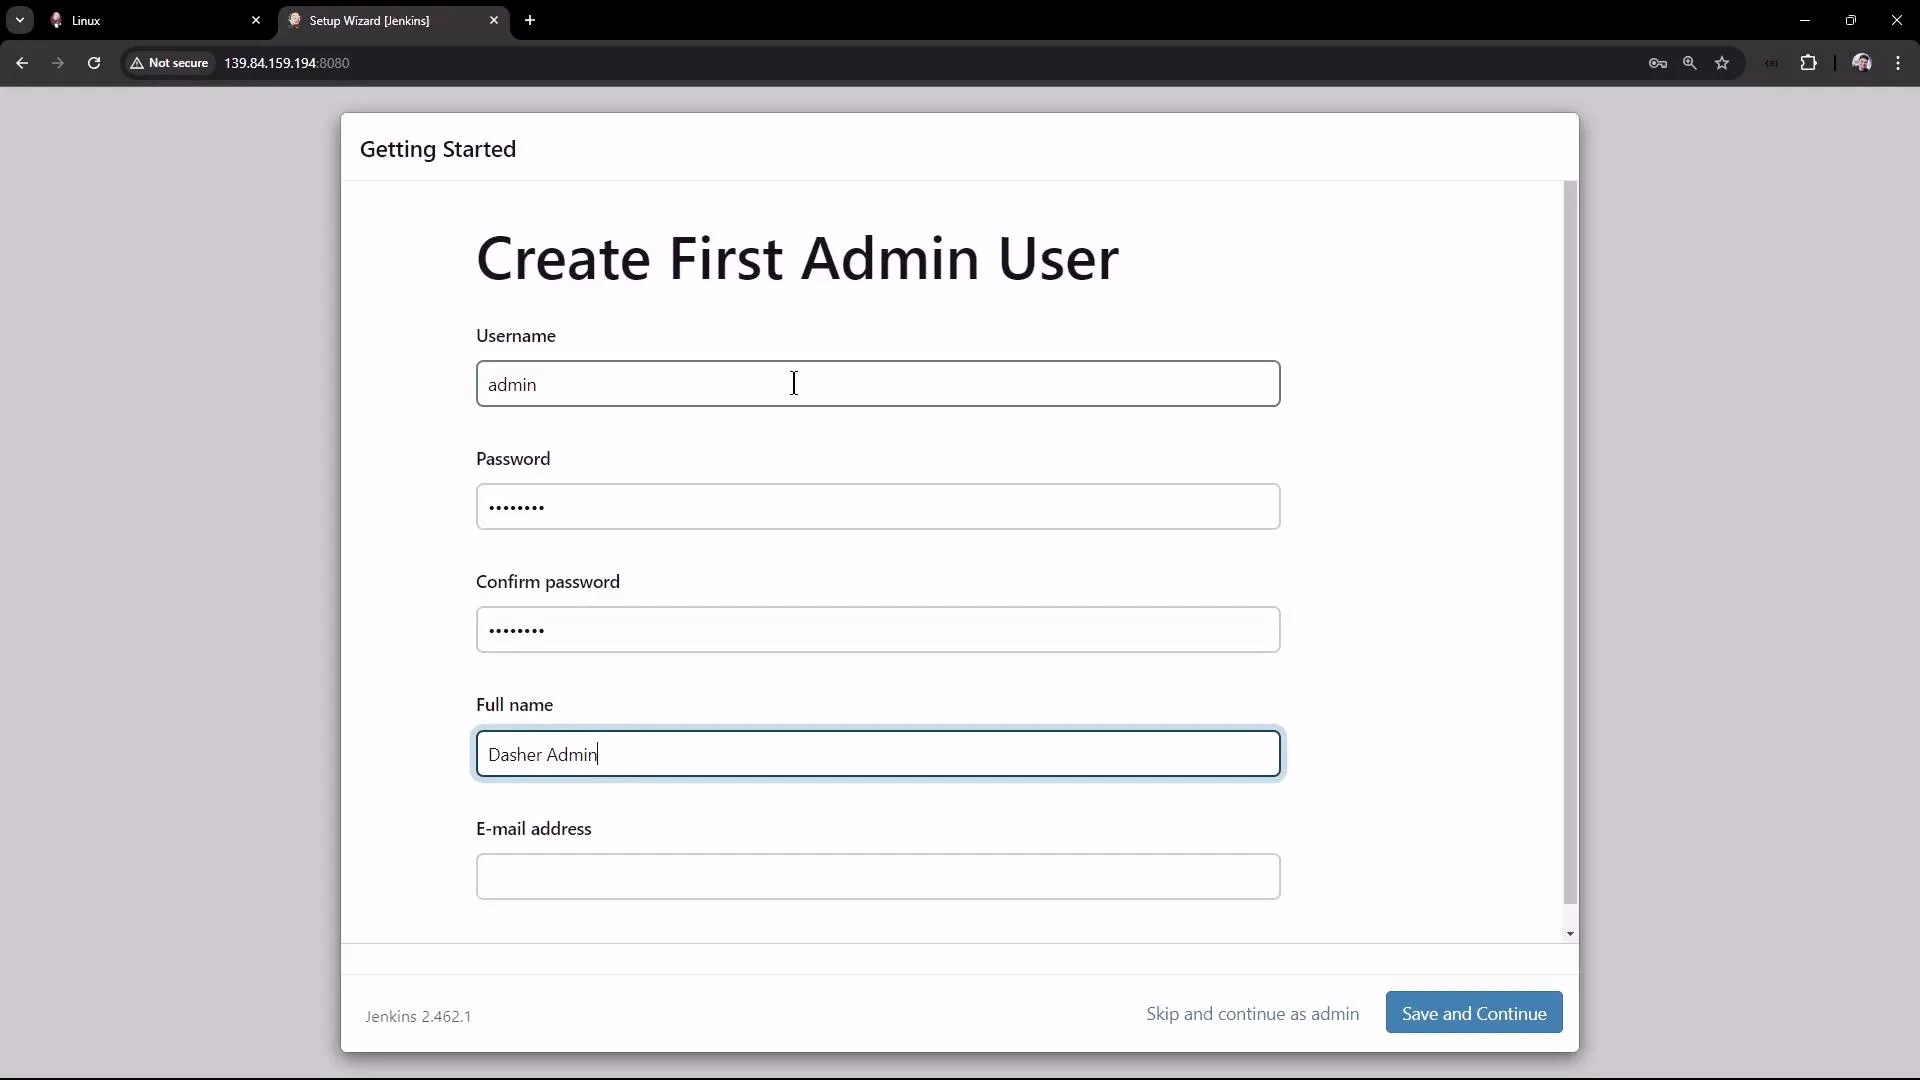
Follow the on-screen prompts to install the selected plugins. Once installation concludes, the wizard will prompt you to create the first admin user. For example, you might use:
- Username: admin
- Password: (choose a secure password)
- Full Name: Demo Admin
- Email: admin@Demo.com
Next, configure the Jenkins URL. Set it to your virtual machine’s public IP and port (e.g., http://139.84.159.194:8080) to ensure all generated links work properly.
After these steps, Jenkins is ready to use.
7. Next Steps
In future guides, we will explore the Jenkins user interface in more detail, configure jobs and pipelines, and learn how to manage builds and continuous integration processes.
Thank you for following this guide. Enjoy building your CI/CD pipeline with Jenkins!
For more information on Jenkins, visit the Jenkins Documentation and explore related topics such as CI/CD best practices.
Chained Freestyle Projects
This article demonstrates how to break a multi-stage process into separate jobs by chaining Freestyle Projects in Jenkins.
This article demonstrates how to break a multi-stage process into separate jobs by chaining Freestyle Projects in Jenkins. Previously, we executed a job that generated ASCII artwork by performing build, test, and deploy stages. Now, we will separate these stages into individual projects and chain them so that the test job runs after the build job, and the deploy job runs only after both the build and test jobs complete.
Below is an example of the complete process originally executed in one job:
# Build a message by invoking the ADVICESLIP APIcurl -s https://api.adviceslip.com/advice > advice.json
# Test to ensure the advice message has more than 5 wordscat advice.json | jq -r .slip.advice > advice.message[ $(wc -w < advice.message) -gt 5 ] && echo "Advice has more than 5 words" || echo "Advice - $(cat advice.message) has 5 words"
# Deploy by installing cowsay and displaying the advice in ASCII artsudo apt-get install cowsay -yecho $PATHexport PATH="$PATH:/usr/games:/usr/local/games"cat advice.message | cowsay -f $(ls /usr/share/cowsay/cows | shuf -n 1)
We will now refactor these steps into separate Freestyle Projects.
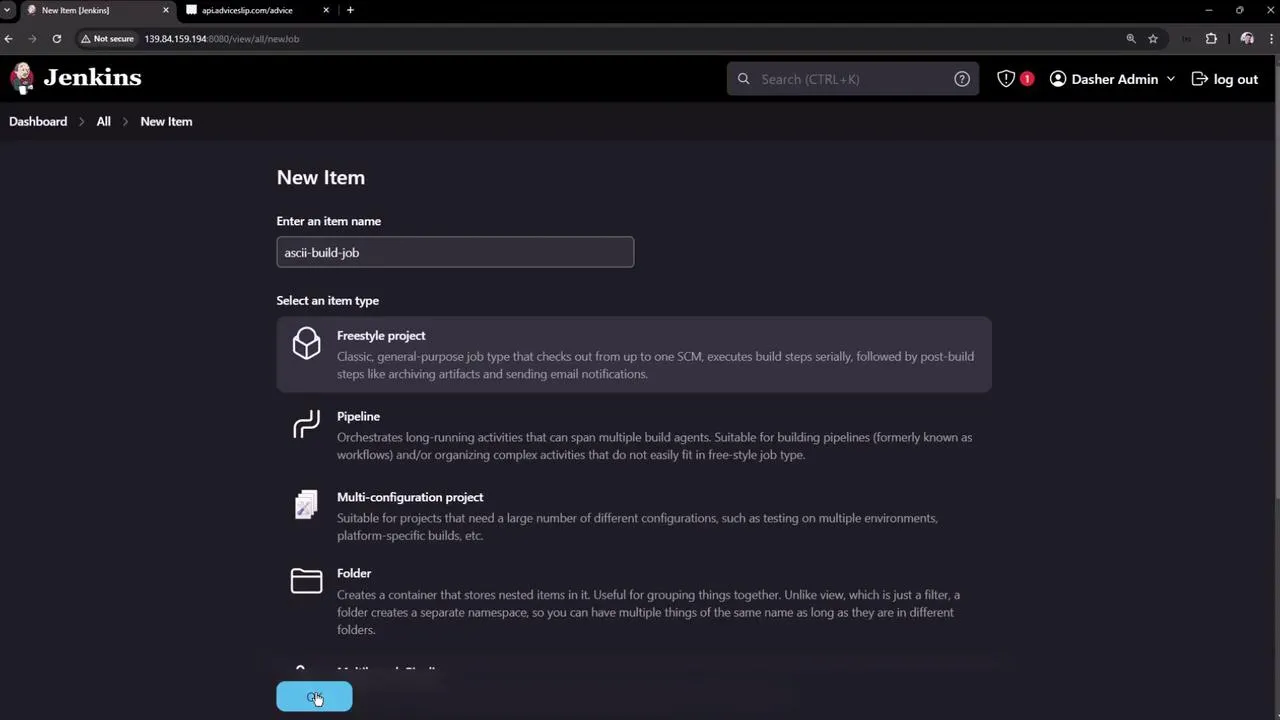
ASCII Build Job
Begin by setting up the build phase as a new Freestyle Project.
- Open the Jenkins dashboard and create a new item. Name the project ASCII Build Job and select the Freestyle Project type. Then click OK.
-
In the project configuration, scroll down to the Build section and add an Execute shell build step. Enter the following commands:
Terminal window # Build: Fetch advice from the API and save to filecurl -s https://api.adviceslip.com/advice > advice.jsoncat advice.json -
Save the configuration.
-
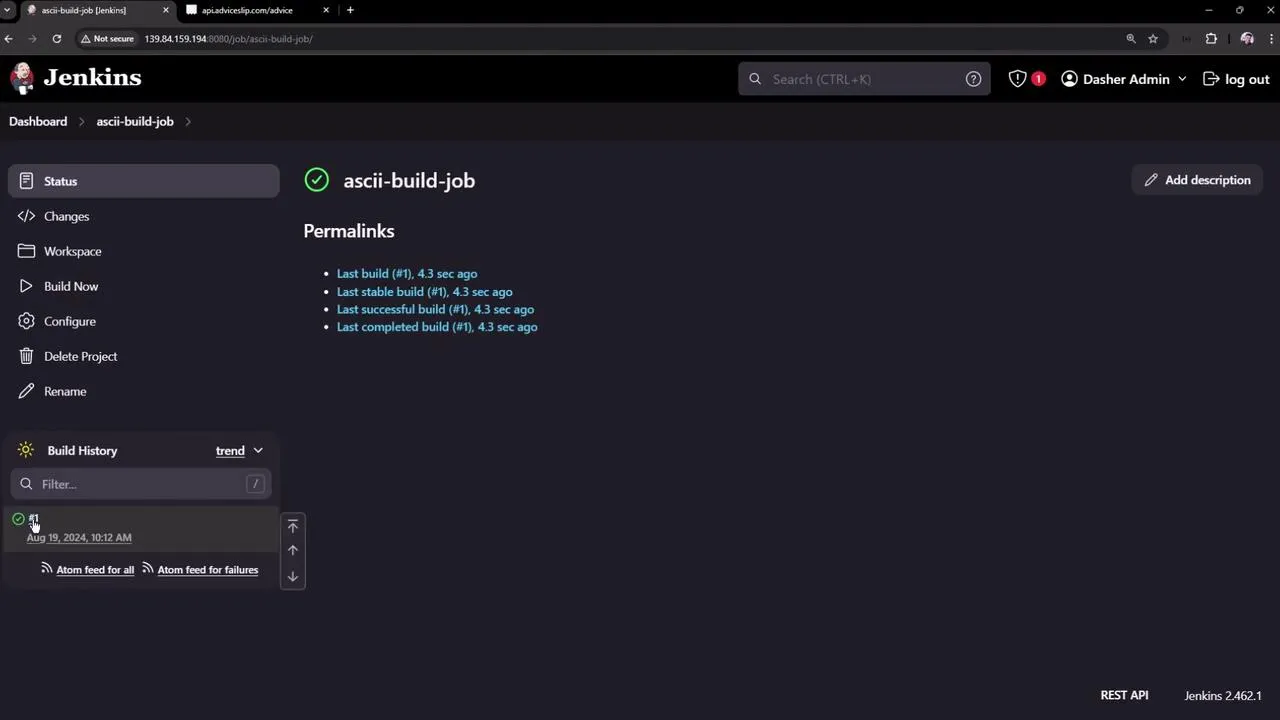
Run a build manually to verify that it completes successfully. After a successful build, a new file named
advice.jsonwill be generated in the workspace. For example, the file might appear as:{"slip": {"id": 59,"advice": "Don't be afraid of silly ideas."}} -
You can review the build history and details on the Jenkins dashboard:
ASCII Test Job
Next, create a test job to verify the output generated by the build job.
-
From the Jenkins dashboard, create a new job named ASCII Test Job. Select the Freestyle Project option and click OK.
-
In the job configuration, add an Execute shell build step. Insert the following script, which performs the necessary tests:
Terminal window # Test: Verify that the advice message has more than 5 wordsls advice.jsoncat advice.json | jq -r '.slip.advice' > advice.messageif [ $(wc -w < advice.message) -gt 5 ]; thenecho "Advice has more than 5 words: $(cat advice.message)"elseecho "Advice message has 5 words or less: $(cat advice.message)"fiThis script checks for the presence of
advice.json, extracts the advice text into a file calledadvice.message, and then confirms that it contains more than five words. -
Save the configuration. You don’t need to trigger this job manually since it will be set up to run automatically after the build job completes.
-
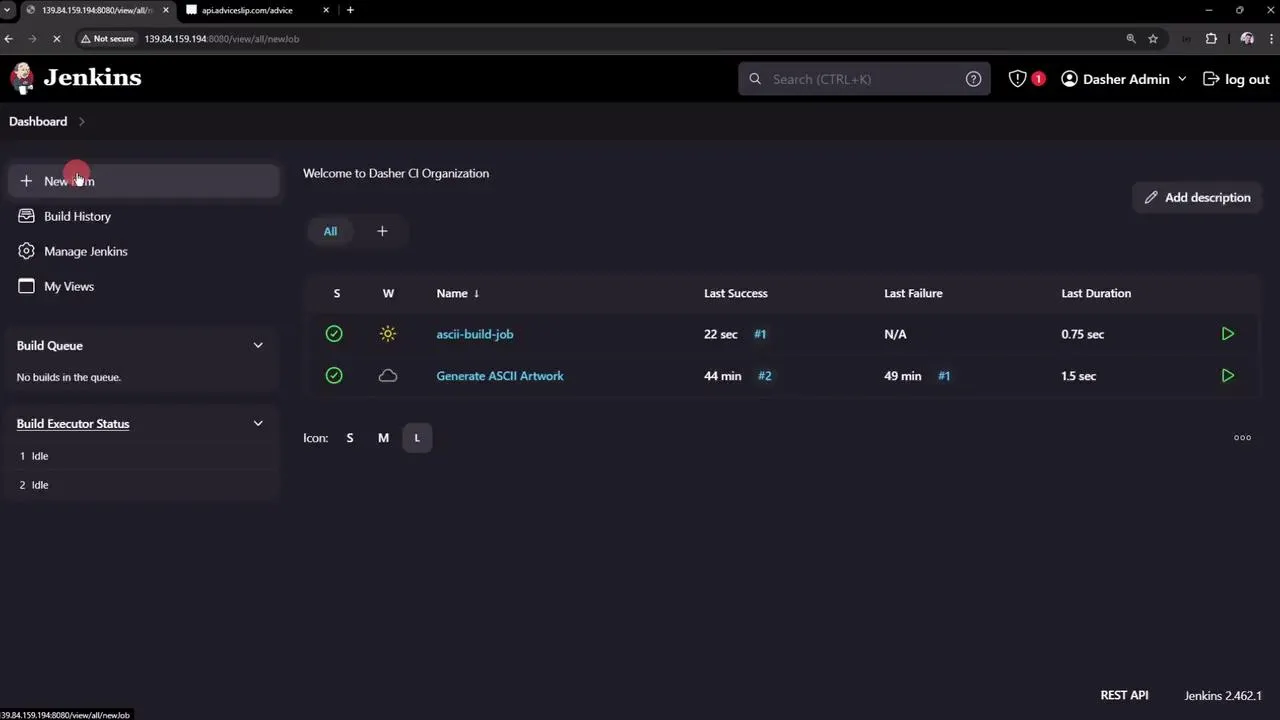
Note that initially the workspace for this job will not include
advice.jsonbecause that file is created in the build job’s workspace. In a later section, we will address artifact sharing between jobs. -
To see Jenkins managing multiple jobs, refer to the following image:
Chaining the Projects
To automate the process, configure the build job to trigger the test job once it completes successfully:
- Open the configuration for ASCII Build Job.
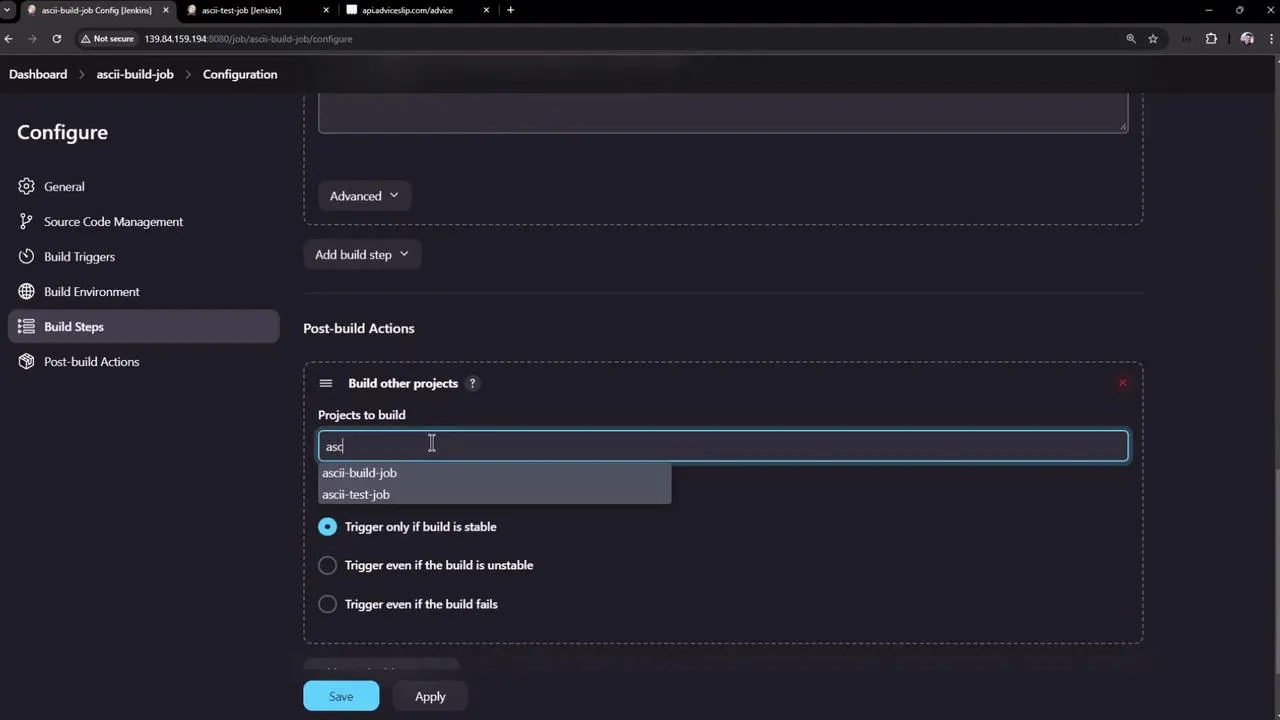
- Scroll to the Post-build Actions section and click Add post-build action. Then, select Build other projects.
- Enter ASCII Test Job in the provided field. (Multiple projects can be listed by separating them with commas.)
- Make sure the downstream job is configured to trigger only upon a successful build. Save your settings.
After these adjustments, when the ASCII Build Job completes successfully, it will automatically trigger the ASCII Test Job.
If the build job successfully runs but the test job fails to find
advice.json, it is due to isolated workspaces. This will be resolved in the next section using the Copy Artifact Plugin.
After applying the settings and running the build, you might see an error in the test job’s console log resembling:
Started by upstream project "ascii-build-job" build number 2originally caused by: Started by user Demo AdminRunning as SYSTEMBuilding in workspace /var/lib/jenkins/workspace/ascii-test-job[ascii-test-job] $ /bin/sh -xe /tmp/jenkins45174349567217279430.sh+ ls advice.jsonls: cannot access 'advice.json': No such file or directoryBuild step 'Execute shell' marked build as failureFinished: FAILUREThis error indicates that the advice.json file is not present in the test job’s workspace.
Workspace Considerations
In the ASCII Build Job, the workspace includes the generated advice.json file:
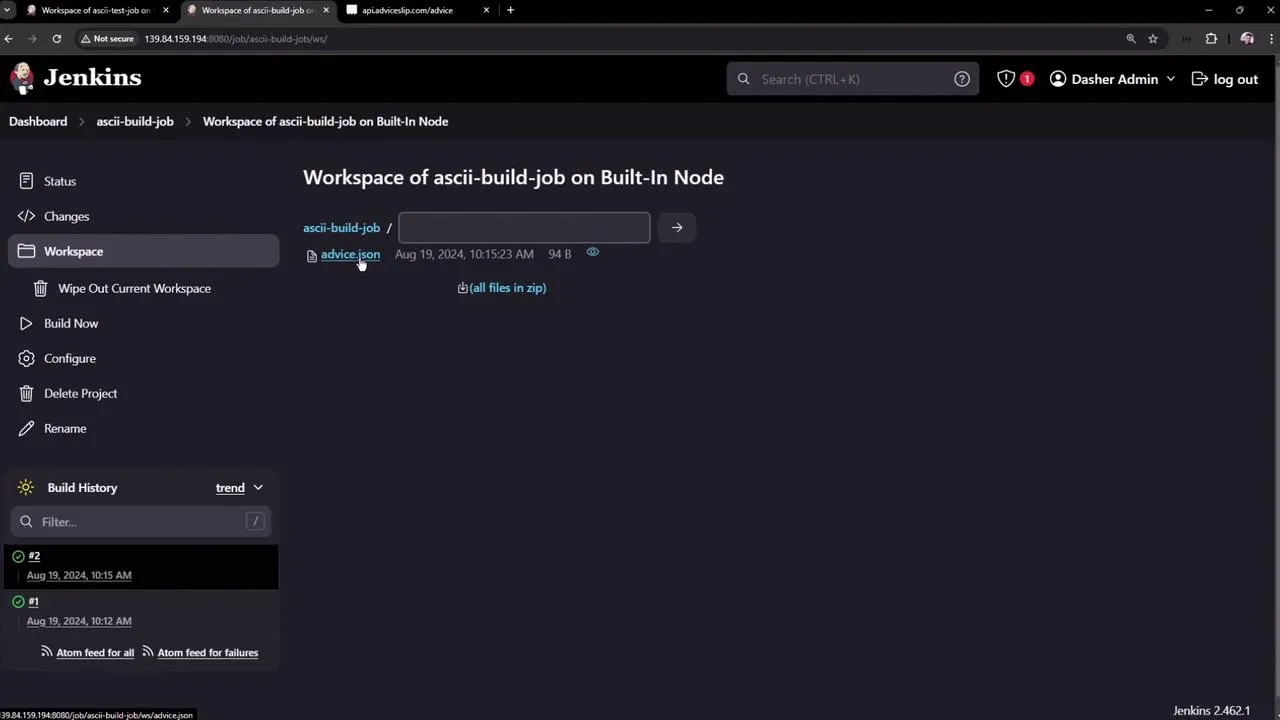
Since each Jenkins job has its own workspace, files are not automatically shared between jobs. To resolve this, use the Copy Artifact Plugin to transfer necessary files like advice.json from the build job’s workspace to the test job’s workspace.
Directly accessing files from another job’s workspace will result in errors. Ensure you properly configure artifact sharing using plugins like the Copy Artifact Plugin.
That concludes the guide on chaining Freestyle Projects in Jenkins. In a future article, we will explore how to copy artifacts between jobs to overcome workspace isolation issues. For more details on Jenkins automation and best practices, please refer to the Jenkins Documentation.
Simple Pipeline Job
This guide explains how to create a simple Pipeline Job in Jenkins, including configuration, stages, and integration with Maven.
In this guide, you’ll learn how to create a simple Pipeline Job in Jenkins. Follow along as we walk through configuring a basic pipeline, inspecting its stages, and later integrating additional build steps with Maven.
Creating the Pipeline Job
Begin by opening the Jenkins UI and clicking on New Item. Select the Pipeline option and assign a name to your job (for example, “Hello World Pipeline”). Finally, click OK.
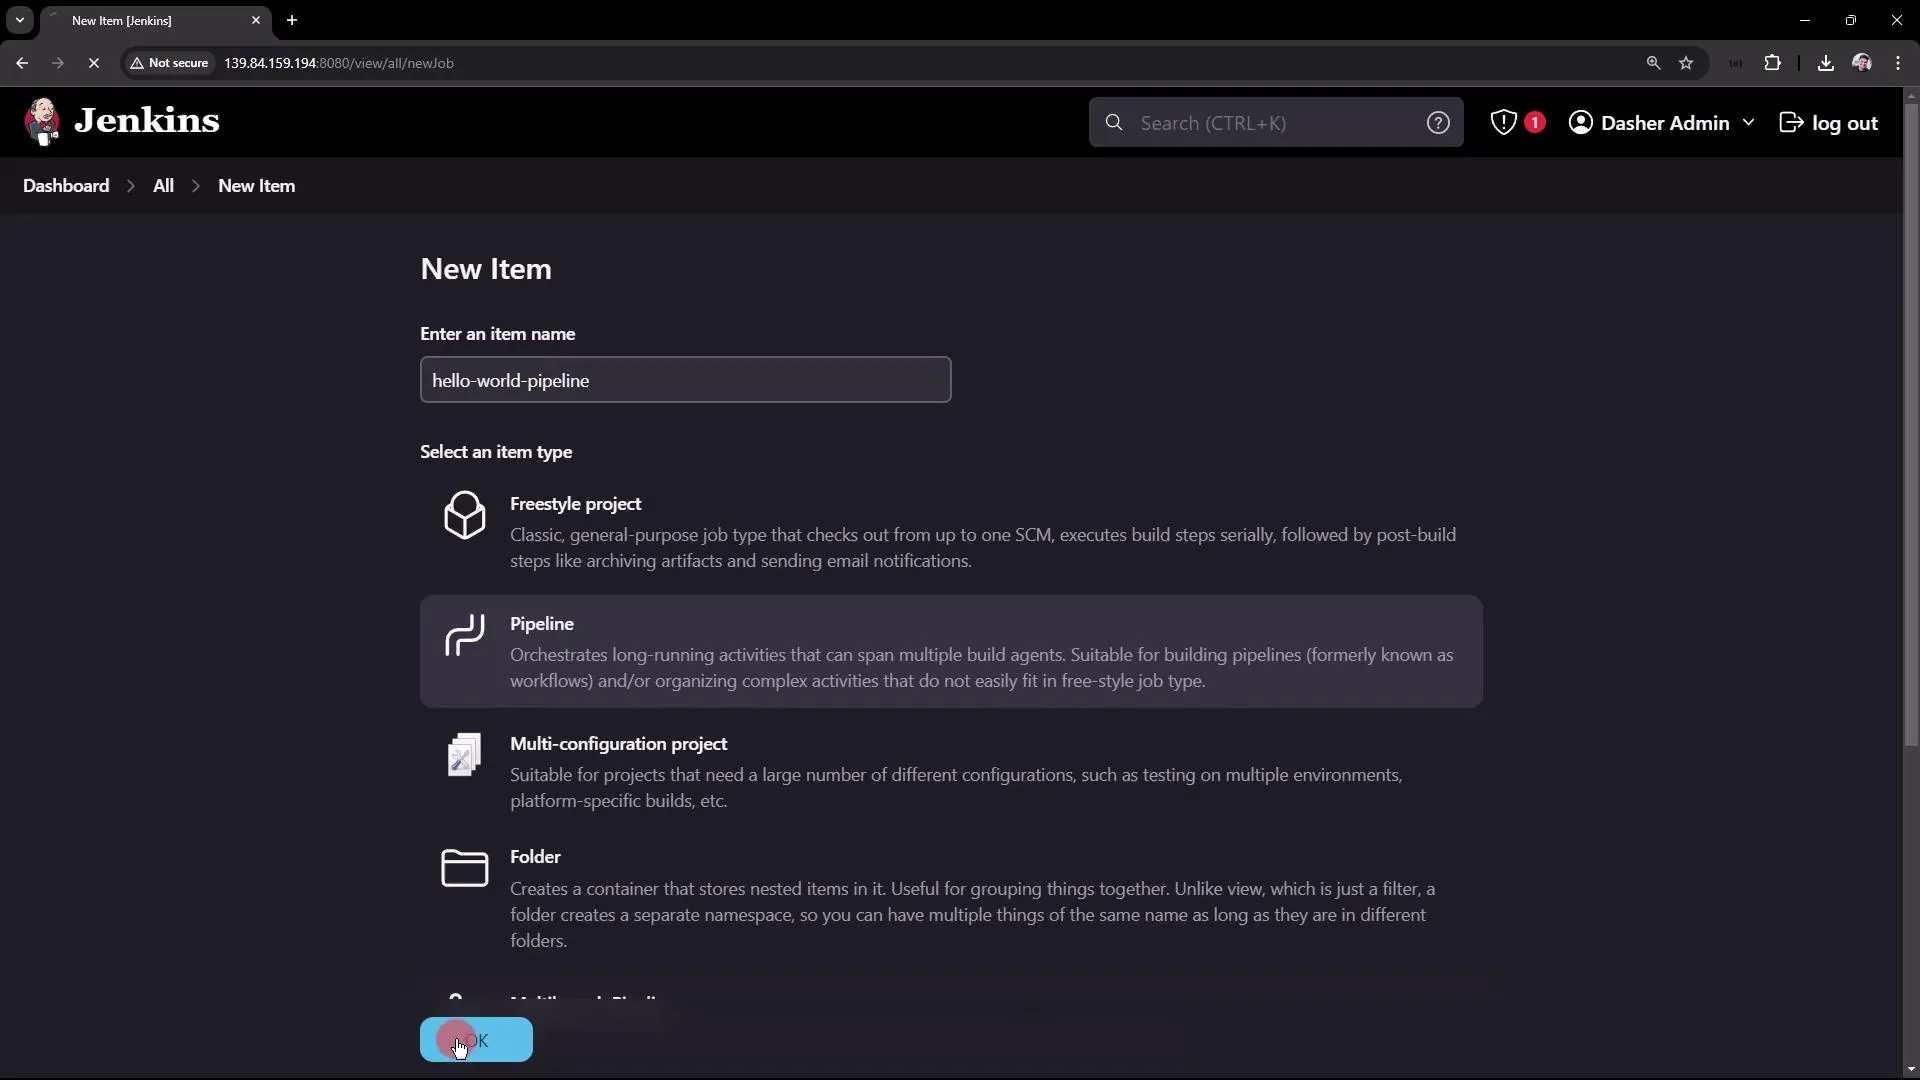
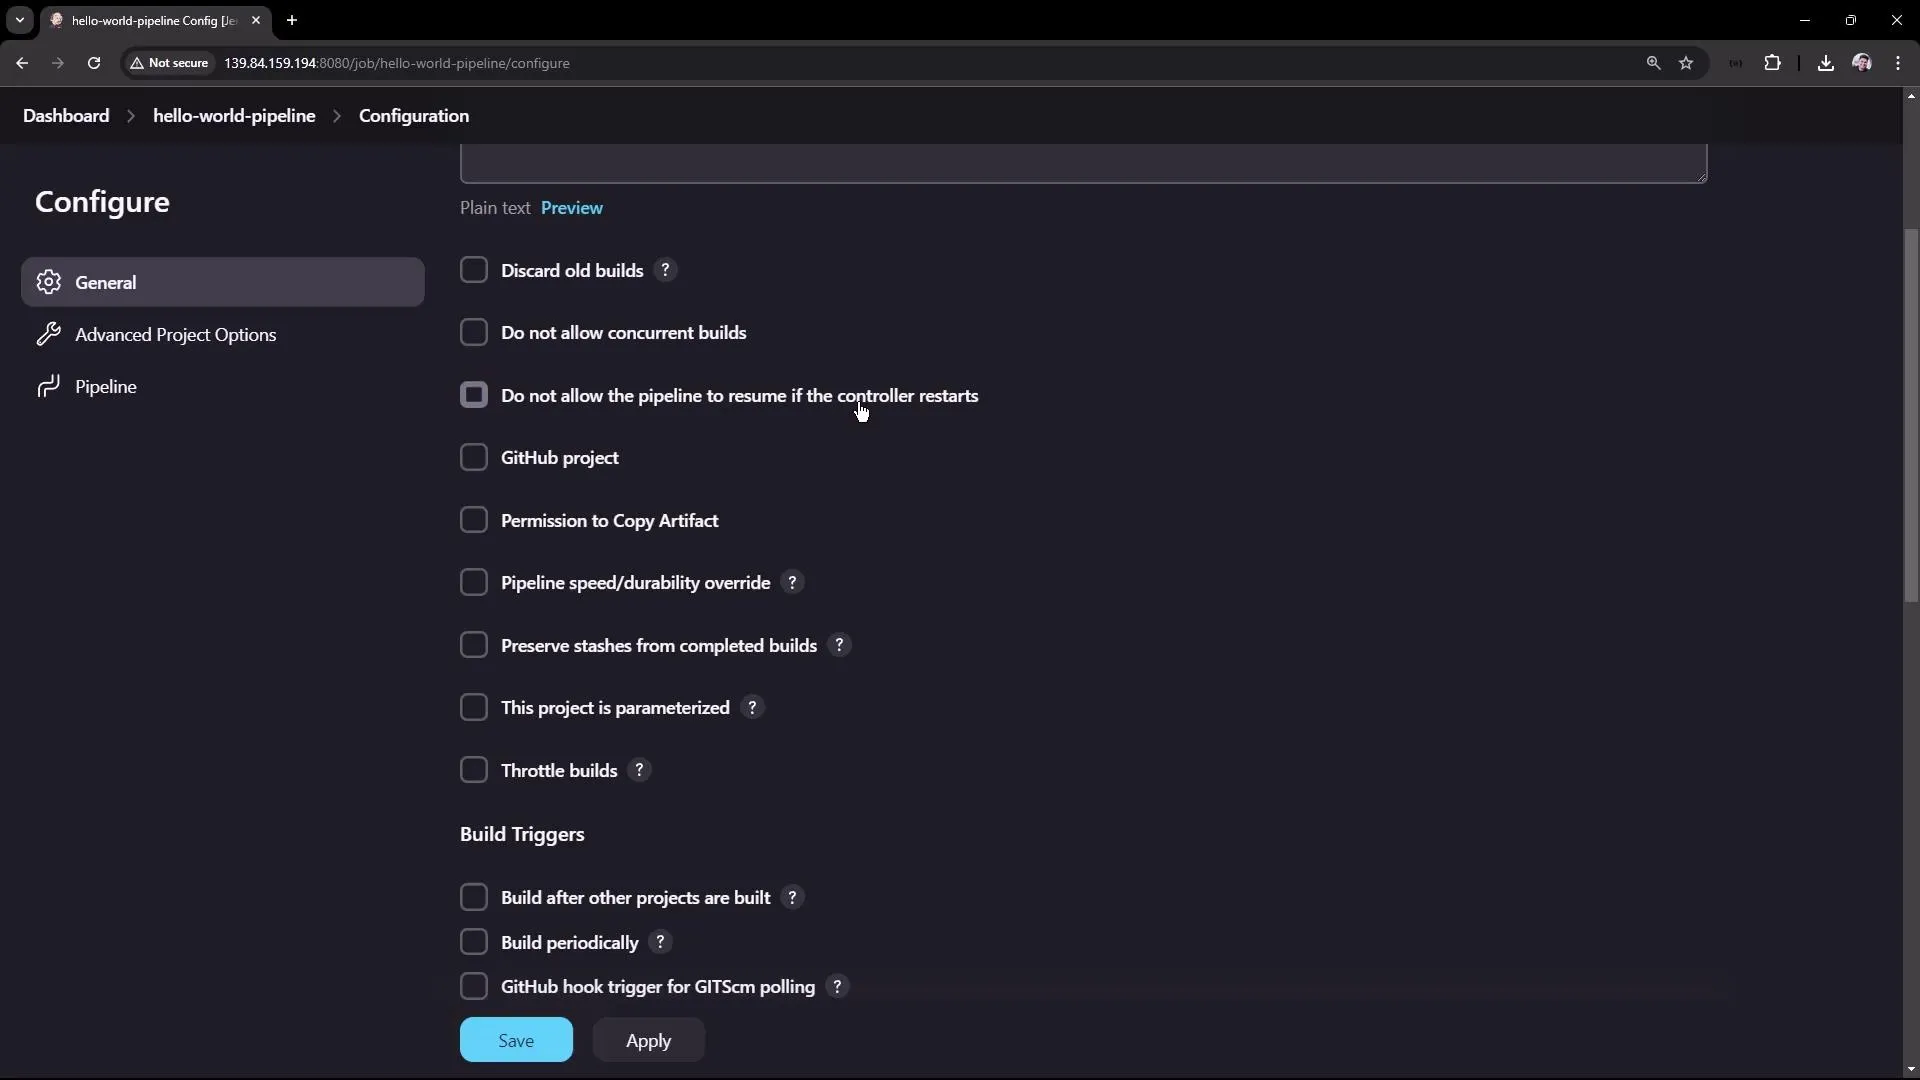
On the job configuration page, you’ll encounter several sections including General, Advanced, Project Options, and Pipeline. Here, you can add a description and configure project-specific options. One useful configuration is preventing the pipeline from resuming after a controller restart—a feature that was previously discussed with Freestyle Projects.
Defining the Pipeline Script
You can define the pipeline script in two ways:
- Directly inline on the configuration page.
- Automatically sourced from a Version Control System like Git or Subversion.
For this tutorial, we’ll use the Pipeline Script option to create a simple “Hello World” pipeline. In later sections, we will explore scripted pipelines in more detail.
Enter the following pipeline script:
pipeline { agent any stages { stage('Hello') { steps { echo 'Hello World' } } }}Within this script:
- The
agent anydirective indicates that the job can run on any available node (commonly the Jenkins controller in basic setups). - The pipeline contains one stage named “Hello” that executes a step to display the message “Hello World” using the
echocommand. - Optionally, you can enable the Groovy sandbox for restricted execution. Disabling it without proper administrative approval may cause the job to wait for authorization.
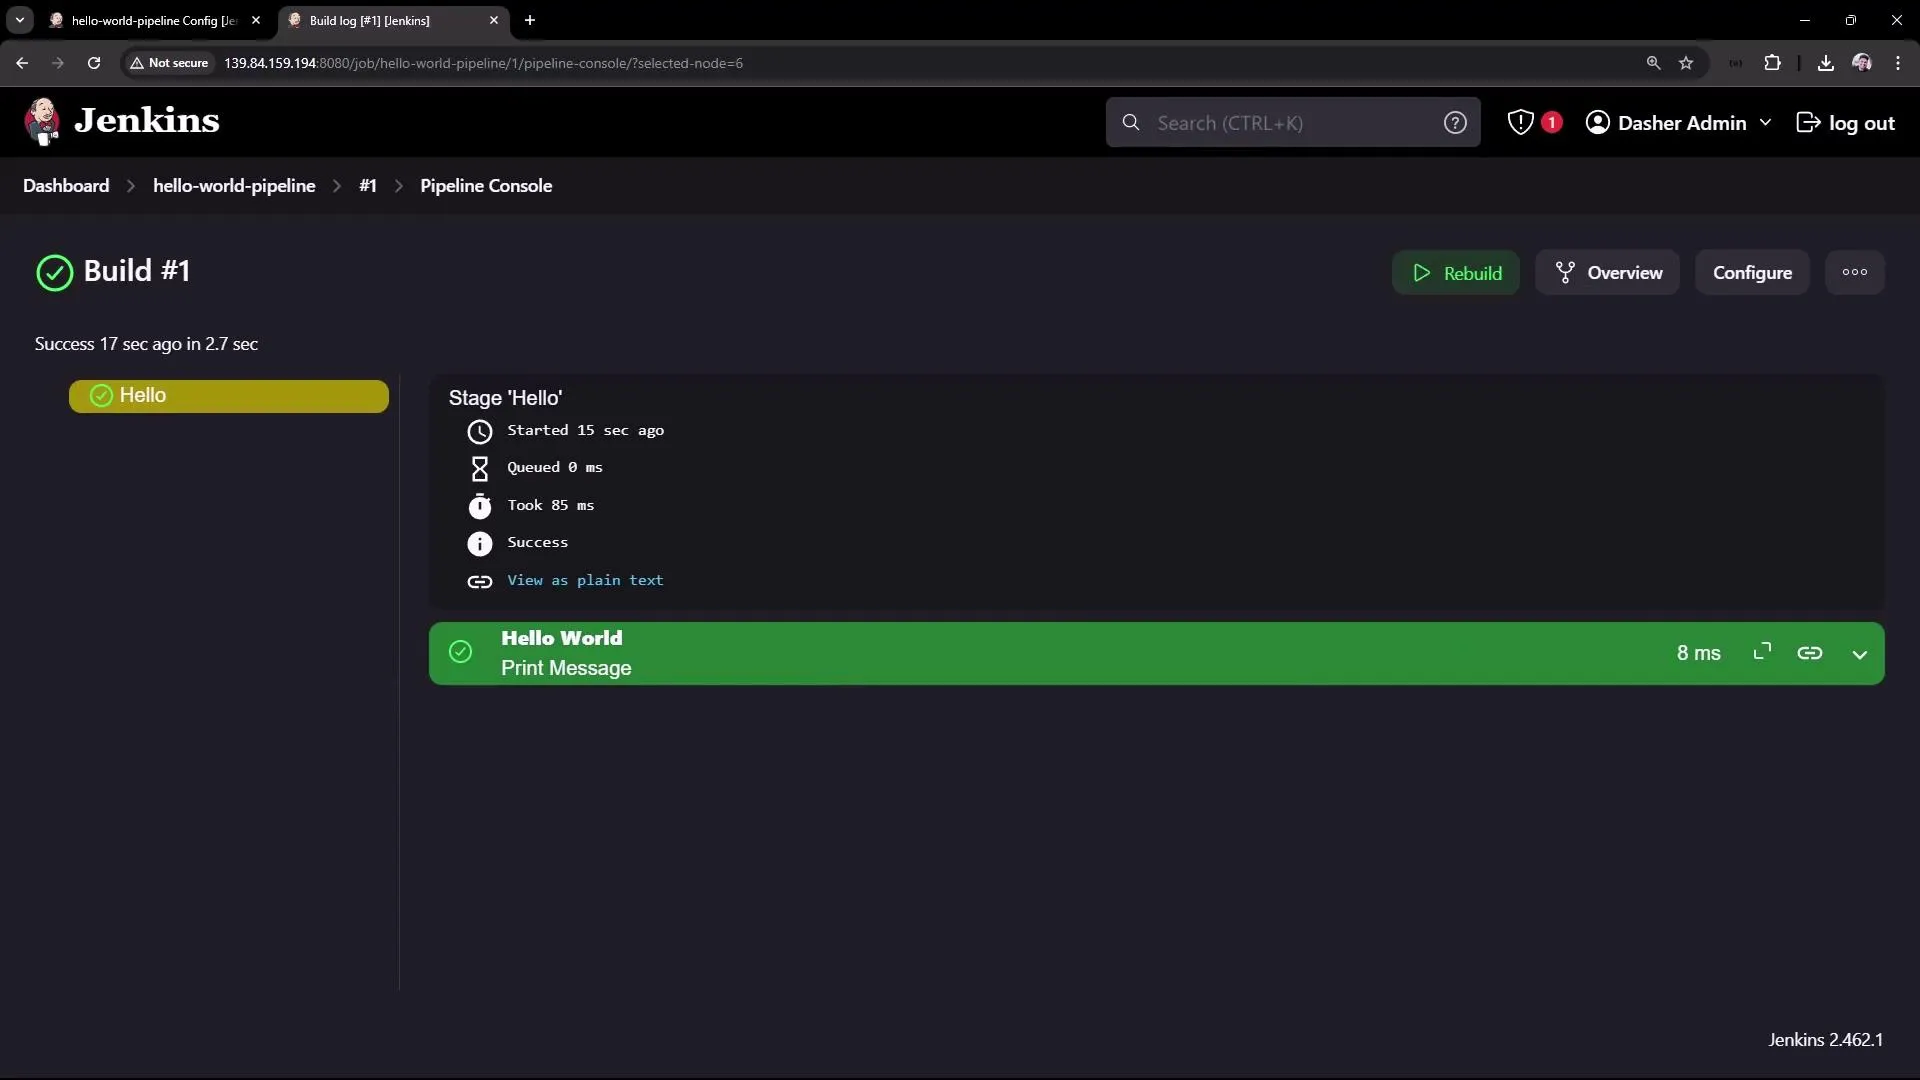
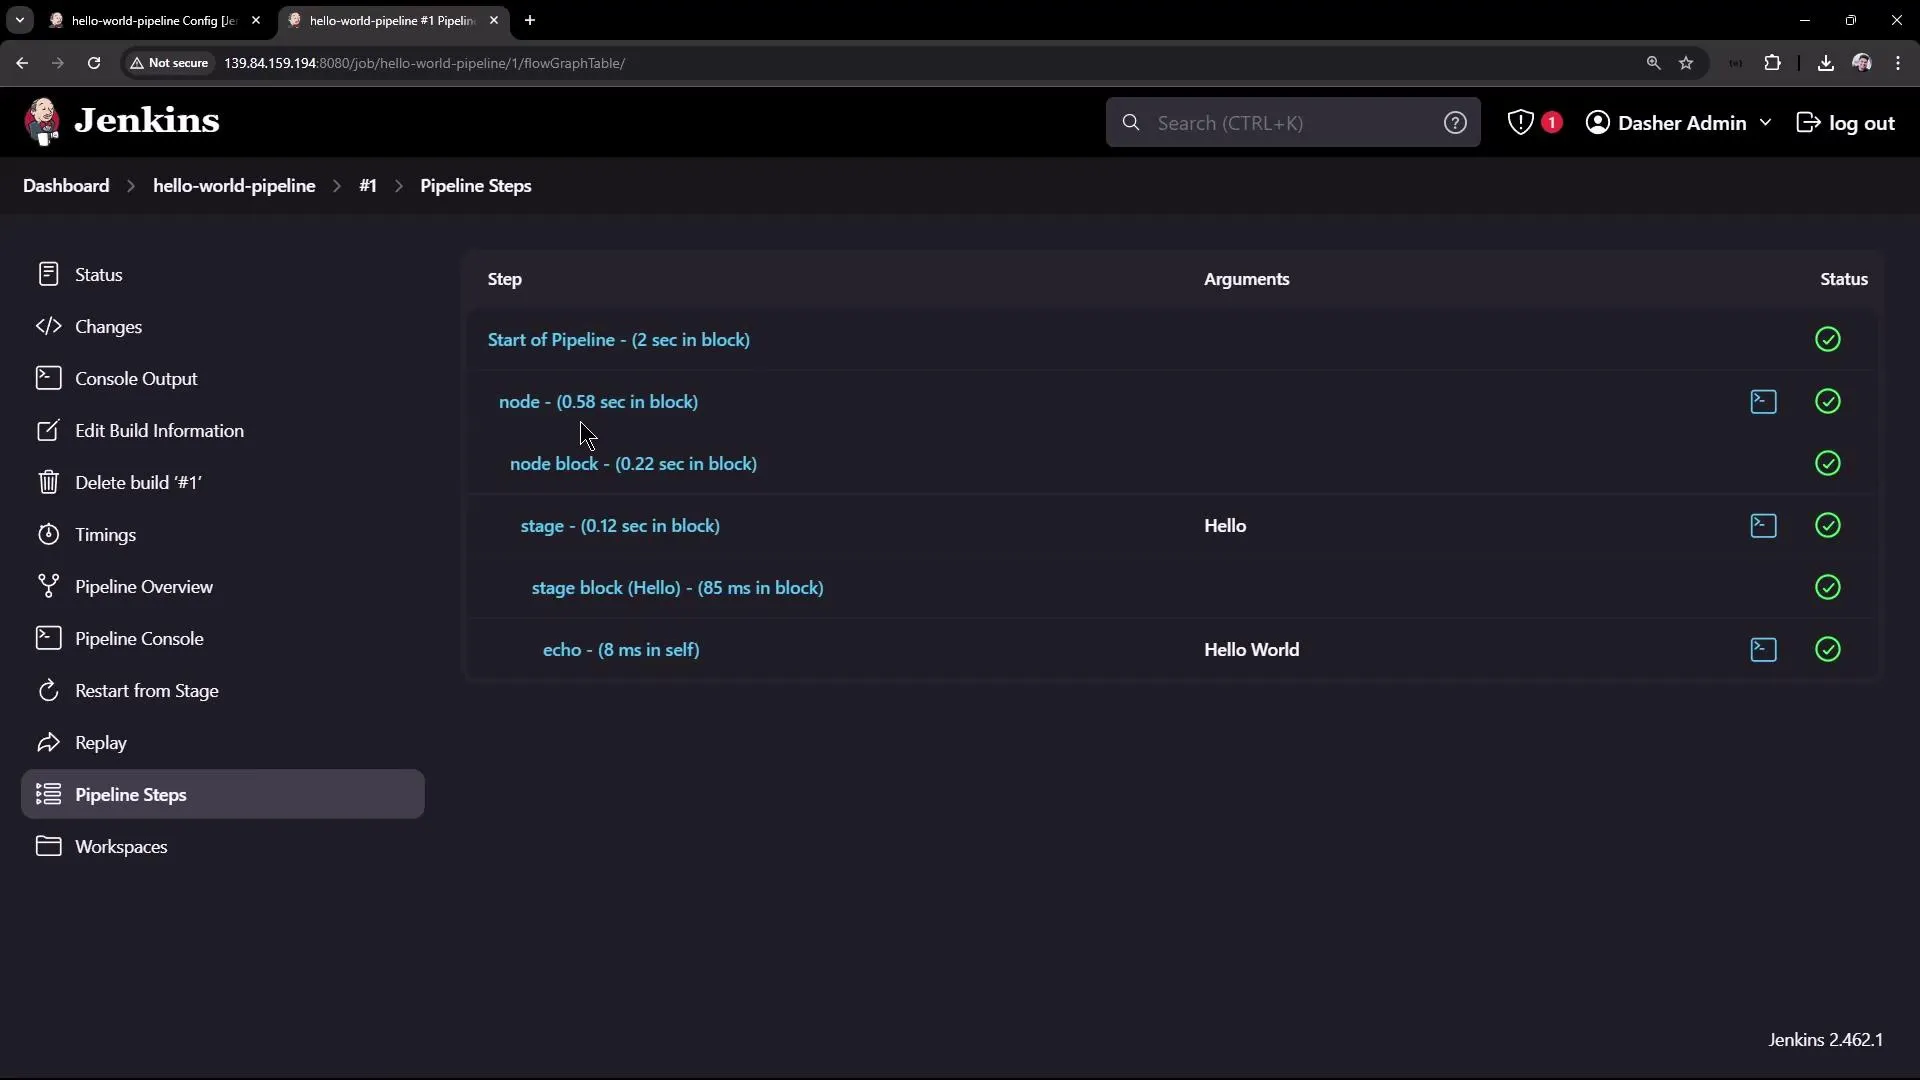
After configuring the pipeline, click Build Now. When the build starts, you’ll see a visual representation of the pipeline execution. Clicking on the “Hello” stage displays the console logs, where you can observe the “Hello World” output. The raw logs can also be reviewed by clicking on the success icon.

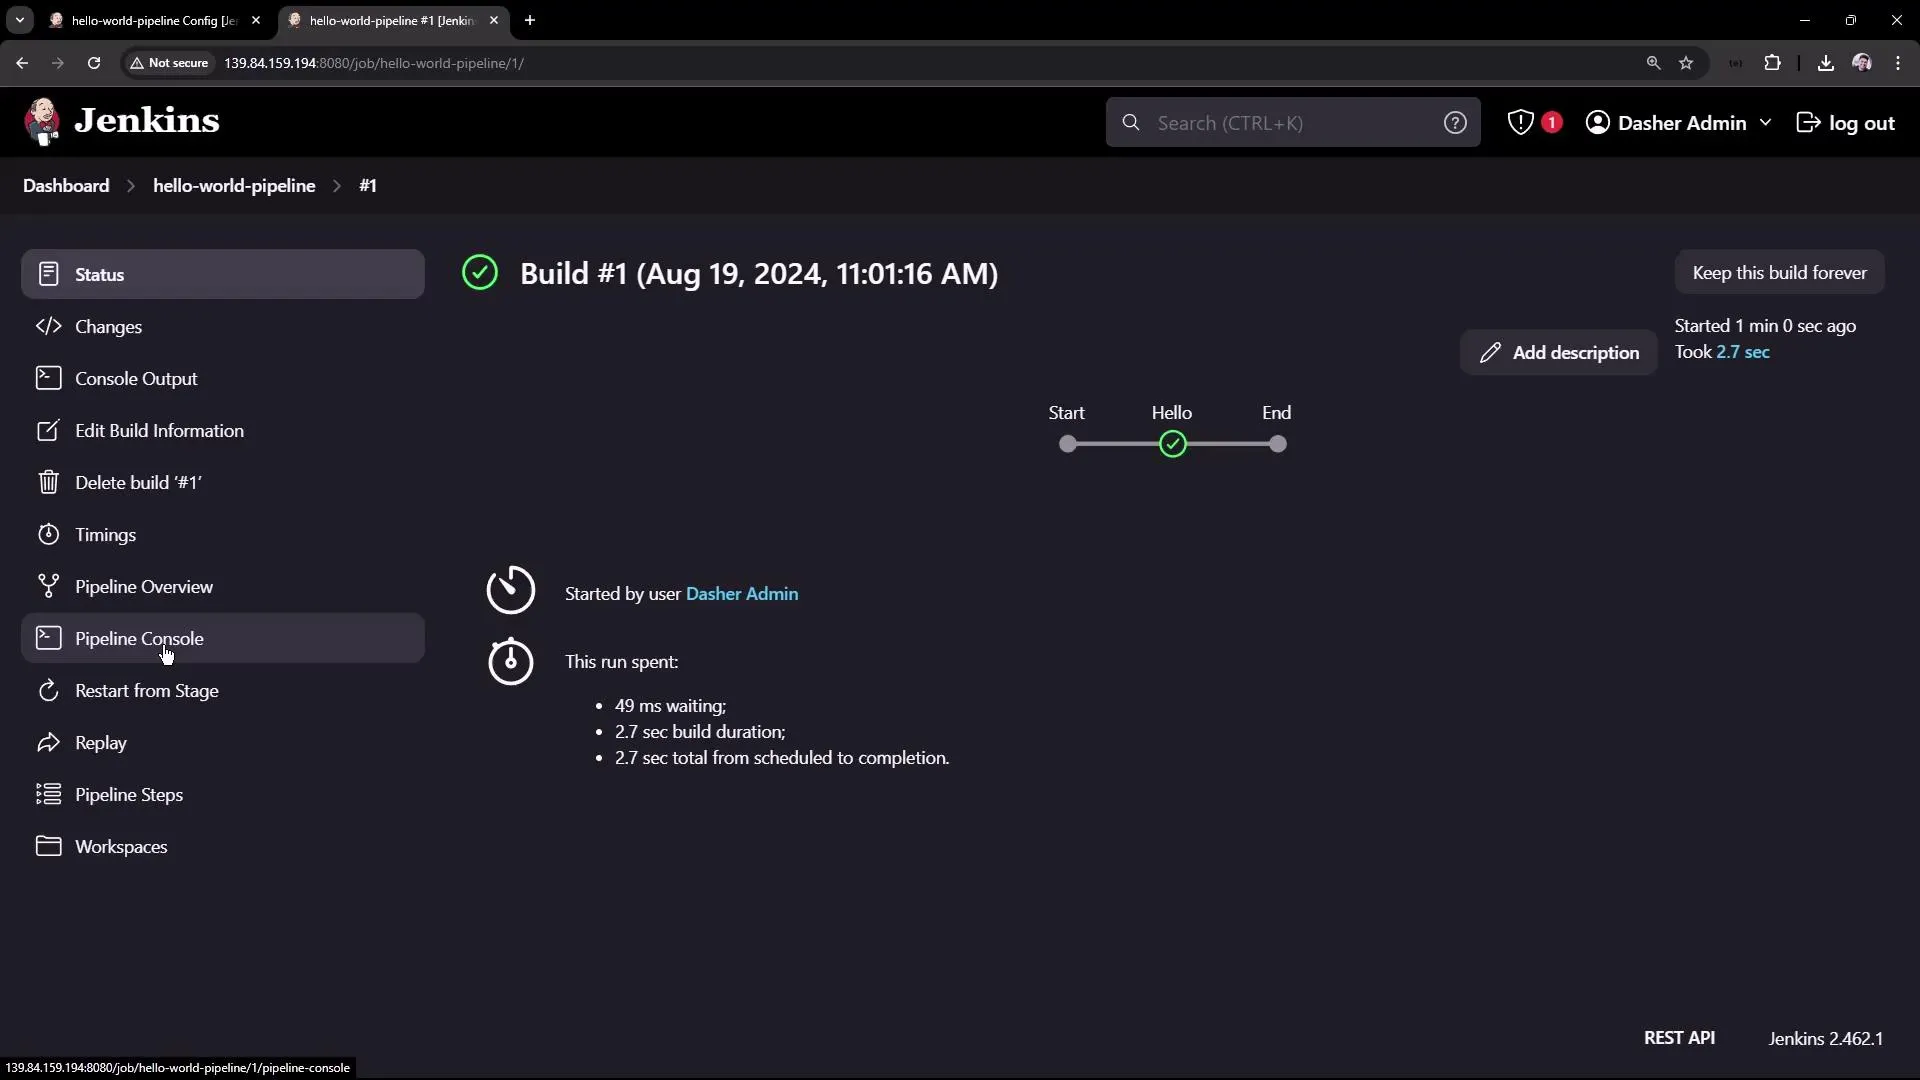
Additionally, the build log provides detailed execution output similar to the example below:
Started by user Demo Admin[Pipeline] Start of Pipeline[Pipeline] nodeRunning on Jenkins in /var/lib/jenkins/workspace/hello-world-pipeline[Pipeline] {[Pipeline] stage[Pipeline] { (Hello)[Pipeline] echoHello World[Pipeline] }[Pipeline] // stage[Pipeline] }[Pipeline] // node[Pipeline] End of PipelineFinished: SUCCESSThis log includes the execution timings, the pipeline overview, and the individual step logs. The interface also supports restarting from a specific stage or replaying the pipeline if necessary.
Extending the Pipeline: GitHub and Maven Integration
Next, we’ll extend the pipeline by adding stages that integrate with GitHub and use Maven for project builds.
The example below demonstrates a pipeline that:
- Configures a Maven tool installation.
- Creates a stage named “Echo Version” to output a message along with the Maven version.
- Includes a stage named “Build” that checks out code from a GitHub repository.
Here is the enhanced pipeline script:
pipeline { agent any tools { // Installs the Maven version configured as "M3" and adds it to the environment PATH. maven "M3" } stages { stage('Echo Version') { steps { sh 'echo Print Maven Version' sh 'mvn -version' } } stage('Build') { steps { // Clone code from a GitHub repository. git 'https://github.com/jglick/simple-maven-project-with-tests.git' } } }}When you trigger the build, you might encounter an error message similar to the following if Maven is not correctly configured:
Started by user Demo Adminorg.codehaus.groovy.control.MultipleCompilationErrorsException: startup failed:WorkflowScript: 6: Tool type "maven" does not have an install of "M3" configured - did you mean "null"? @ line 6, column 15. maven "M3" ^1 error...Finished: FAILUREThis error indicates that Jenkins could not find a Maven installation named “M3”.
Configuring Maven in Jenkins
To resolve this Maven configuration issue, follow these steps:
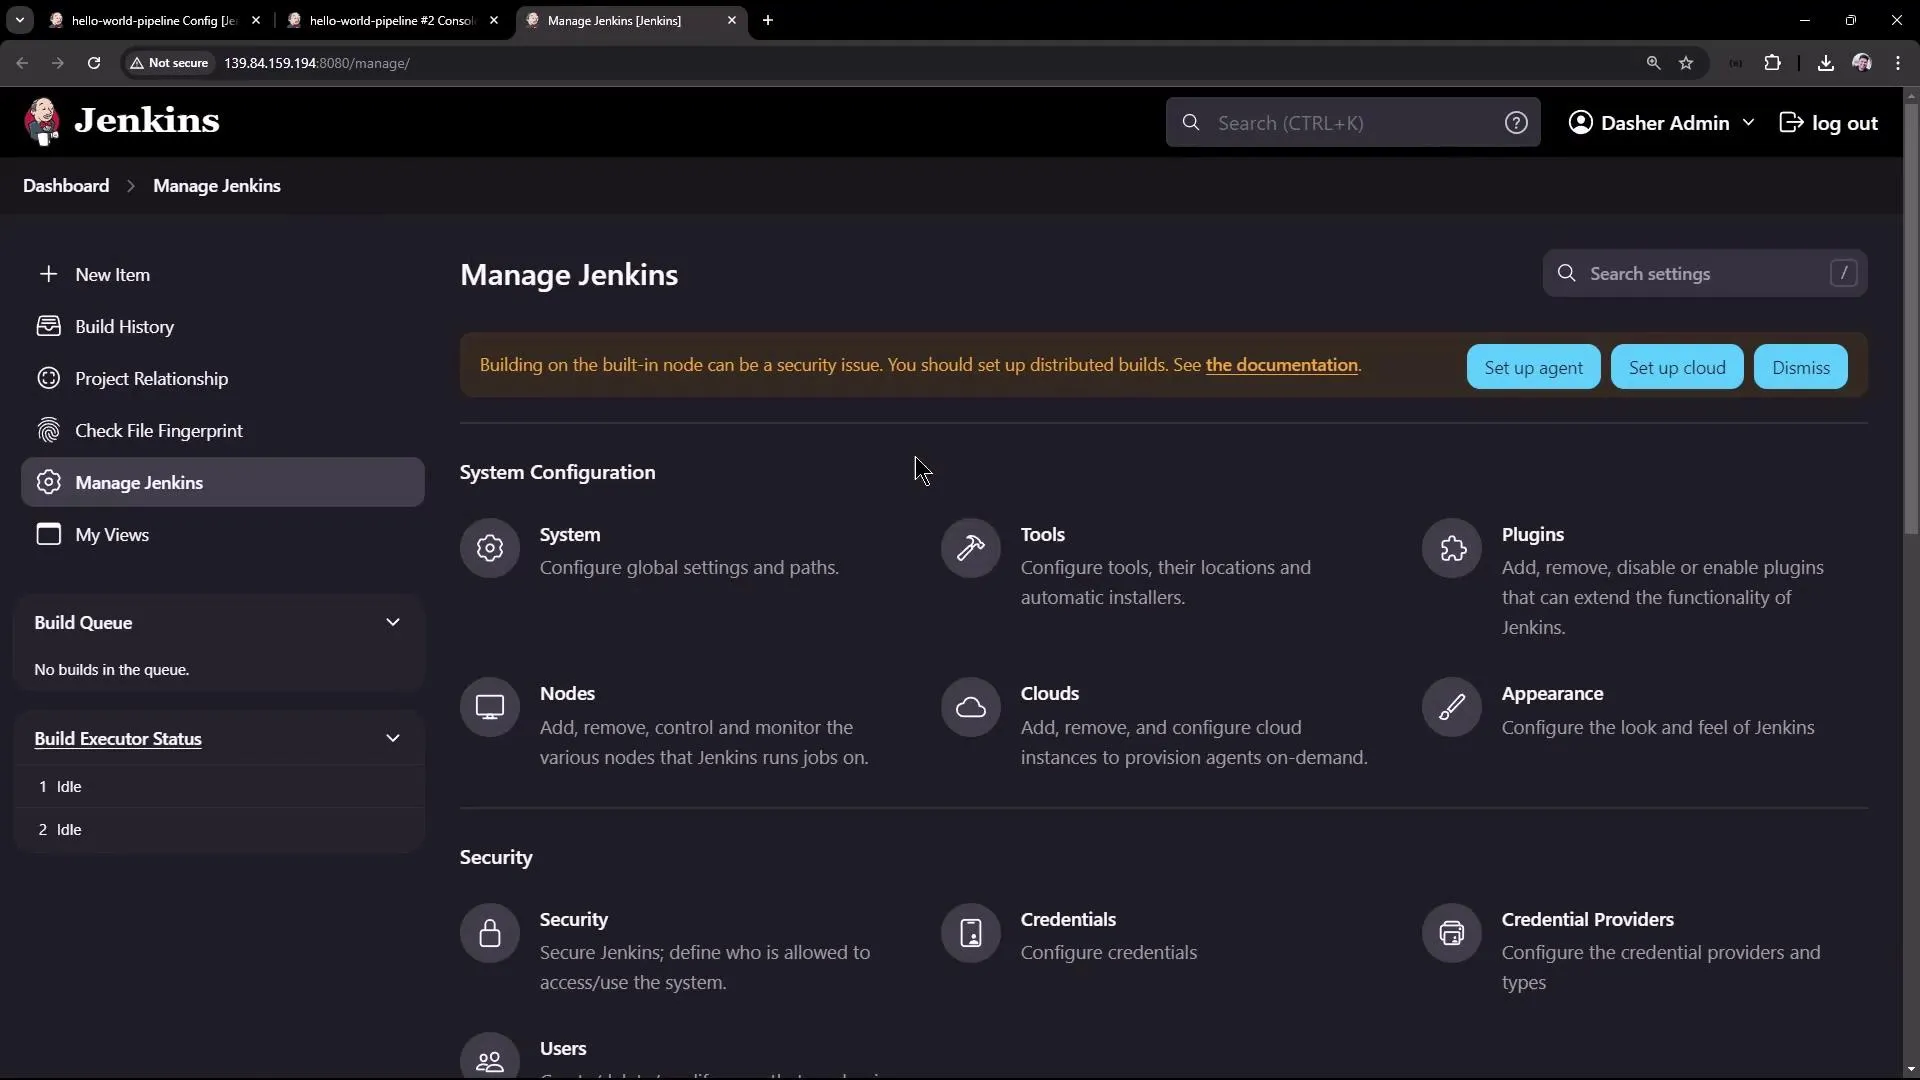
- Open the Jenkins Dashboard and navigate to Manage Jenkins.
- Click on Global Tool Configuration (or simply Tools in some Jenkins versions).
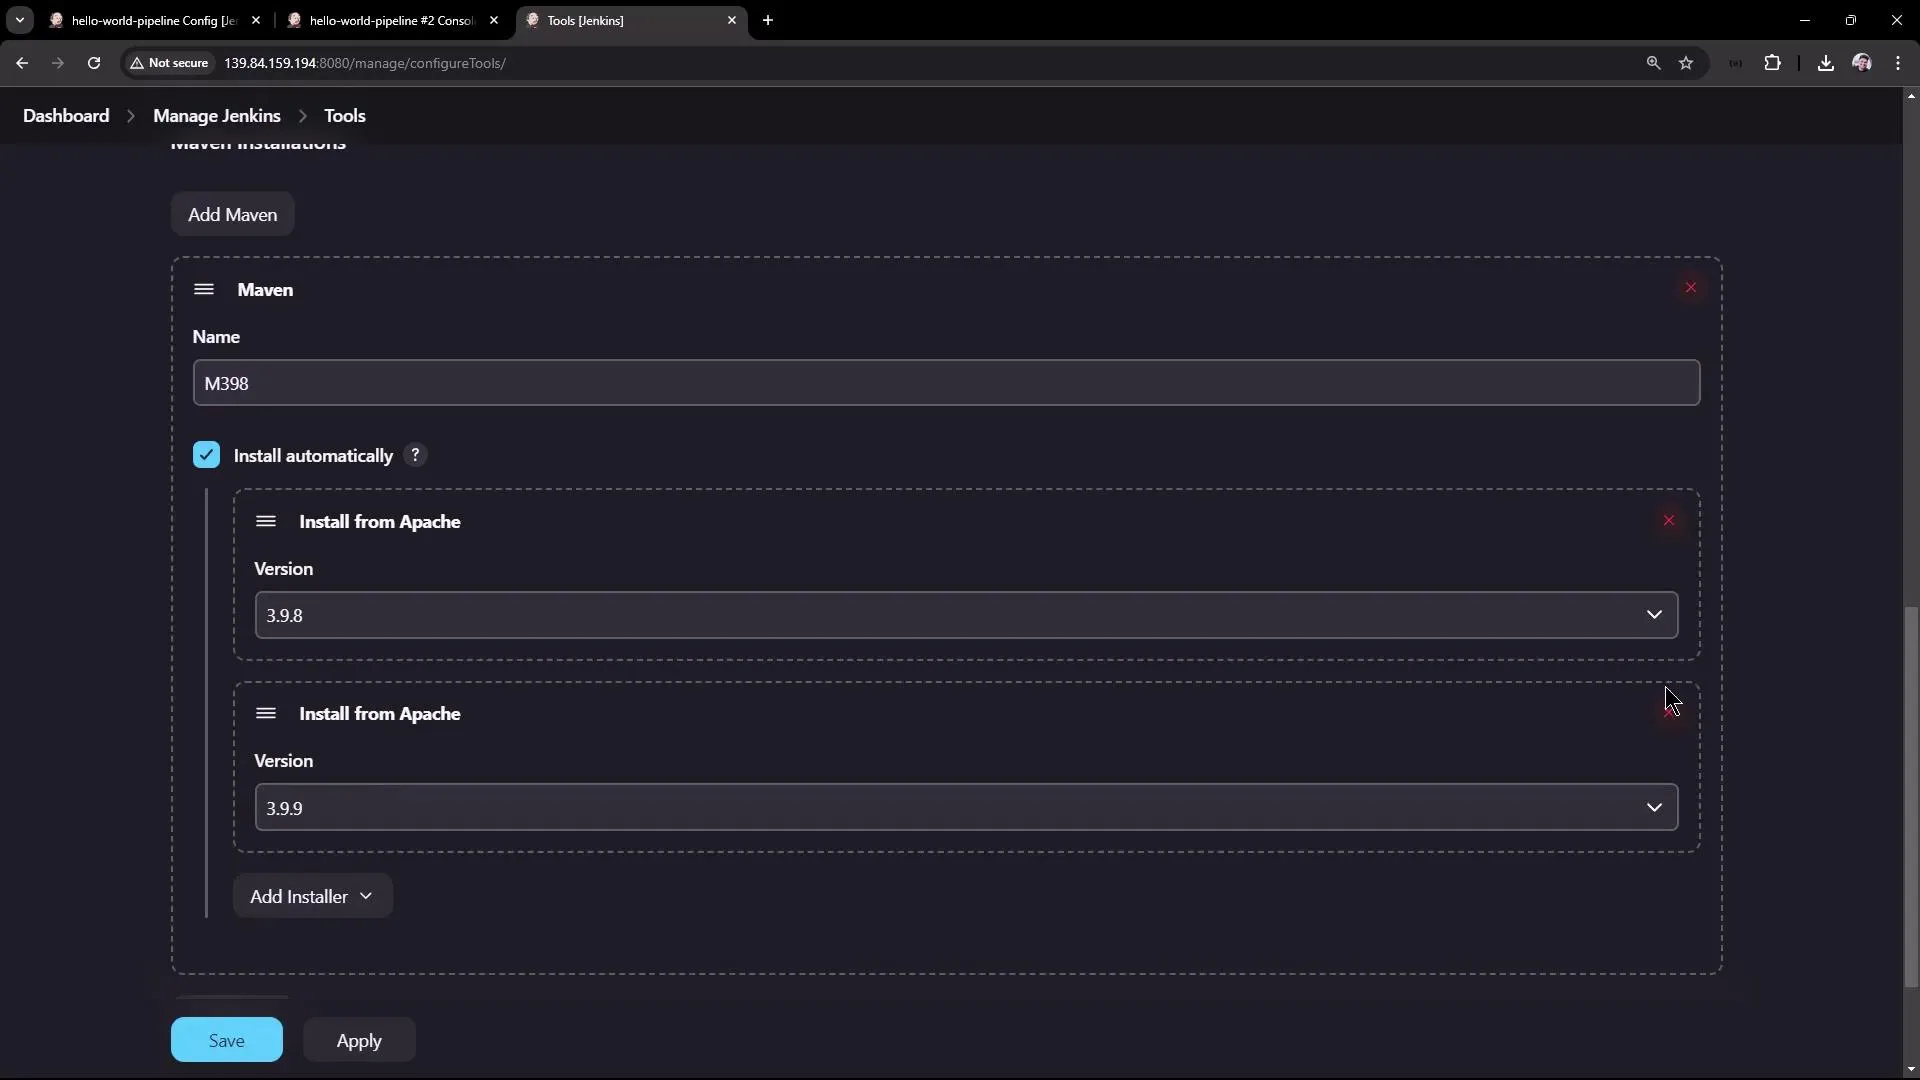
- Scroll down to the Maven section. Since no Maven installation is currently configured, add a new installation.
If you have Maven installed on your node, provide its installation path. Otherwise, you can configure Jenkins to automatically install Maven from Apache. For example, set up Maven version 3.9.8 and assign it a unique name such as M398—this naming makes it clear which version is in use.
After configuring Maven, go back to your pipeline configuration and update the tools section to reference the newly named installation:
pipeline { agent any tools { // Installs the Maven version configured as "M398" and adds it to the environment PATH. maven "M398" } stages { stage('Echo Version') { steps { sh 'echo Print Maven Version' sh 'mvn -version' } } // Uncomment the Build stage once tool configuration is verified. // stage('Build') { // steps { // git 'https://github.com/jglick/simple-maven-project-with-tests.git' // } // } }}Triggering the build now should succeed. In the console output, you will first observe Maven being installed (if necessary) and unpacked. The “Echo Version” stage will then run, printing “Print Maven Version” followed by details about the Maven version installed. An example output might look like this:
+ echo Print Maven VersionPrint Maven Version+ mvn --versionApache Maven 3.9.8 (36645f6c9b5079805ea5009217e36f2cff34256)Maven home: /var/lib/jenkins/tools/hudson.tasks.Maven_MavenInstallation/M398Java version: 17.0.12, vendor: Ubuntu, runtime: /usr/lib/jvm/java-17-openjdk-amd64Default locale: en_US, platform encoding: UTF-8OS name: "linux", version: "6.8.0-39-generic", arch: "amd64", family: "unix"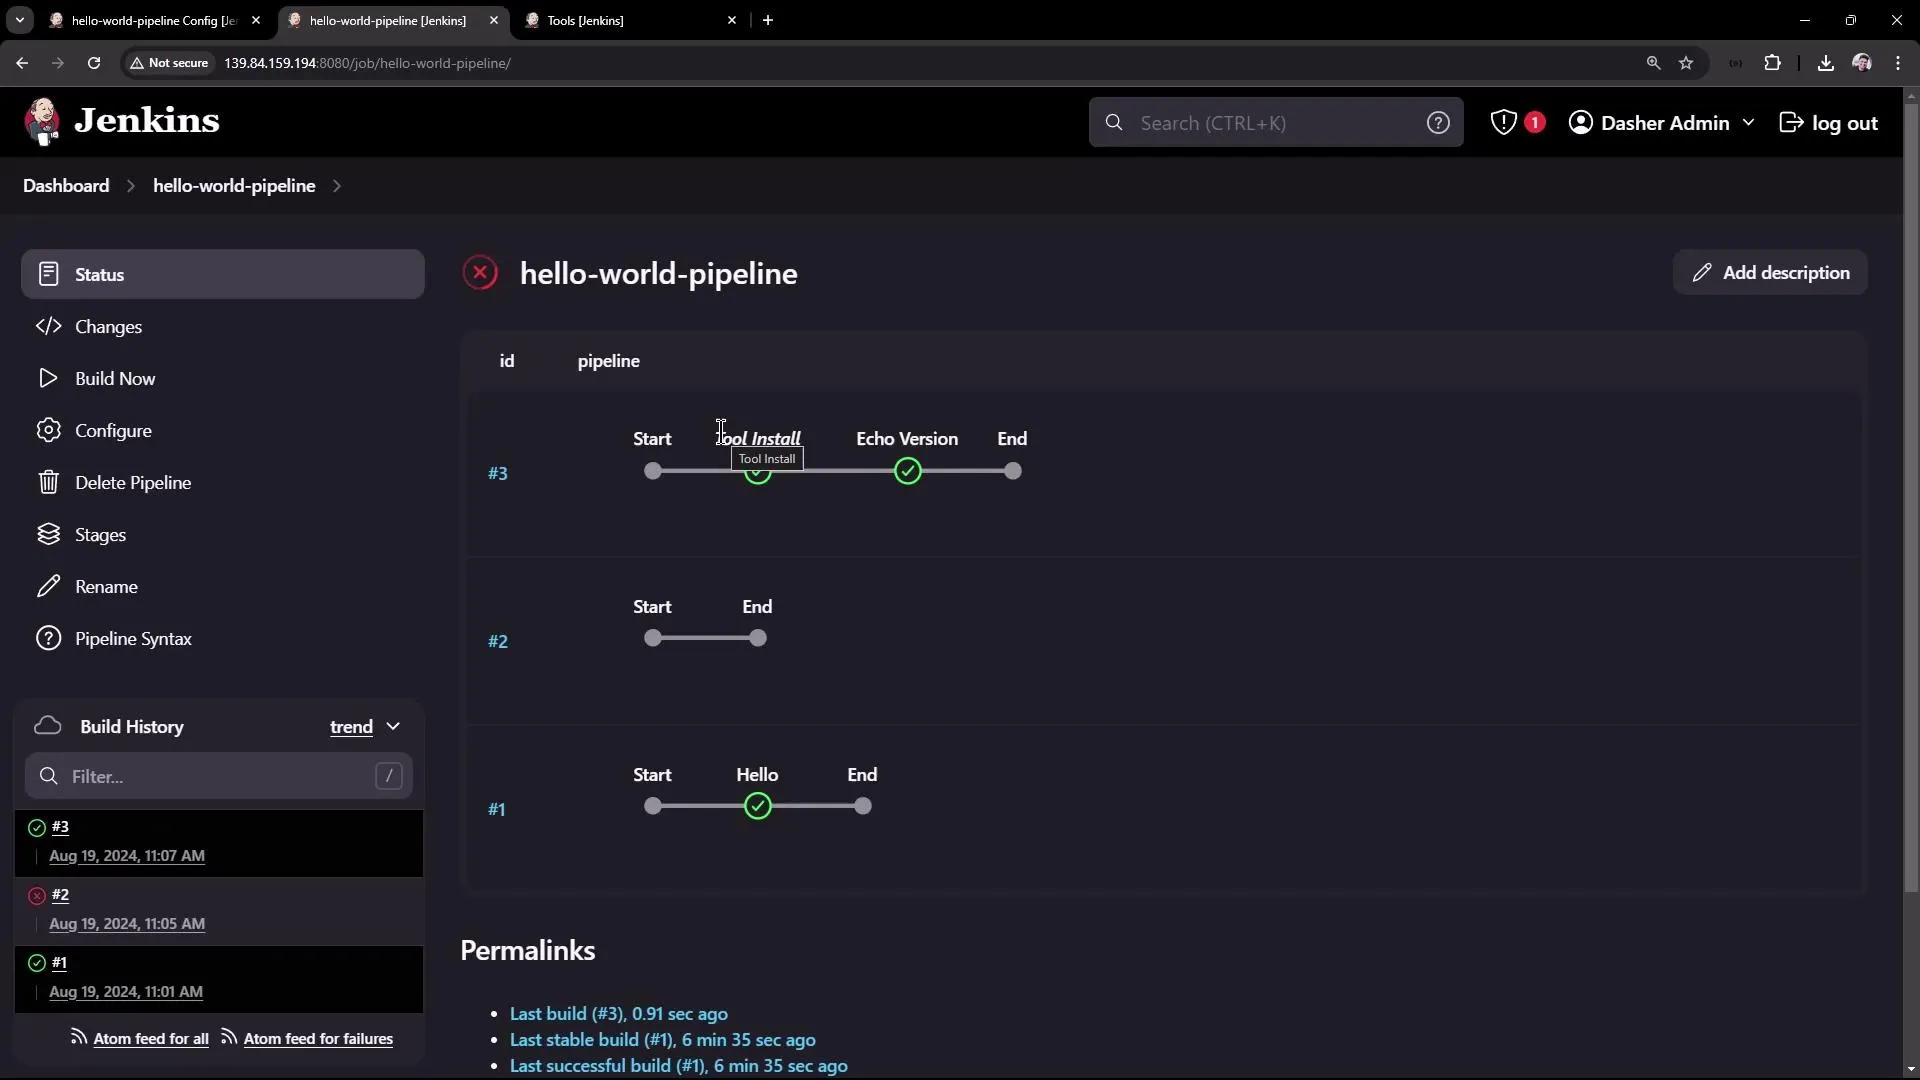
This confirms that Maven has been correctly configured in Jenkins and the pipeline is executing using the Groovy sandbox.
Conclusion
In this article, we demonstrated how to create a simple Pipeline Job in Jenkins, from setting up a basic “Hello World” pipeline to extending it with GitHub integration and Maven build steps. We also addressed Maven configuration issues and provided steps to resolve them, ensuring smooth pipeline execution.
For further insights, explore other Jenkins documentation such as the Jenkins Pipeline Documentation to deepen your understanding of more advanced pipeline features.
Thank you for reading, and happy building!
Build and Test via Pipeline
This article explains how to enhance a Jenkins Pipeline by adding stages for building and testing a Java application.
In this lesson, we enhance our Jenkins Pipeline by adding multiple stages to build and test a Java application. The sections below explain the updates and modifications, preserving the original content structure and technical diagrams.
Overview
Previously, we configured the Maven tool and printed the Maven version. In that example, the Pipeline featured only an “Echo Version” stage while the build stage was commented out. Refer to the following Jenkins dashboard snapshot:
In this updated Pipeline, we add two new stages:
- Build: Retrieve the code from a Git repository and build the application using Maven.
- Unit Test: Execute unit tests for verification.
Build Stage Example
In the build stage, the code is first fetched from a Git repository, and then Maven is used to build the application. Commands differ based on the operating system: on a Unix agent, we use sh, while bat is utilized for Windows agents.
stage('Build') { steps { // Get some code from a GitHub repository git 'https://github.com/igluok/simple-maven-project-with-tests.git' // Run Maven on a Unix agent. sh 'mvn -Dmaven.test.failure.ignore=true clean package' // To run Maven on a Windows agent, use: // bat 'mvn -Dmaven.test.failure.ignore=true clean package' } post { // Record the test results and archive the jar if Maven runs the tests, // even if some tests fail. success { junit '**/target/surefire-reports/TEST-*.xml' archiveArtifacts 'target/*.jar' } }}Here, Maven’s clean package command is used with the option to ignore test failures during packaging. Post-build actions then archive the test results and packaged JAR file.
Complete Pipeline Script with Multiple Stages
The complete Pipeline script now includes:
- Echo Version: Prints Maven version details.
- Build: Fetches the source code from the Git repository and builds the application.
- Unit Test: Runs unit tests in a separate stage.
pipeline {    agent any
    tools {        // Install the Maven version configured as "M398" and add it to the path.        maven "M398"    }
    stages {        stage('Echo Version') {            steps {                sh 'echo Print Maven Version'                sh 'mvn -version'            }        }        stage('Build') {            steps {                // Get some code from a github repository specifying the main branch                git branch: 'main', url: 'https://github.com/example/repo.git'                // Run Maven Package command and skip tests                sh 'mvn clean package -DskipTests=true'            }        }        stage('Unit Test') {            steps {                sh 'mvn test'            }        }    }}
The Git plugin is used to fetch source code from a self-hosted Git service, which, despite a URL similar to GitHub, is actually served by github.
Maven Commands Used in the Pipeline
mvn clean package -DskipTests=truemvn testjava -jar target/hello-demo-*.jarcurl -s http://localhost:6767/hello- The first command builds the application while skipping tests.
- The second command executes the unit tests.
- The third command deploys the application using the generated JAR file.
- Finally, the
curlcommand tests the running application by accessing the/helloendpoint on port 6767, which returns a 200 OK response.
Unit Test Cases
The repository contains several JUnit test cases for the Hello Controller. One test was initially configured to expect an incorrect greeting, causing a failure:
@Testpublic void welcome_startsWithExpectedGreeting() throws Exception { mvc.perform(MockMvcRequestBuilders.get("/hello").accept(MediaType.APPLICATION_JSON)) .andExpect(status().isOk()) .andExpect(content().string(startsWith("Hla")));}Since the actual response starts with “Hello”, the test was updated accordingly:
@Testpublic void welcome_startsWithExpectedGreeting() throws Exception { mvc.perform(MockMvcRequestBuilders.get("/hello").accept(MediaType.APPLICATION_JSON)) .andExpect(status().isOk()) .andExpect(content().string(startsWith("Hello")));}Additional test cases ensure that:
- The response is not null.
- The response string is not empty.
- The response has the expected length.
- The response ends with the expected text.
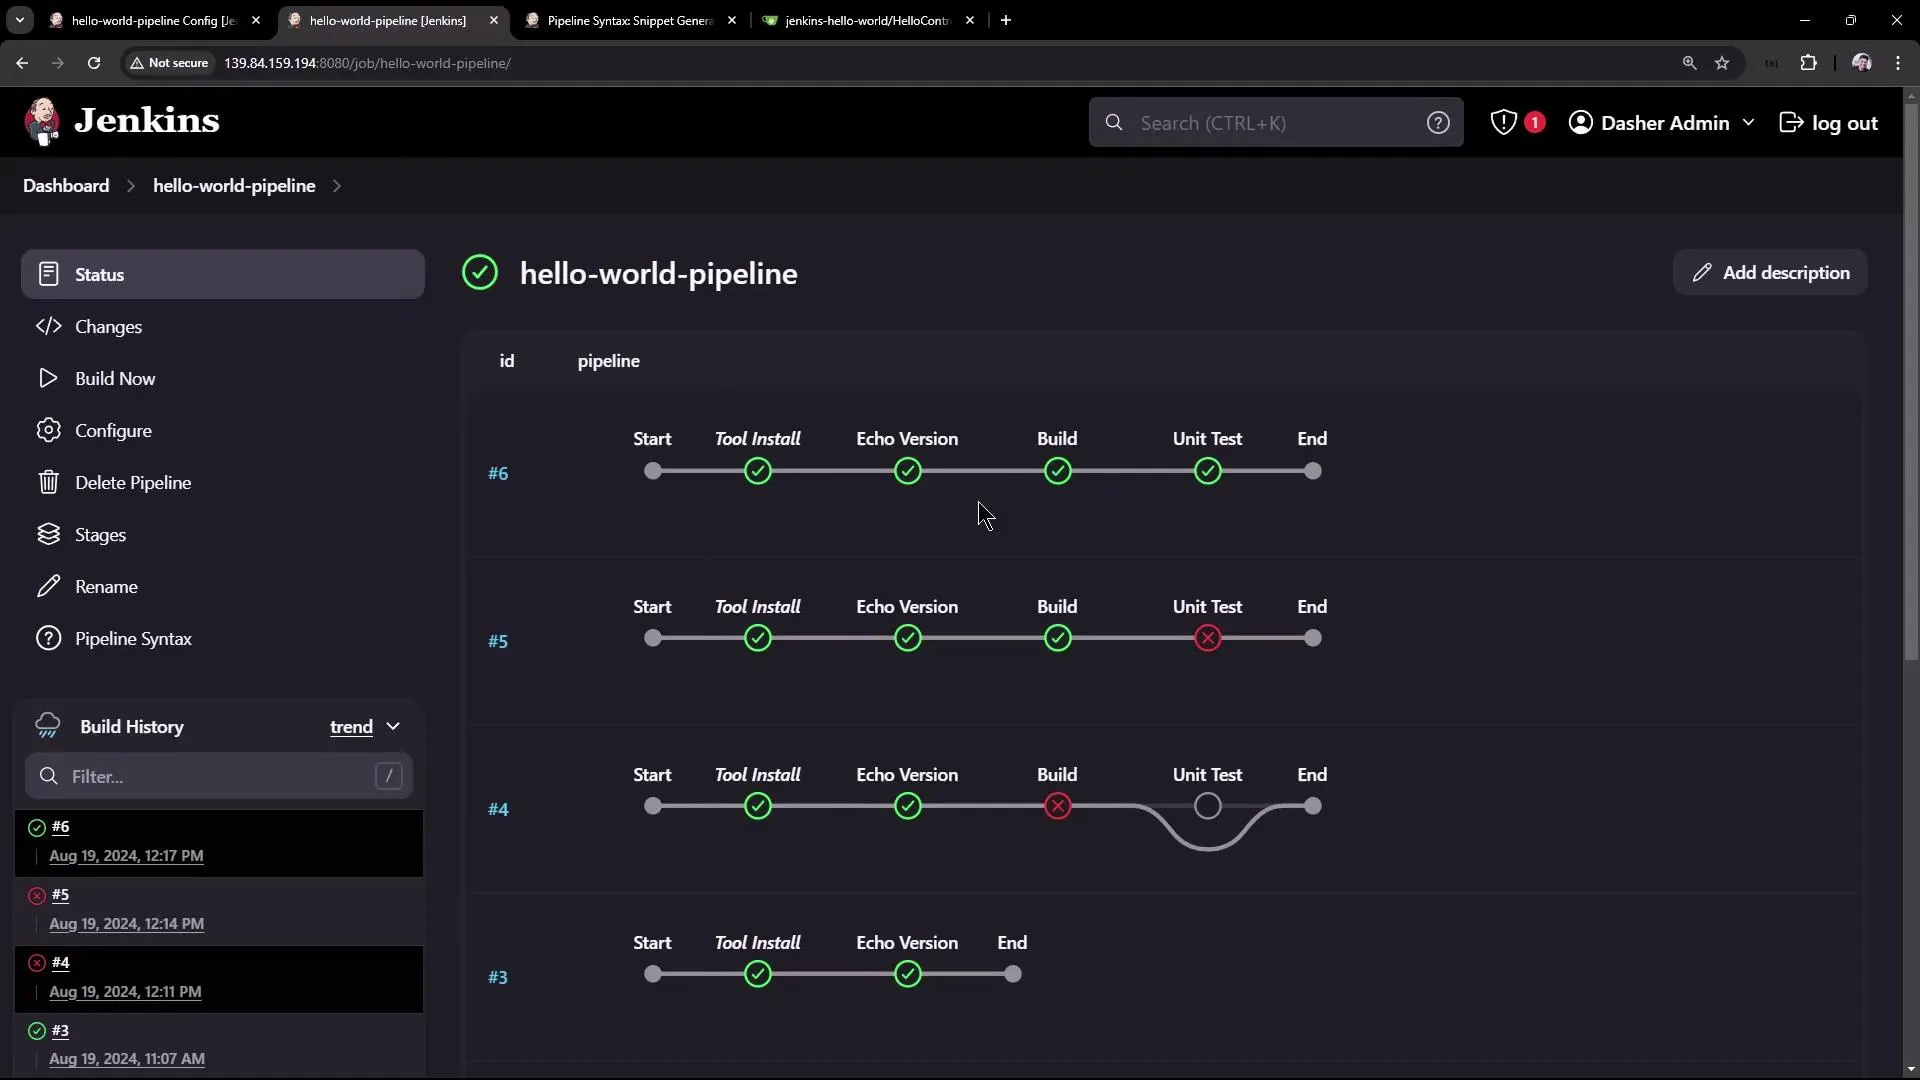
After updating the test, the Pipeline executed all six test cases successfully.
Pipeline Syntax and Git Branch Update
An error occurred during Pipeline execution because Jenkins attempted to clone the repository’s master branch, while our repository uses the main branch. The Git checkout has been updated to specify the main branch:
git branch: 'main', url: 'https://github.com/example/repo.git'The updated Pipeline script now looks like this:
pipeline {    agent any
    tools {        // Install the Maven version configured as "M398" and add it to the path.        maven "M398"    }
    stages {        stage('Echo Version') {            steps {                sh 'echo Print Maven Version'                sh 'mvn -version'            }        }        stage('Build') {            steps {                // Get some code from a github repository specifying the main branch                git branch: 'main', url: 'https://github.com/example/repo.git'                // Run Maven Package command and skip tests                sh 'mvn clean package -DskipTests=true'            }        }        stage('Unit Test') {            steps {                sh 'mvn test'            }        }    }}
After redeploying, the build stage completed successfully (after downloading dependencies), and all unit tests passed.
Summary and Next Steps
Using this Pipeline, we built the application and executed unit tests in separate stages. In the next session, we will:
- Transition the Pipeline script from the Jenkins UI to a Git repository for version control and collaboration.
- Explore further enhancements by implementing an end-to-end Pipeline with a Node.js application.
Refer to the following Jenkins dashboard snapshot to see an overview of the successful Pipeline execution:
Thank you for following along with this lesson.
Stay tuned for our upcoming session, where we will integrate version control practices and demonstrate how to implement a Node.js application using a similarly structured Pipeline.
Pipeline Script from SCM
Learn to obtain a Jenkins pipeline script from a Source Control Management system like GitHub for better version control and maintainability.
In this lesson, you’ll learn how to obtain a Jenkins pipeline script directly from a Source Control Management (SCM) system like GitHub. Traditionally, the pipeline script was defined directly in the Jenkins UI. For example, a typical script defined in the Jenkins UI looked like this:
pipeline {    agent any
    tools {        // Install the Maven version configured as "M398" and add it to the path.        maven "M398"    }
    stages {        stage('Echo Version') {            steps {                sh 'echo Print Maven Version'                sh 'mvn -version'            }        }
        stage('Build') {            steps {                // Get some code from a Git repo                git 'https://github.com/example/repo.git'
                // Run Maven Package CMD                sh 'mvn clean package -DskipTests=true'            }        }
        stage('Unit Test') {            steps {                sh 'mvn test'            }        }    }}
Defining your pipeline script in SCM allows you to maintain version control over your build configuration, making it easier to track changes over time.
Creating a Jenkinsfile
Instead of embedding the pipeline script in Jenkins, you can add it to your GitHub (or Git repository) to keep it version-controlled. In your repository, create a new file (typically named Jenkinsfile) at the root level and paste the pipeline script. Note that Jenkins automatically looks for a file named “Jenkinsfile” unless you specify a different script path.
Below is an updated example of a Jenkinsfile saved in the repository. Notice that the Maven tool is now referenced as “M3”:
pipeline {    agent any
    tools {        // Install the Maven version configured as "M3" and add it to the path.        maven "M3"    }
    stages {        stage('Echo Version') {            steps {                sh 'echo Print Maven Version'                sh 'mvn -version'            }        }        stage('Build') {            steps {                // Get some code from a github repository                git 'https://github.com/example/repo.git'
                // Run Maven Package CMD                sh "mvn clean package -DskipTests=true"            }        }        stage('Unit Test') {            steps {                sh 'mvn test'            }        }    }}
Pipeline Script from SCM Configuration
When you configure your Jenkins pipeline job with the Pipeline Script from SCM option, Jenkins automatically checks out your repository. This means you can remove or comment out explicit Git commands in your pipeline. For example, the modified Jenkinsfile using SCM looks like this:
pipeline {    agent any
    tools {        // Install the Maven version configured as "M398" and add it to the path.        maven "M398"    }
    stages {        stage('Echo Version') {            steps {                sh "echo Print Maven Version"                sh "mvn -version"            }        }        stage('Build') {            steps {                // No explicit Git checkout required since SCM performs the checkout automatically                sh "mvn clean package -DskipTests=true"            }        }    }}
To set up your pipeline to retrieve the script from SCM:
- Select the SCM Option: Choose “Pipeline Script from SCM” as the definition.
- Choose Your SCM: Select Git as the SCM provider.
- Provide Details: Enter the repository URL, specify the branch (e.g., ‘main’), and if needed, set the script path if your Jenkinsfile resides in a subdirectory.
An example configuration using a GitLab repository might include the following script:
pipeline {    agent any
    tools {        // Install the Maven version configured as "M3" and add it to the path.        maven "M3"    }
    stages {        stage('Echo Version') {            steps {                sh 'echo Print Maven Version'                sh 'mvn -version'            }        }        stage('Build') {            steps {                // Get some code from a GitLab repository                git branch: 'main', url: 'https://github.com/example/repo.git'            }        }    }}
If you receive an error message indicating that the repository URL is not valid, double-check that the URL is correct and that no credentials are needed for a public repository.
During configuration, you might encounter an error message similar to the one shown below:

Since the repository is public, credentials are not required. In the advanced settings, ensure the correct branch name (such as ‘main’) is specified. Jenkins will search for the Jenkinsfile in the repository root by default unless a different path is defined.
Understanding the Build Process
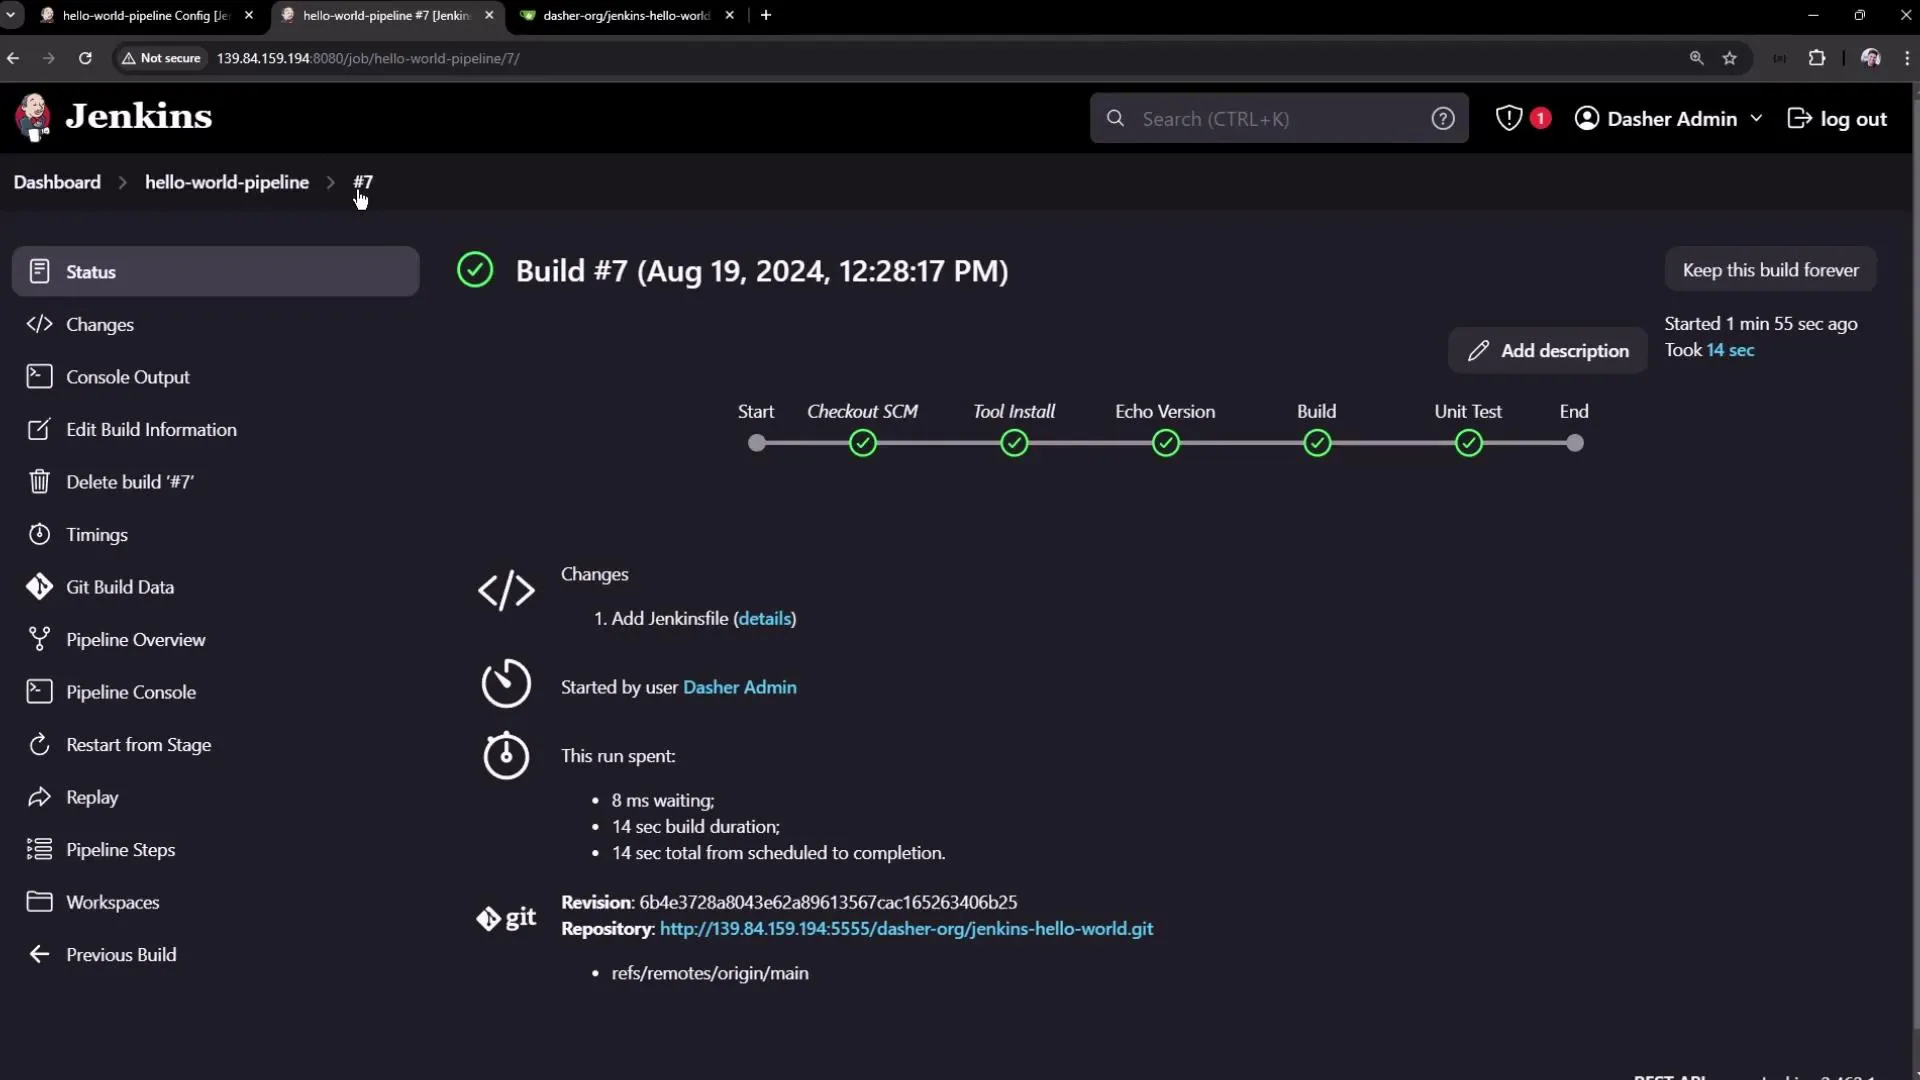
After the configuration is complete, Jenkins checks out your repository and executes the defined stages. The build log will include details like fetching the repository, commit messages, and more. An excerpt from a typical build log might look like this:
> git rev-parse --resolve-git-dir /var/lib/jenkins/workspace/hello-world-pipeline/.git # timeout=10> git config remote.origin.url https://github.com/example/repo.git # timeout=10> git fetch upstream changes from https://github.com/example/repo.git> git --version # timeout=10> git version 2.43.0> git fetch --tags --force --progress -- https://139.84.159.194:5555/Demo-org/jenkins-hello-world.git +refs/heads/*:refs/remotes/origin/*> git rev-parse refs/remotes/origin/main^{commit} # timeout=10Checking out Revision 6b4e37284084c62a896135672cac165263406b25 (refs/remotes/origin/main)> git config core.sparsecheckout # timeout=10> git checkout -f 6b4e37284084c62a896135672cac165263406b25 # timeout=10Commit message: "Add Jenkinsfile"> git rev-list --no-walk a05dbf36e7307e735bac28687c6464cb3ef6 # timeout=10After the checkout, the pipeline moves on to subsequent stages. For instance, the output of the “Echo Version” stage may look like this:
+ echo Print Maven VersionPrint Maven Version+ mvn -versionApache Maven 3.9.8 (36645f6c9b5079805ea5009217e36f2cffd34256)Maven home: /var/lib/jenkins/tools/hudson.tasks.Maven_MavenInstallation/M398Java version: 17.0.12, vendor: Ubuntu, runtime: /usr/lib/jvm/java-17-openjdk-amd64Default locale: en_US, platform encoding: UTF-8OS name: "linux", version: "6.8.0-39-generic", arch: "amd64", family: "unix"Exploring the Jenkins Workspace
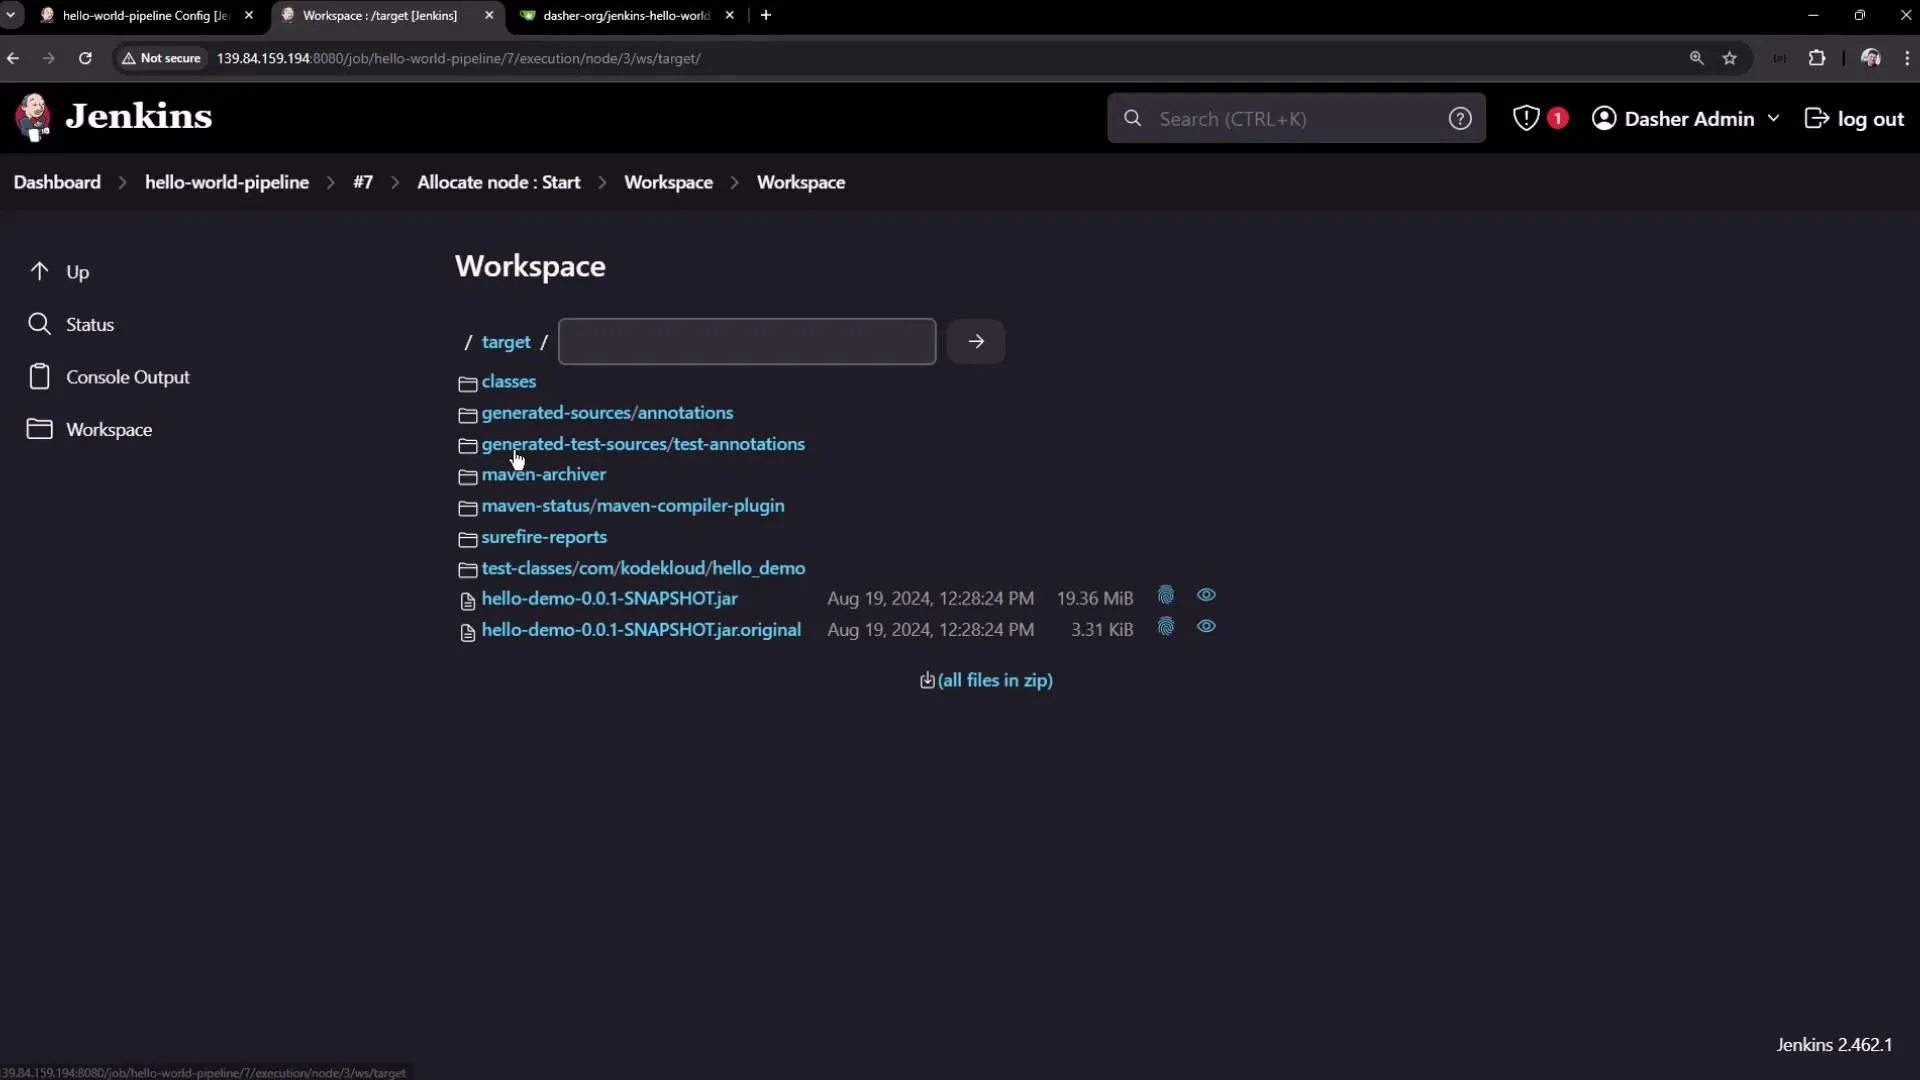
After a successful build, you can review the workspace files via the Jenkins UI. The workspace includes both the repository files and the build outputs (such as the generated Maven target folder, test reports, and packaged application files).
For example, here is an interface displaying the workspace files for the project:
You can also inspect detailed build stages in the pipeline interface:
Accessing the Workspace via Terminal
You can also access the Jenkins master to review the workspace directly. For example, using the terminal:
root@jenkins-controller-1 in /var/lib/jenkins$ cd workspace/
root@jenkins-controller-1 in lib/jenkins/workspace$ lltotal 32drwxr-xr-x  8 jenkins jenkins 4096 Aug 19 11:07 ./drwxr-xr-x 18 jenkins jenkins 4096 Aug 19 12:29 ../drwxr-xr-x  2 jenkins jenkins 4096 Aug 19 10:12 ascii-build-job/drwxr-xr-x  2 jenkins jenkins 4096 Aug 19 10:37 ascii-deploy-job/drwxr-xr-x  2 jenkins jenkins 4096 Aug 19 10:32 ascii-test-job/drwxr-xr-x  5 jenkins jenkins 4096 Aug 19 09:23 'Generate ASCII Artwork'/drwxr-xr-x  2 jenkins jenkins 4096 Aug 19 12:28 hello-world-pipeline/drwxr-xr-x  2 jenkins jenkins 4096 Aug 19 12:28 'hello-world-pipeline@tmp'/
Then, to examine the “hello-world-pipeline” workspace:
root@jenkins-controller-1 in lib/jenkins/workspace$ cd hello-world-pipeline
root@jenkins-controller-1 in hello-world-pipeline on @ HEAD (6b4e372) via v17.0.12$ lltotal 56drwxr-xr-x 5 jenkins jenkins 4096 Aug 19 12:28 ./drwxr-xr-x 8 jenkins jenkins 4096 Aug 19 11:07 ../drwxr-xr-x 2 jenkins jenkins 4096 Aug 19 12:28 .git/-rw-r--r-- 1 jenkins jenkins  383 Aug 19 12:14 .gitignore-rw-r--r-- 1 jenkins jenkins  758 Aug 19 12:14 Jenkinsfile-rw-r--r-- 1 jenkins jenkins 10606 Aug 19 12:14 mvnw-rw-r--r-- 1 jenkins jenkins  6913 Aug 19 12:14 mvnw.cmd-rw-r--r-- 1 jenkins jenkins 1755 Aug 19 12:14 pom.xml-rw-r--r-- 1 jenkins jenkins  445 Aug 19 12:14 README.mddrwxr-xr-x 1 jenkins jenkins  512 Aug 19 12:14 src/drwxr-xr-x 9 jenkins jenkins 4096 Aug 19 12:28 target/
This workspace houses all repository files along with build outputs such as Maven targets and test reports.
Conclusion
By following this lesson, you now understand how to retrieve a pipeline script from SCM, version control your build configurations, and streamline the pipeline setup in Jenkins. This approach offers better maintainability and traceability for your continuous integration workflows.
Thank you for exploring how to integrate SCM with Jenkins pipeline scripts. Happy building!
Create Pipeline using Blue Ocean Graphical Editor
Learn to create and configure a Jenkins pipeline using the Blue Ocean graphical editor for improved continuous integration.
In this tutorial, you’ll learn how to create and configure a Jenkins pipeline using the Blue Ocean graphical editor for an enhanced continuous integration experience.
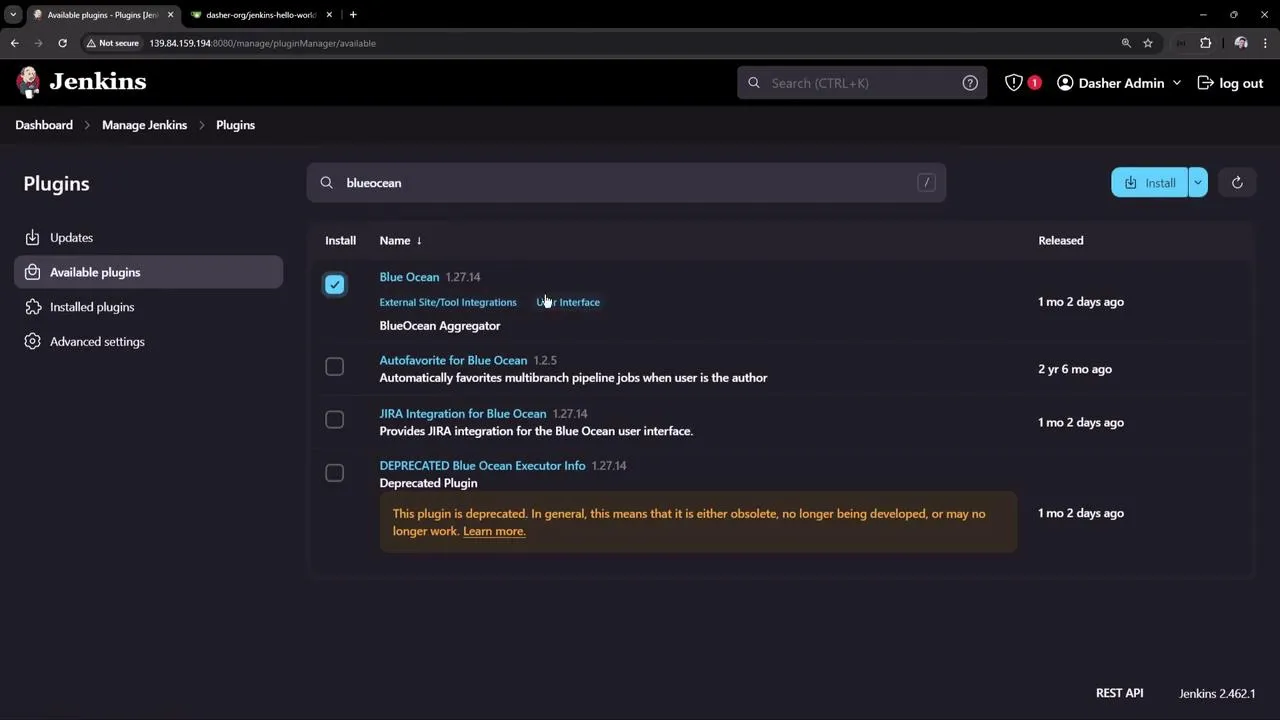
To get started, access your Jenkins instance and navigate to the plugins management page. Search for “Blue Ocean” and install the plugin. Blue Ocean bundles modern plugins that revamp the Jenkins user interface, focusing on simplifying pipeline creation and management.
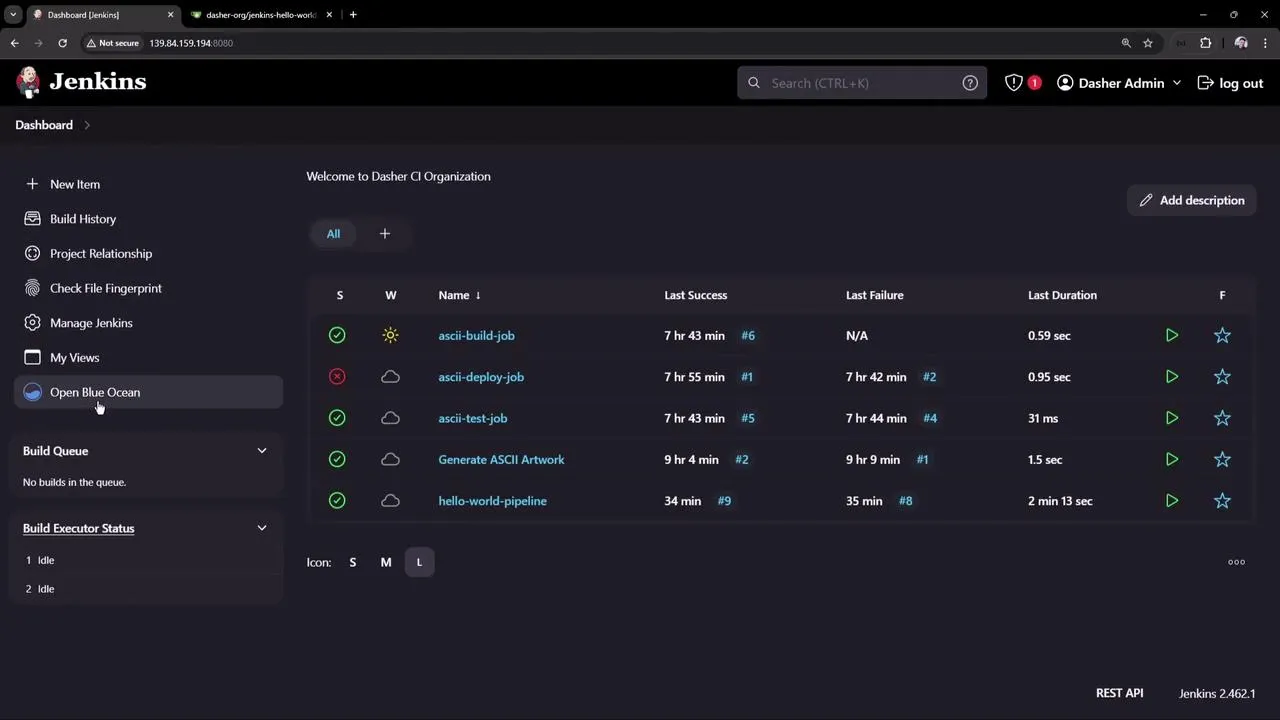
After the installation is complete, your main dashboard will reveal an “Open Blue Ocean” option. This view not only refreshes the visualization of your pipelines but also offers an easy switch-back to the classic interface with a simple arrow icon.
The Jenkins dashboard now displays a list of jobs with their statuses, including details such as last success, failure, and duration. The sidebar gives you access to options like “Build History” and the new “Open Blue Ocean” view.
Creating a New Pipeline
To create a new pipeline, click on the “New Pipeline” button. The first step integrates Blue Ocean with your Source Control Management (SCM) tool. Jenkins supports popular SCM platforms, including GitHub, Bitbucket, and GitHub Enterprise.
If you plan to use GitHub, select the Git option, paste your repository URL, and enter your GitHub credentials (e.g., user “GitHub-admin”). Jenkins leverages the credential binding plugin to securely store these credentials.
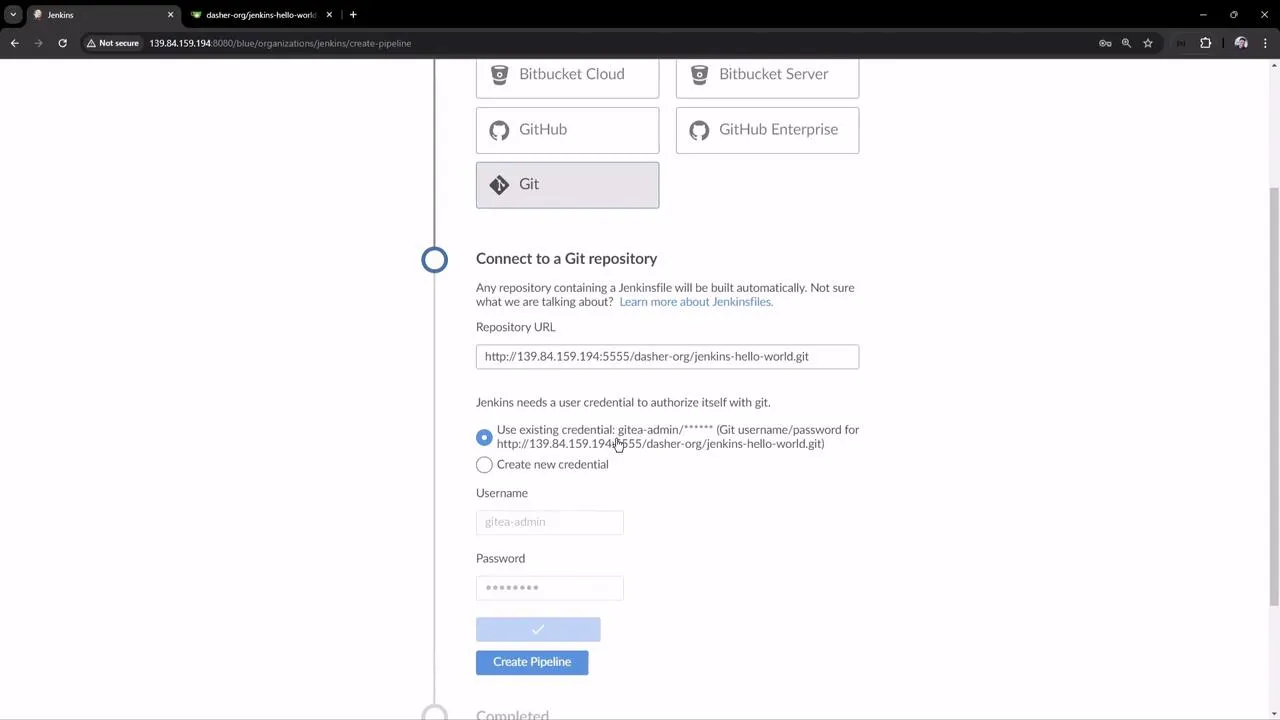
Once authentication is complete, Jenkins scans your GitHub repository for branches that contain a Jenkinsfile. If found, the pipeline triggers automatically; if not, you will be prompted to create one. In our example, the repository already includes a Jenkinsfile with multiple stages such as “Unit Test.”
In the Jenkinsfile example below, the “Unit Test” stage incorporates a loop that introduces a 60-second delay before proceeding:
stage('Build') {    steps {        // Get some code from a github repository        // git branch: 'main', url: 'https://github.com/example/repo.git'        // Run Maven Package CMD        sh 'mvn clean package -DskipTests=true'    }}
stage('Unit Test') {    steps {        script {            for (int i = 0; i < 60; i++) {                echo "${i + 1}"                sleep 1            }        }        sh 'mvn test'    }}
After saving the pipeline configuration, Blue Ocean presents all build steps, including “Echo Version,” “Build,” and “Unit Test,” along with real-time logs on a single page. You might need to wait a moment as the stages complete.
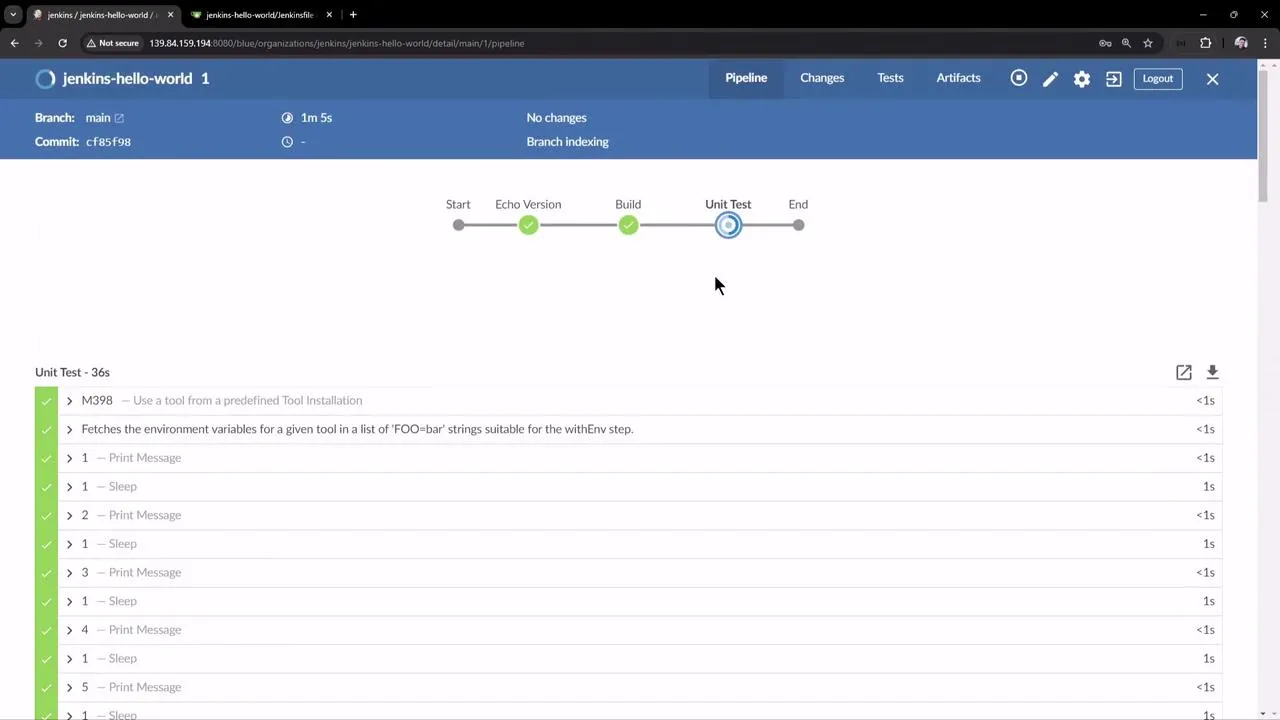
Additional details such as the branch that triggered the build, build duration, commit ID, and a summary of changes are readily available within the interface.
Configuring the Pipeline
By clicking the pencil icon, you can edit the pipeline directly in the Blue Ocean interface. This feature lets you modify commands or shell scripts for any stage. For instance, you can adjust the “Unit Test” stage as follows:
for (int i = 0; i < 60; i++) { echo "${i + 1}"}Press Ctrl S (or Command S on macOS) to save any changes, which are then updated in your Jenkinsfile.
Below is an updated snippet of the Jenkinsfile with modifications for archiving artifacts and processing test results:
stage('Build') {    steps {        sh 'mvn clean package -DskipTests=true'        archiveArtifacts 'target/hello-demo-*.jar'    }}
stage('Unit Test') {    steps {        sh 'mvn test'        junit(testResults: 'target/surefire-reports/TEST-*.xml', keepProperties: true, keepTestNames: true)    }}
tools {    maven 'M398'}
Archiving Artifacts
Once the build stage generates a JAR file in the target directory, you can archive it as an artifact by following these steps:
- Within the build stage, click the plus icon to add a new step.
- Choose the “Archive the artifacts” option.
- Specify the JAR file path using a wildcard (e.g.,
target/hello-demo-*.jar) to automatically accommodate version changes.
To verify the artifact is generated, SSH into the Jenkins controller and list the workspace directories:
root@jenkins-controller-1:~#cd /var/lib/jenkins/workspace/llIdentify the workspace (e.g., jenkins-hello-world_main) and inspect the target directory:
cd jenkins-hello-world_mainll target/You should see a file similar to hello-demo-0.0.1-SNAPSHOT.jar.
Archiving Test Reports
After running the unit tests, JUnit XML reports are generated in the target/surefire-reports/ directory. To archive these reports:
- Add a new step in the “Unit Test” stage.
- Choose “Archive JUnit formatted test results.”
- Enter the path such as
target/surefire-reports/TEST-*.xml.
Verify the test reports by listing the directory via the Jenkins controller:
ll target/surefire-reports/You should observe the XML and related text files corresponding to your tests.
The JUnit plugin then processes these reports and displays test trends, including summaries of passed, skipped, and failed tests.
Full Jenkinsfile Recap
Below is the complete updated Jenkinsfile incorporating all modifications:
pipeline { agent any tools { // Install the Maven version configured as "M398" and add it to the path. maven 'M398' } stages { stage('Echo Version') { steps { sh 'echo Print Maven Version' sh 'mvn -version' } } stage('Build') { steps { // Get code from Git repository git branch: 'main', url: 'https://github.com/example/repo.git' sh 'mvn clean package -DskipTests=true' archiveArtifacts 'target/hello-demo-*.jar' } } stage('Unit Test') { steps { sh 'mvn test' junit(testResults: 'target/surefire-reports/TEST-*.xml', keepProperties: true, keepTestNames: true) } } }}After saving and committing the Jenkinsfile, Jenkins will trigger a new build. A commit message like “Added artifact archive for build stage and JUnit reports” is recorded automatically. In case the artifact pattern does not match (for instance, using hello-world instead of hello-demo), update the Jenkinsfile accordingly.
Inspect the Jenkins logs to ensure that the Maven build produces the JAR file and that the unit tests run successfully.
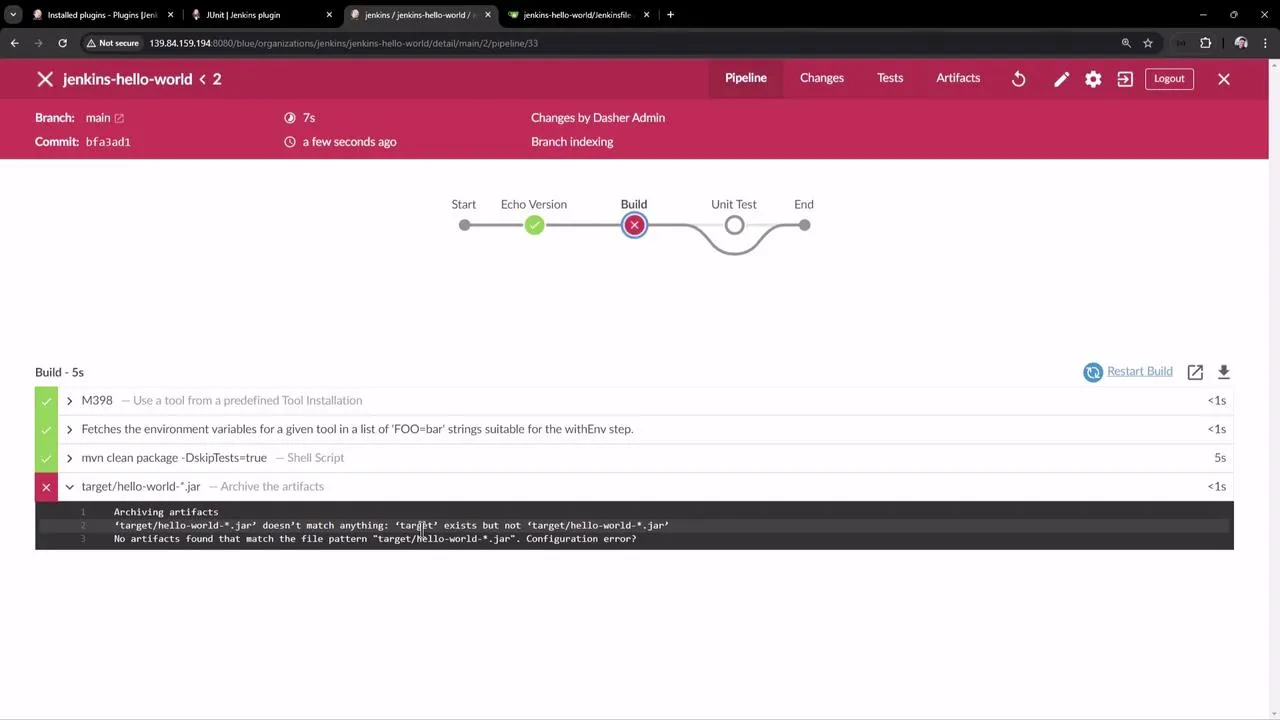
After updating the file path to match the correct artifact name and re-running the build, the process completes successfully and executes the unit tests:
mvn clean package -DskipTests=trueand
mvn testThe JUnit plugin then displays test results alongside options for downloading artifacts.
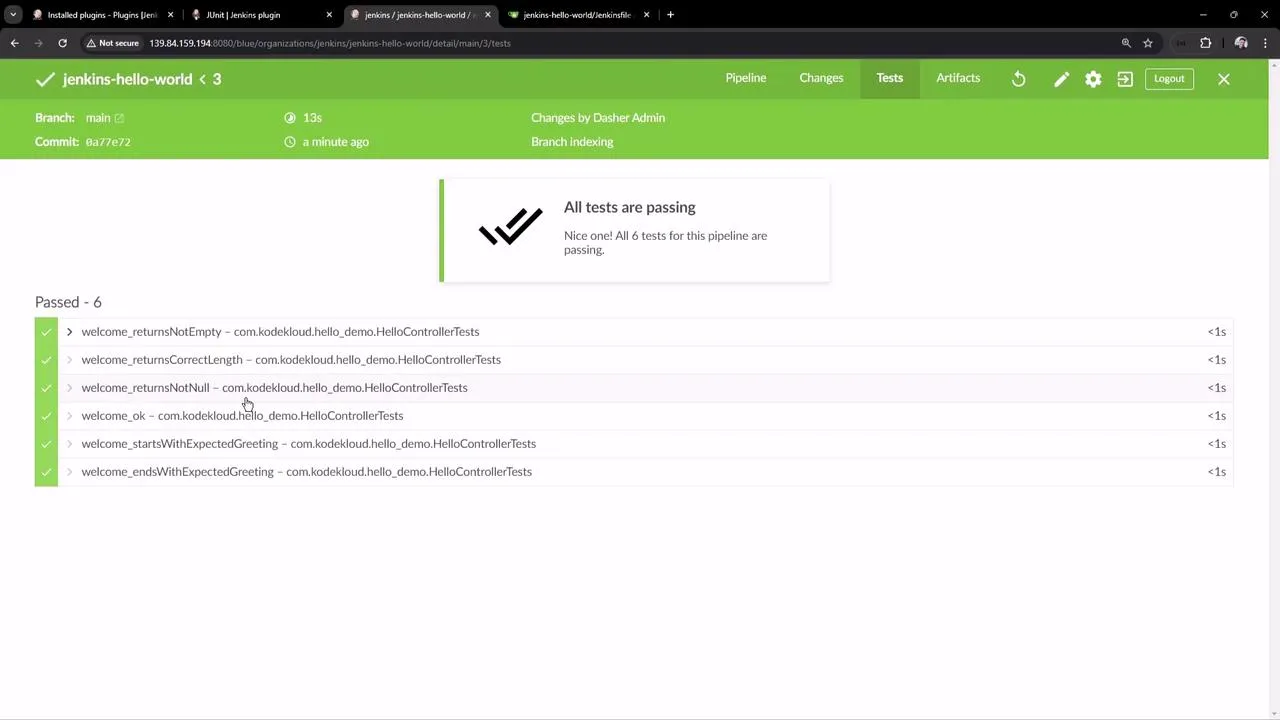
Final Remarks
This lesson demonstrated how you can leverage the Blue Ocean plugin to efficiently create, configure, and visualize Jenkins pipelines. The intuitive interface makes it easy to edit your pipeline, update the Jenkinsfile, and archive both build artifacts and test reports.
The classic Jenkins UI remains available for inspecting build history and tracking test result trends over time.
Happy building and continuous integration with Jenkins!
Create Pipeline with Parameters
This guide demonstrates creating a Jenkins pipeline using parameters for flexible and dynamic job configurations.
In this guide, we demonstrate how to create a Jenkins pipeline that leverages parameters for building flexible and dynamic jobs. A parameterized build in Jenkins lets you pass in custom values when triggering a build, making your CI/CD process more versatile and easily configurable.
Below is an example repository called “parameterized-pipeline-job-init” on GitHub. This repository hosts a simple Java Spring Boot “Hello World” application with two branches—test and main—where the only difference is the Jenkinsfile. Each branch’s Jenkinsfile defines a different set of stages, which we will review next.
Comparing Jenkinsfiles for Test and Main Branches
Test Branch Jenkinsfile
In the test branch, the Jenkinsfile defines the following stages:
- Maven Version
- Build
- Test
- Local Deployment
- Integration Testing
Below is the initial Jenkinsfile from the test branch:
pipeline { agent any stages { stage('Maven Version') { steps { sh 'echo Print Maven Version' sh 'mvn -version' } } stage('Build') { steps { sh 'mvn clean package -DskipTests=true' archiveArtifacts 'target/hello-demo-*.jar' } } stage('Test') { steps { sh 'mvn test' junit(testResults: 'target/surefire-reports/TST-*.xml', keepProperties: true, keepTestNames: true) } } }}To compare the differences between the two Jenkinsfiles, a third-party tool is used. In the comparison, the test branch Jenkinsfile appears on the left and the main branch Jenkinsfile on the right. Although both use the same pipeline agent and tools, the stages are slightly different. The test branch includes the Maven Version, Build, Test stages, and adds local deployment with the java -jar command for integration testing. In the test branch, the local deployment stage uses triple double quotes to allow for multiline string construction and pristine whitespace preservation:
stage('Local Deployment') {    steps {        sh """java -jar target/hello-demo-*.jar > /dev/null &"""    }}
stage('Integration Testing') {    steps {        sh 'sleep 5s'        sh 'curl -s http://localhost:6767/hello'    }}
This approach runs the Java application in the background (thanks to the ampersand) while redirecting its output to /dev/null.
Main Branch Jenkinsfile
In the main branch, the Jenkinsfile is designed to build a production-ready pipeline. Notice that the Maven Version stage is omitted. Instead, the stages include:
- Build
- Test
- Containerization
- Kubernetes Deployment
- Integration Testing
Below is a simplified version of the main branch Jenkinsfile:
/****** BRANCH - main *****/pipeline { agent any stages { stage('Build') { steps { sh 'mvn clean package -DskipTests=true' archiveArtifacts 'target/hello-demo-*.jar' } } stage('Test') { steps { sh 'mvn test' junit(testResults: 'target/surefire-reports/TEST-*.xml', keepProperties: true, keepTestNames: true) } } stage('Containerization') { steps { sh 'echo Docker Build Image..' sh 'echo Docker Tag Image....' sh 'echo Docker Push Image......' } } stage('Kubernetes Deployment') { steps { sh 'echo Deploy to Kubernetes using [GitOps with ArgoCD](https://learn.kodekloud.com/user/courses/gitops-with-argocd)' } } stage('Integration Testing') { steps { sh 'sleep 10s' sh 'echo Testing using cURL commands......' } } }}Here, the containerization stage simulates building, tagging, and pushing a Docker image, whereas the deployment stage simulates deploying to Kubernetes using ArgoCD. The integration testing stage verifies the deployment by pausing for a defined duration (using sleep) before issuing a test call.
Configuring a Parameterized Pipeline Job in Jenkins
Parameterizing your pipeline job enables a single job to run across branches and customize build options dynamically. Follow these steps in Jenkins:
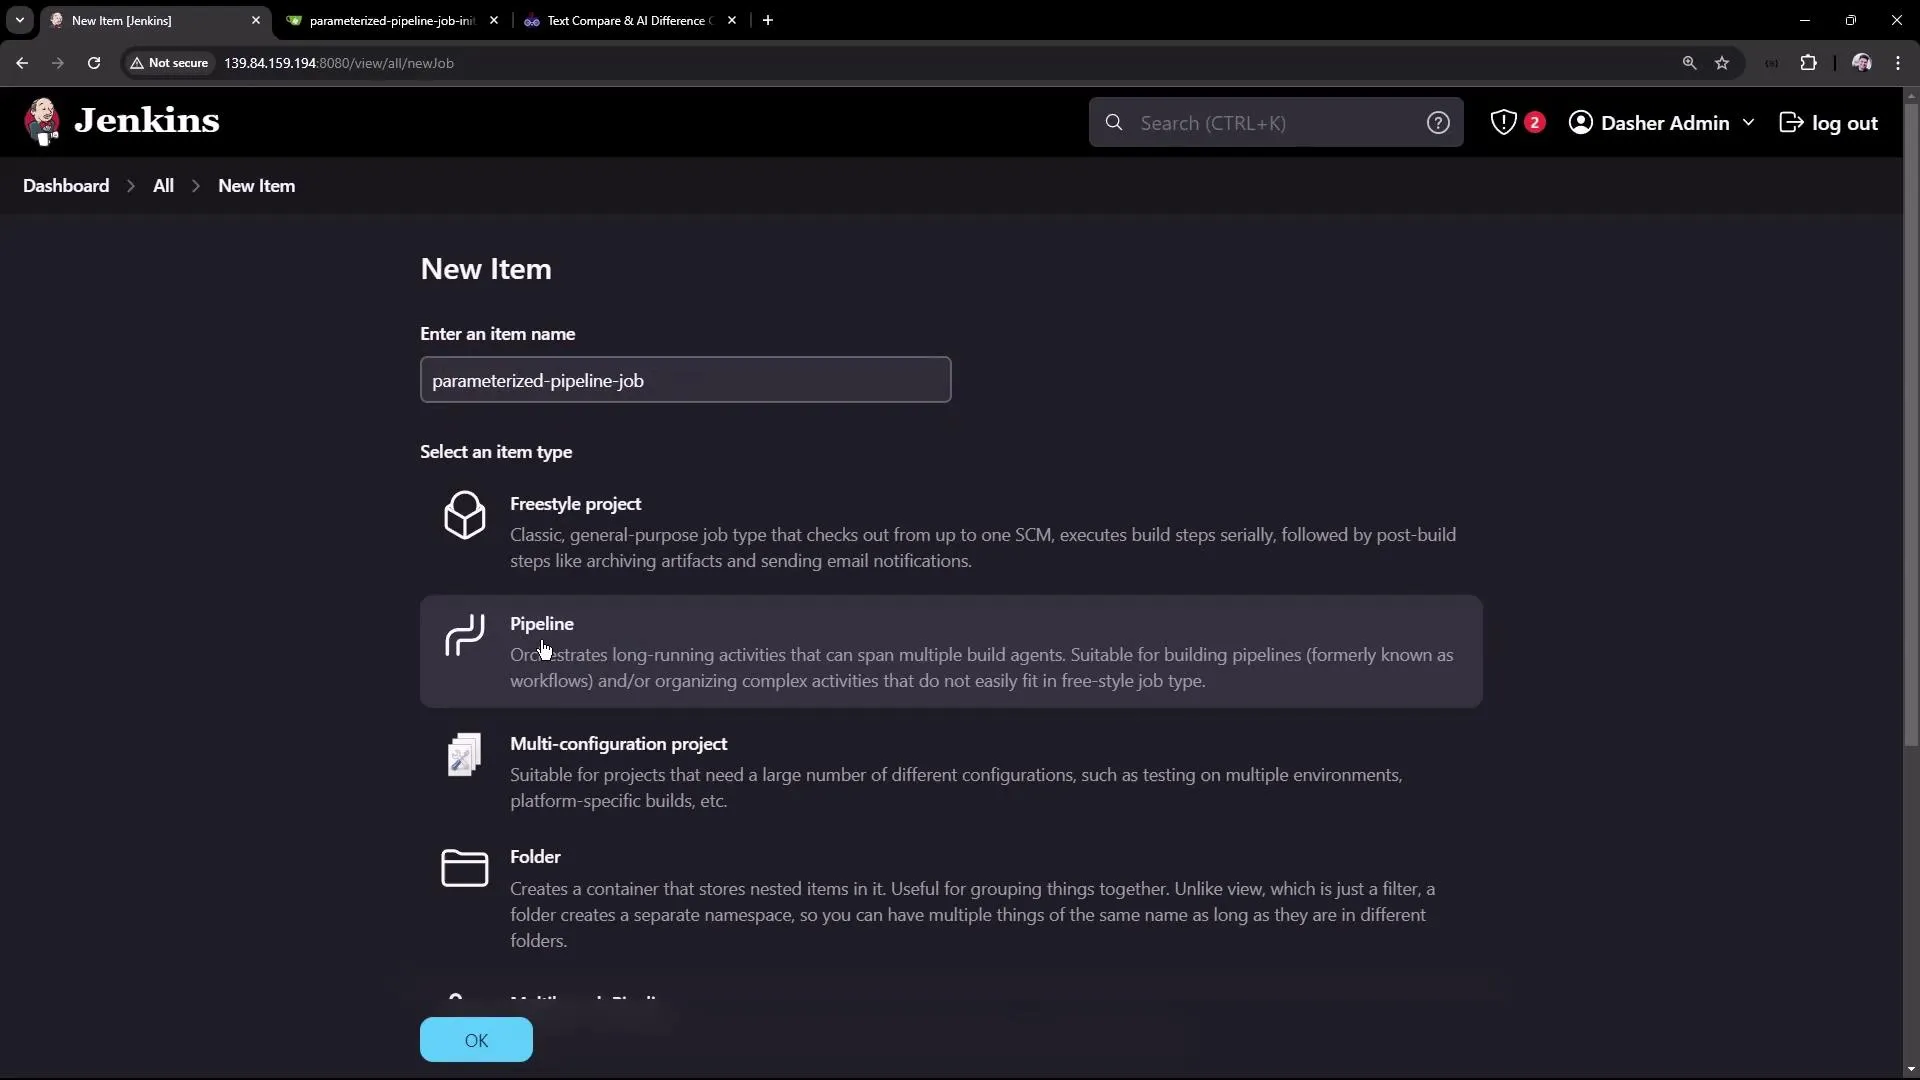
1. Create a New Pipeline Job
-
In Jenkins Classic UI, click New Item.
-
Name the job (e.g., “parameterized-pipeline-job”) and select the Pipeline project type.
2. Configure Source Control Management (SCM)
-
Enter the repository URL for your pipeline script.
-
Specify the branch. Initially, use the test branch by setting the script path to
Jenkinsfile.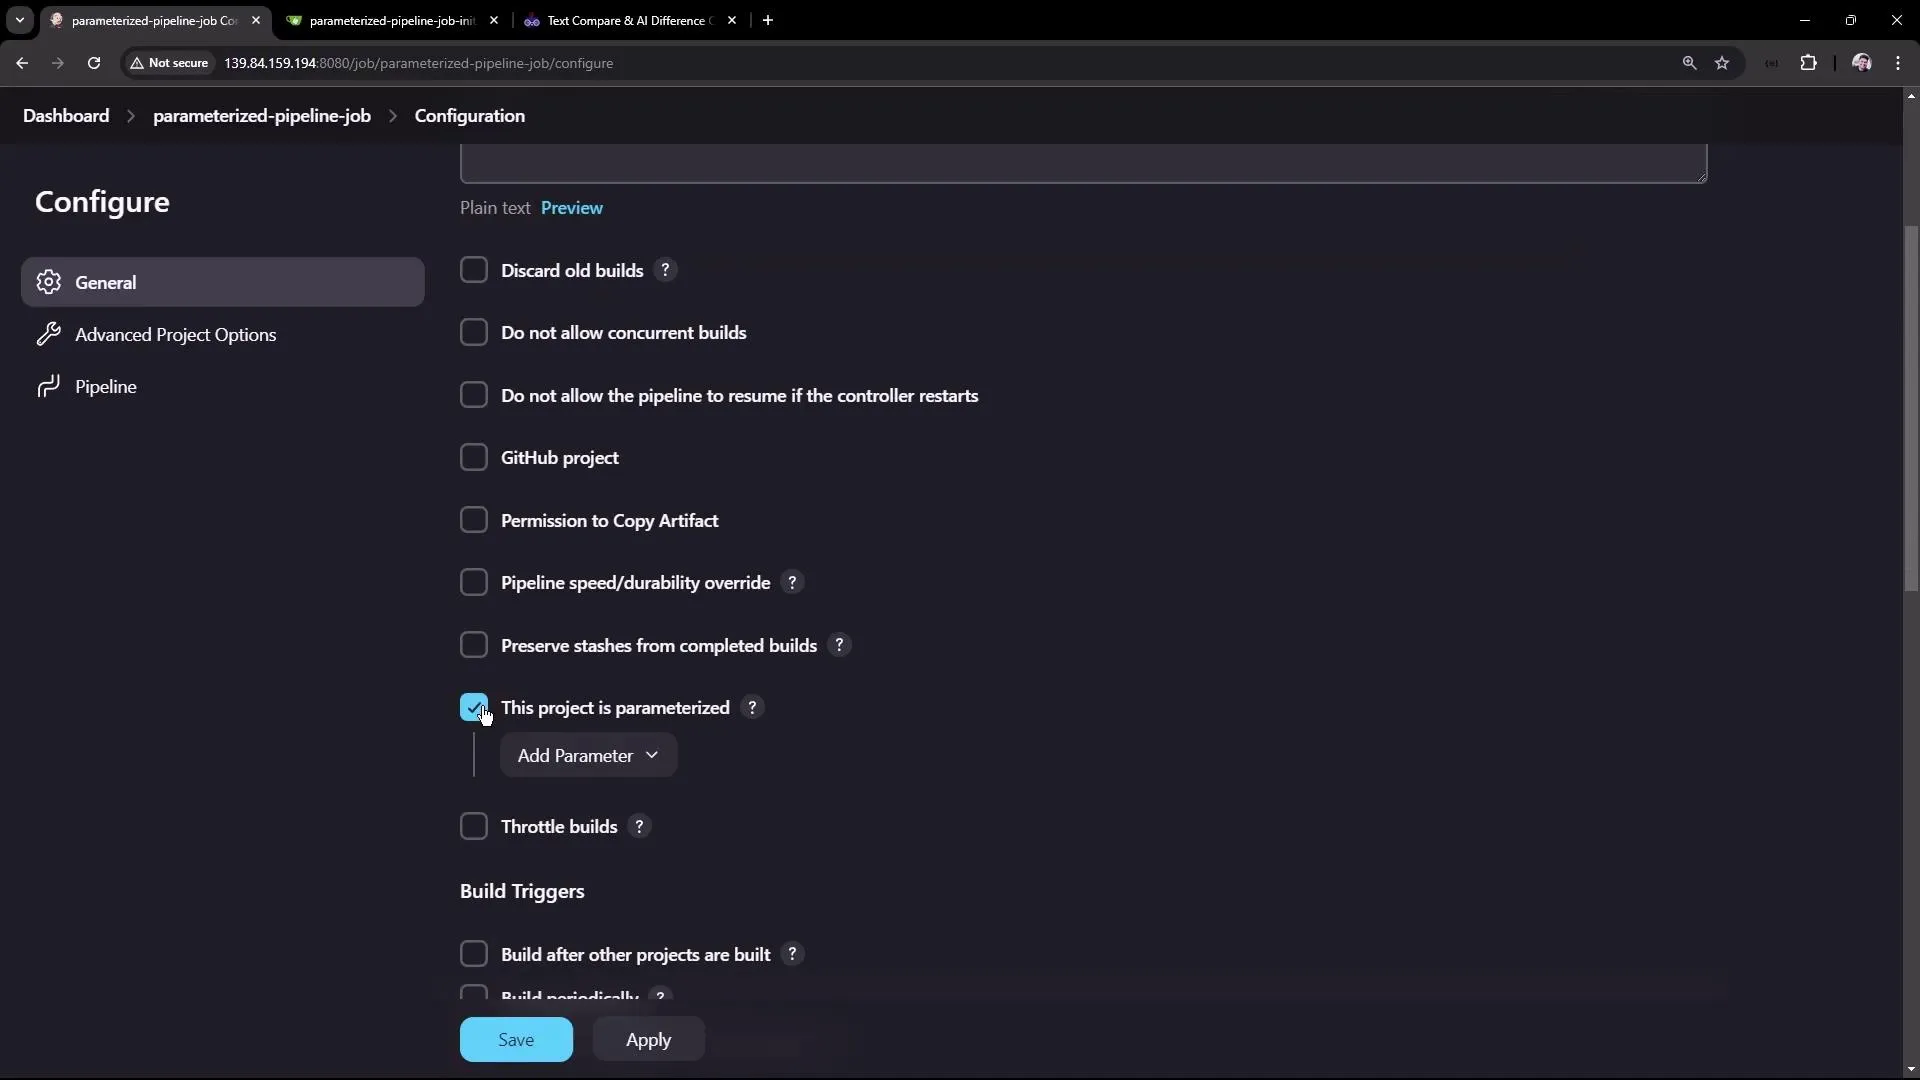
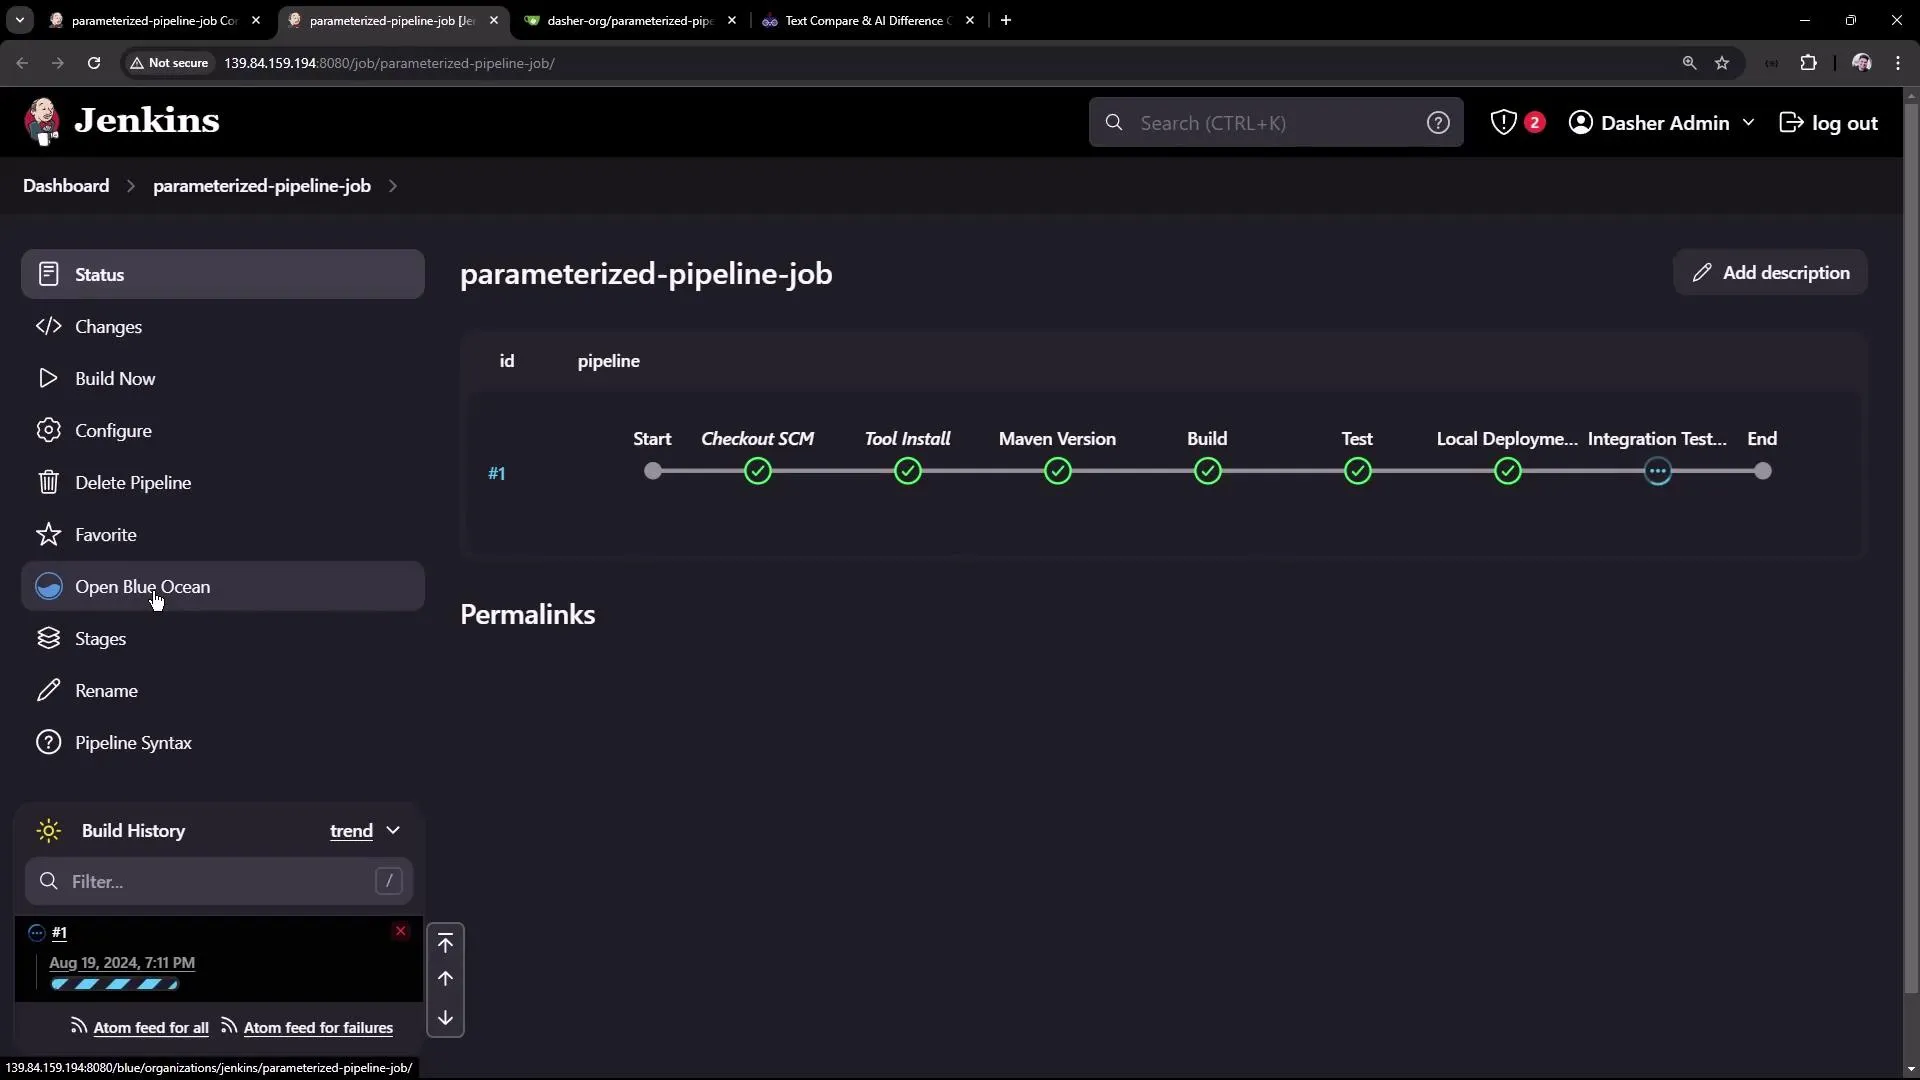
3. Run a Quick Build
-
Click Apply and then Build Now to validate the configuration.
-
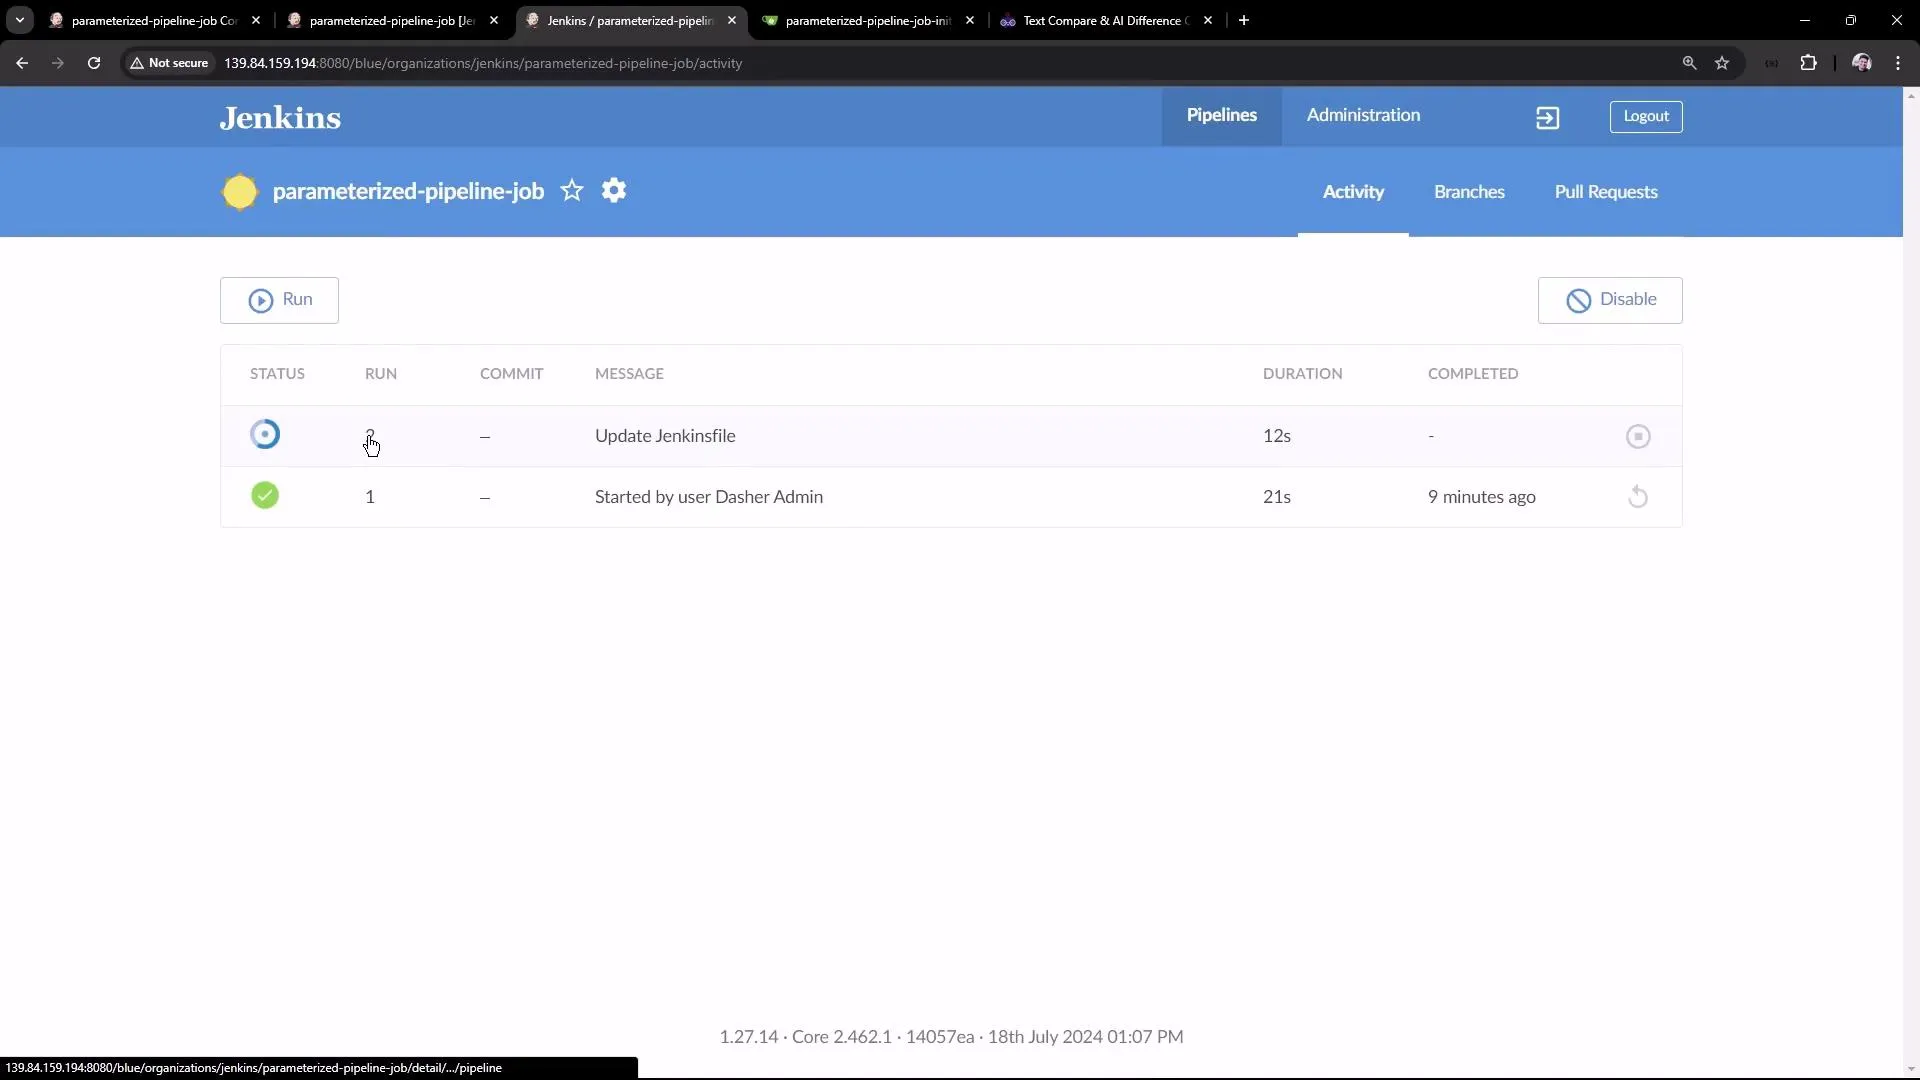
The run should display the build and test stages, along with the deployment phase. Use the Blue Ocean interface to view detailed logs.
4. Enable Parameterization
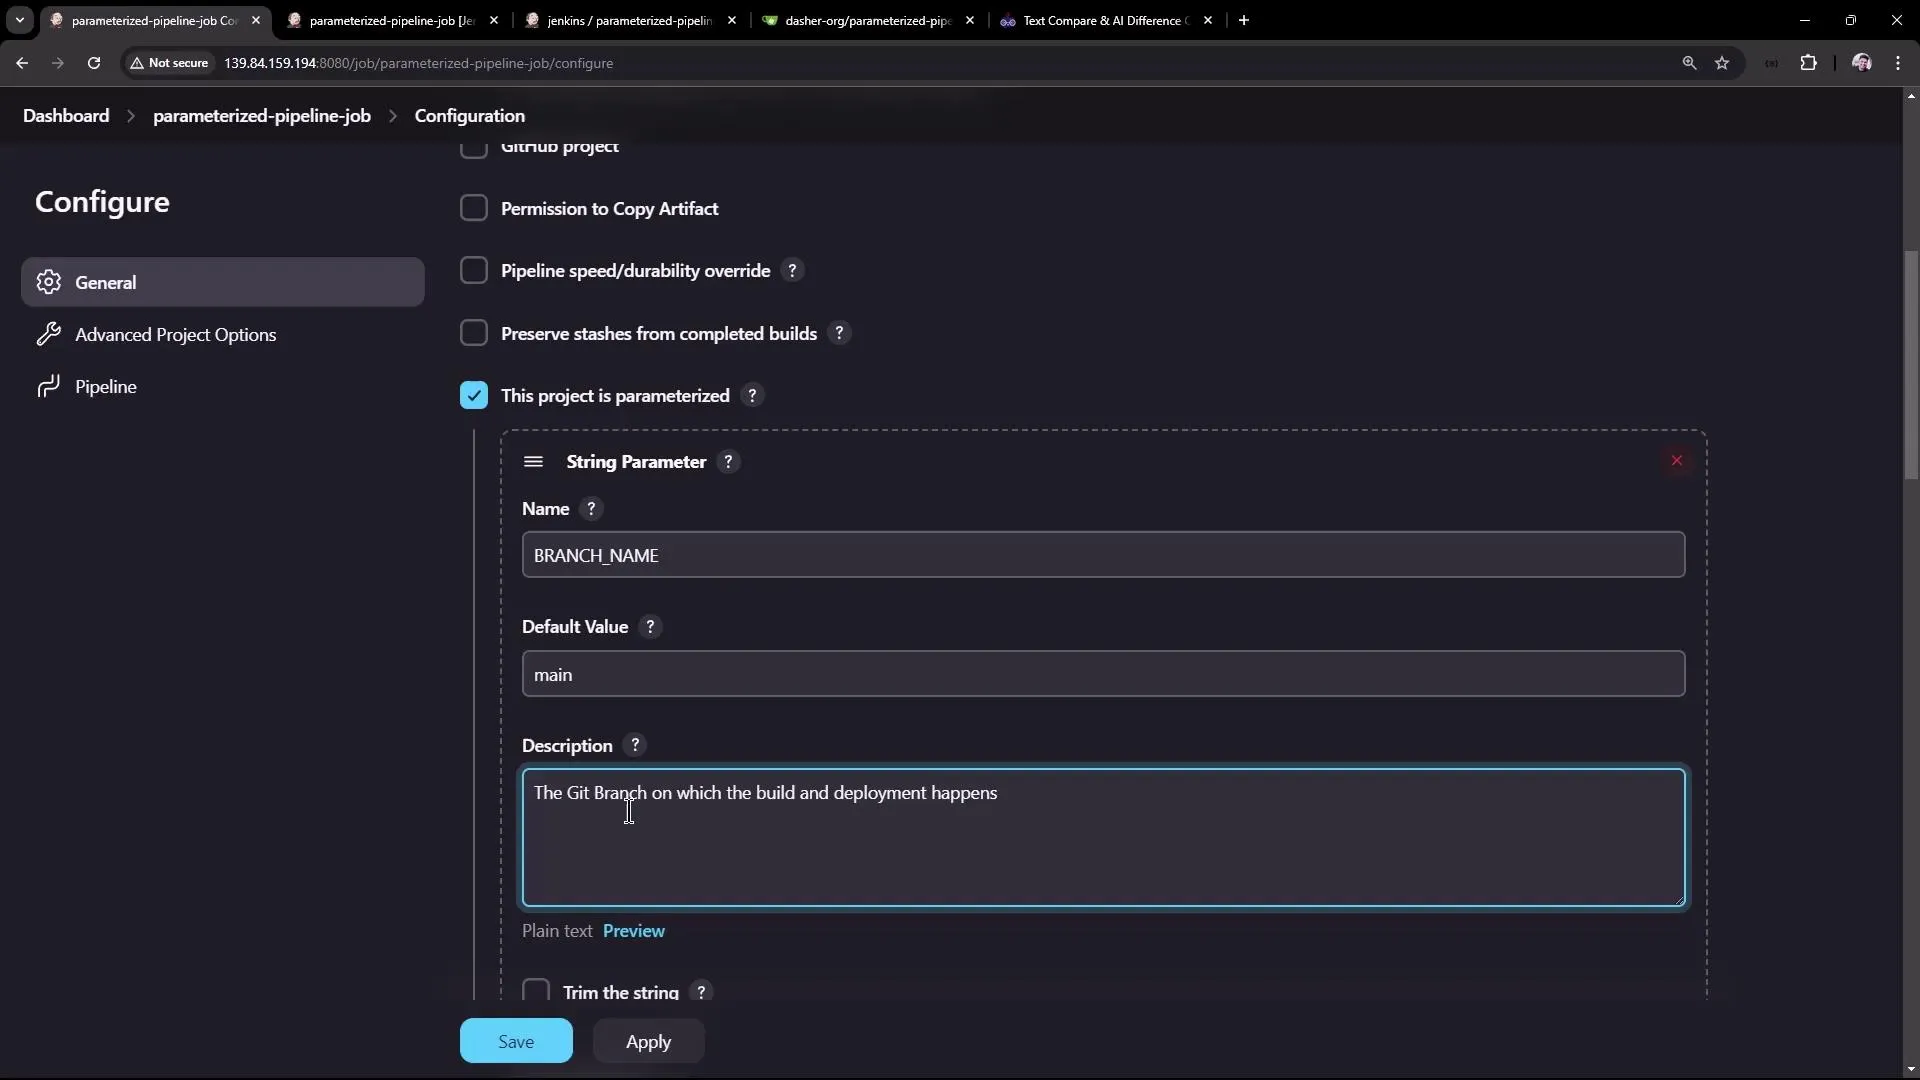
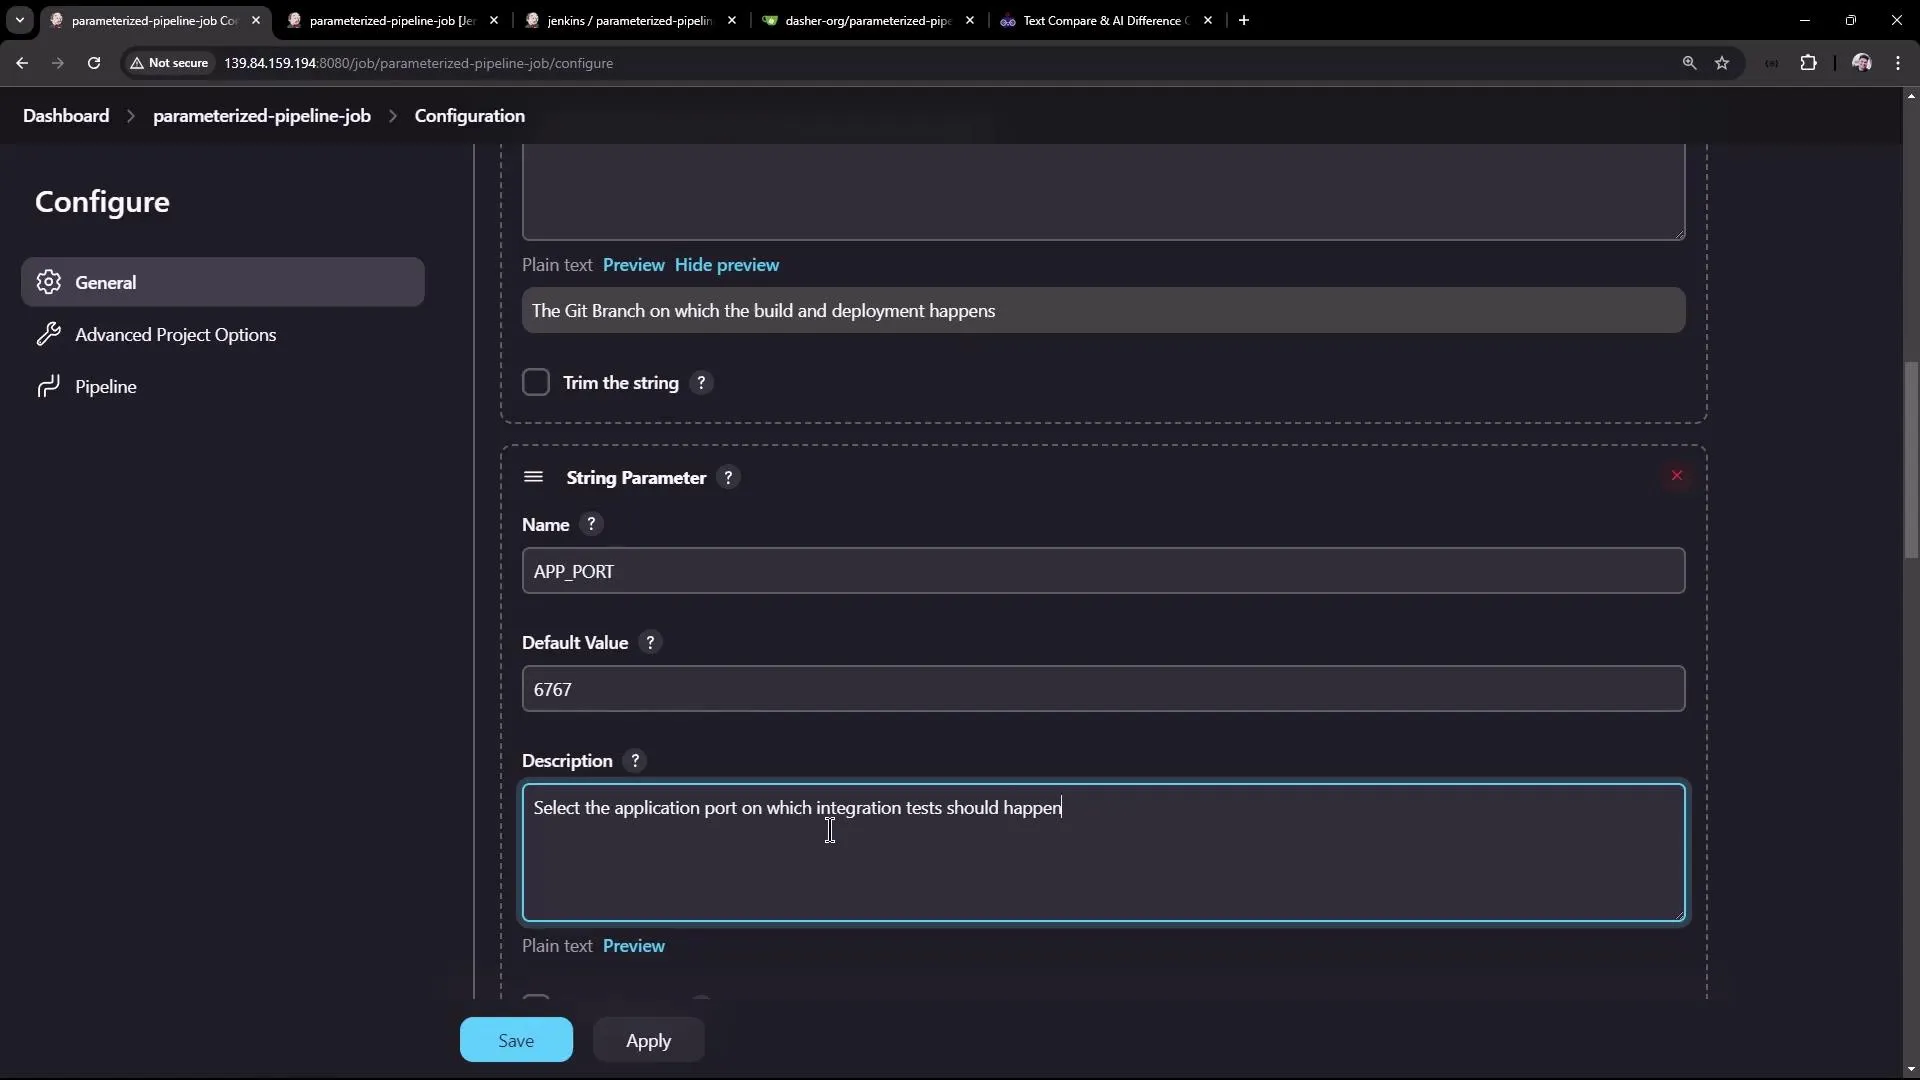
- In the job configuration, enable the This project is parameterized option.
- Add the following parameters to the job:
| Parameter | Type | Default Value | Description |
|---|---|---|---|
| BRANCH_NAME | String | main | Specifies which Git branch to build. |
| APP_PORT | String | 6767 | The port on which the application will run during integration testing. |
| SLEEP_TIME | Choice | 5s | Sets the sleep duration before the integration test. Choices include: 5s, 10s, 15s, 20s, and 25s. |

5. Parameterizing the Pipeline Script
Modify the Jenkinsfile to reference the defined parameters using the syntax ${params.PARAMETER_NAME}. For example, update the Maven Version stage in the test branch as follows:
pipeline { agent any stages { stage('Maven Version') { steps { sh 'echo Print Maven Version' sh 'mvn -version' sh "echo Sleep-Time - ${params.SLEEP_TIME}, Port - ${params.APP_PORT}, Branch - ${params.BRANCH_NAME}" } } stage('Build') { steps { sh 'mvn clean package -DskipTests=true' archiveArtifacts 'target/hello-demo-*.jar' } } stage('Test') { steps { sh 'mvn test' junit(testResults: 'target/surefire-reports/TEST-*.xml', keepProperties: true, keepTestNames: true) } } stage('Local Deployment') { steps { sh 'java -jar target/hello-demo-*.jar > /dev/null &' } } }}Ensure that the integration testing stage also utilizes the parameterized sleep duration:
stage('Integration Testing') { steps { sh "sleep ${params.SLEEP_TIME}" sh 'curl -s http://localhost:6767/hello' }}Remember to use double quotes in shell commands when referencing parameters to allow for proper variable substitution.
6. Triggering Parameterized Builds
-
After committing the changes to the repository (for example, on the test branch), refresh the Jenkins job page. You should now see a Build with Parameters option.
-
Clicking on Build with Parameters allows you to adjust default values (e.g., switching the branch to
testor setting the sleep time to5s) before triggering the build.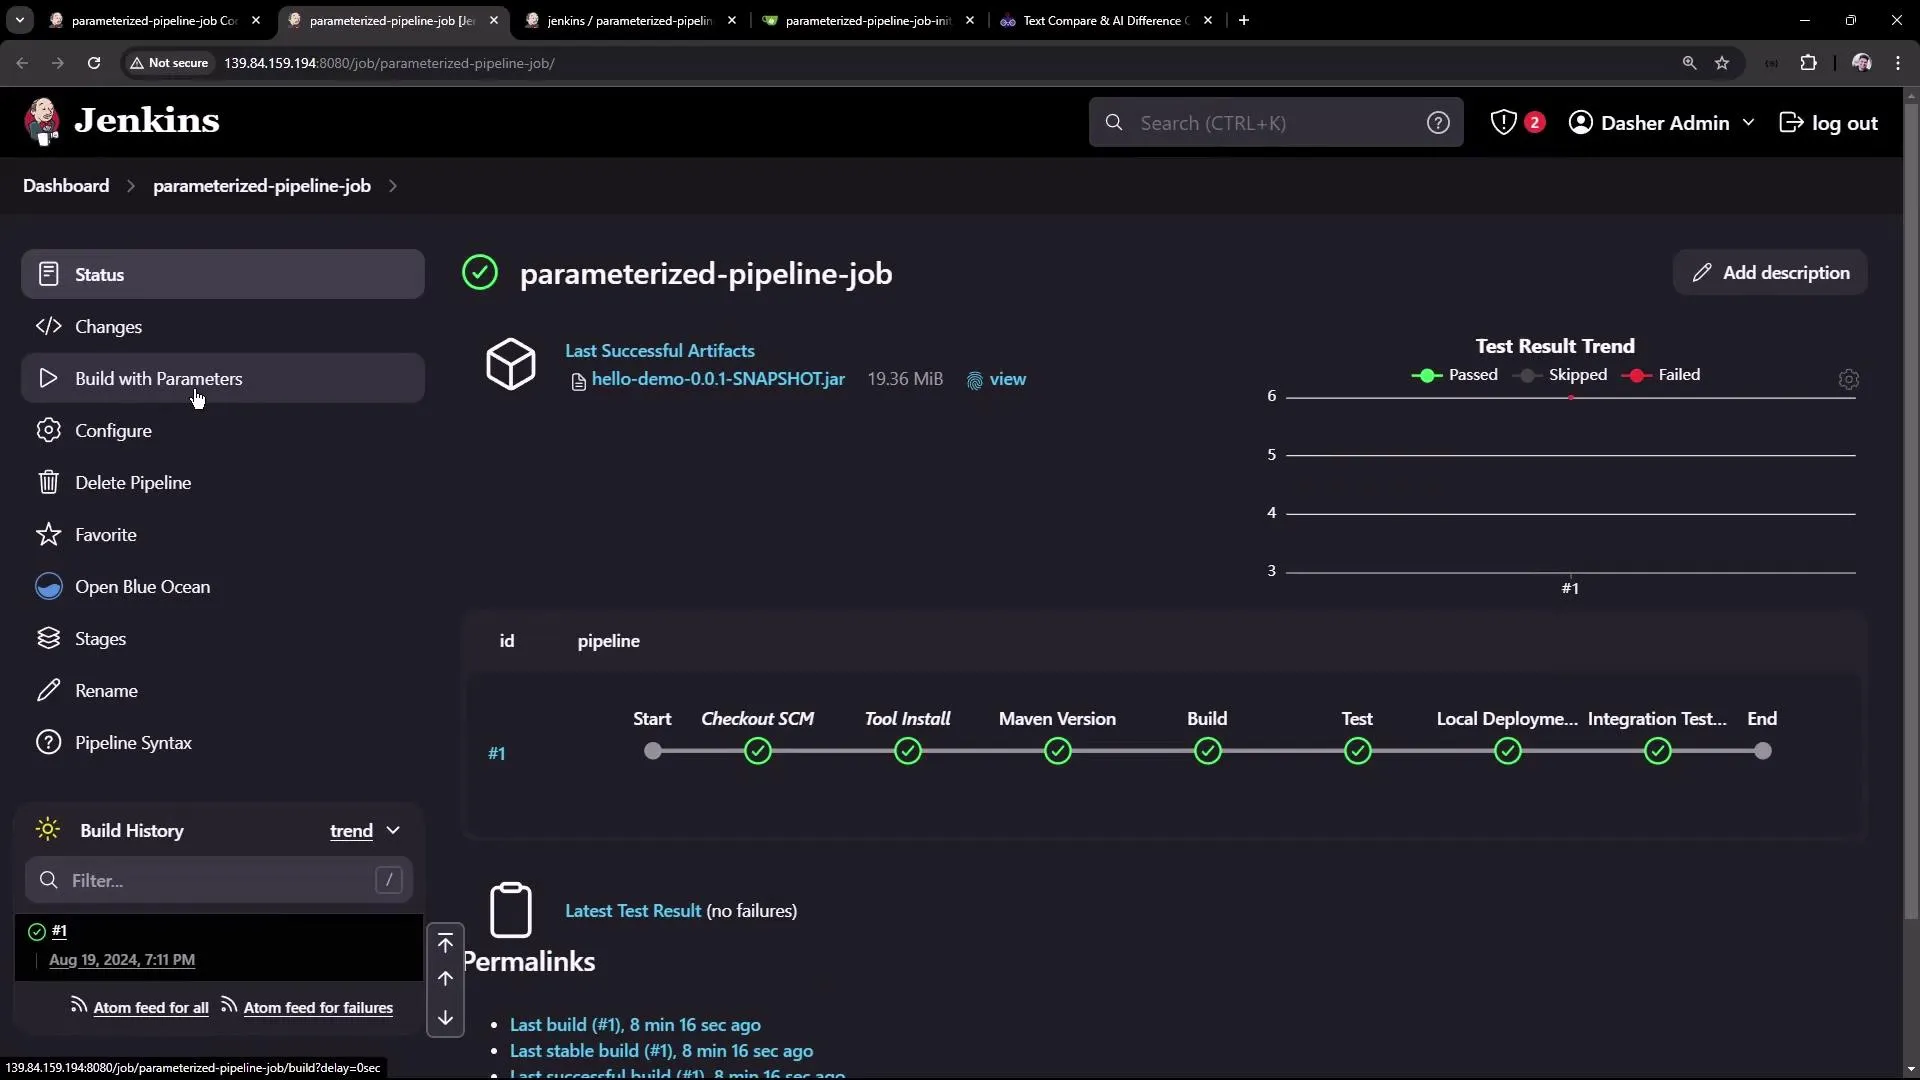
-
Once the build starts, you can use Blue Ocean to review detailed logs.
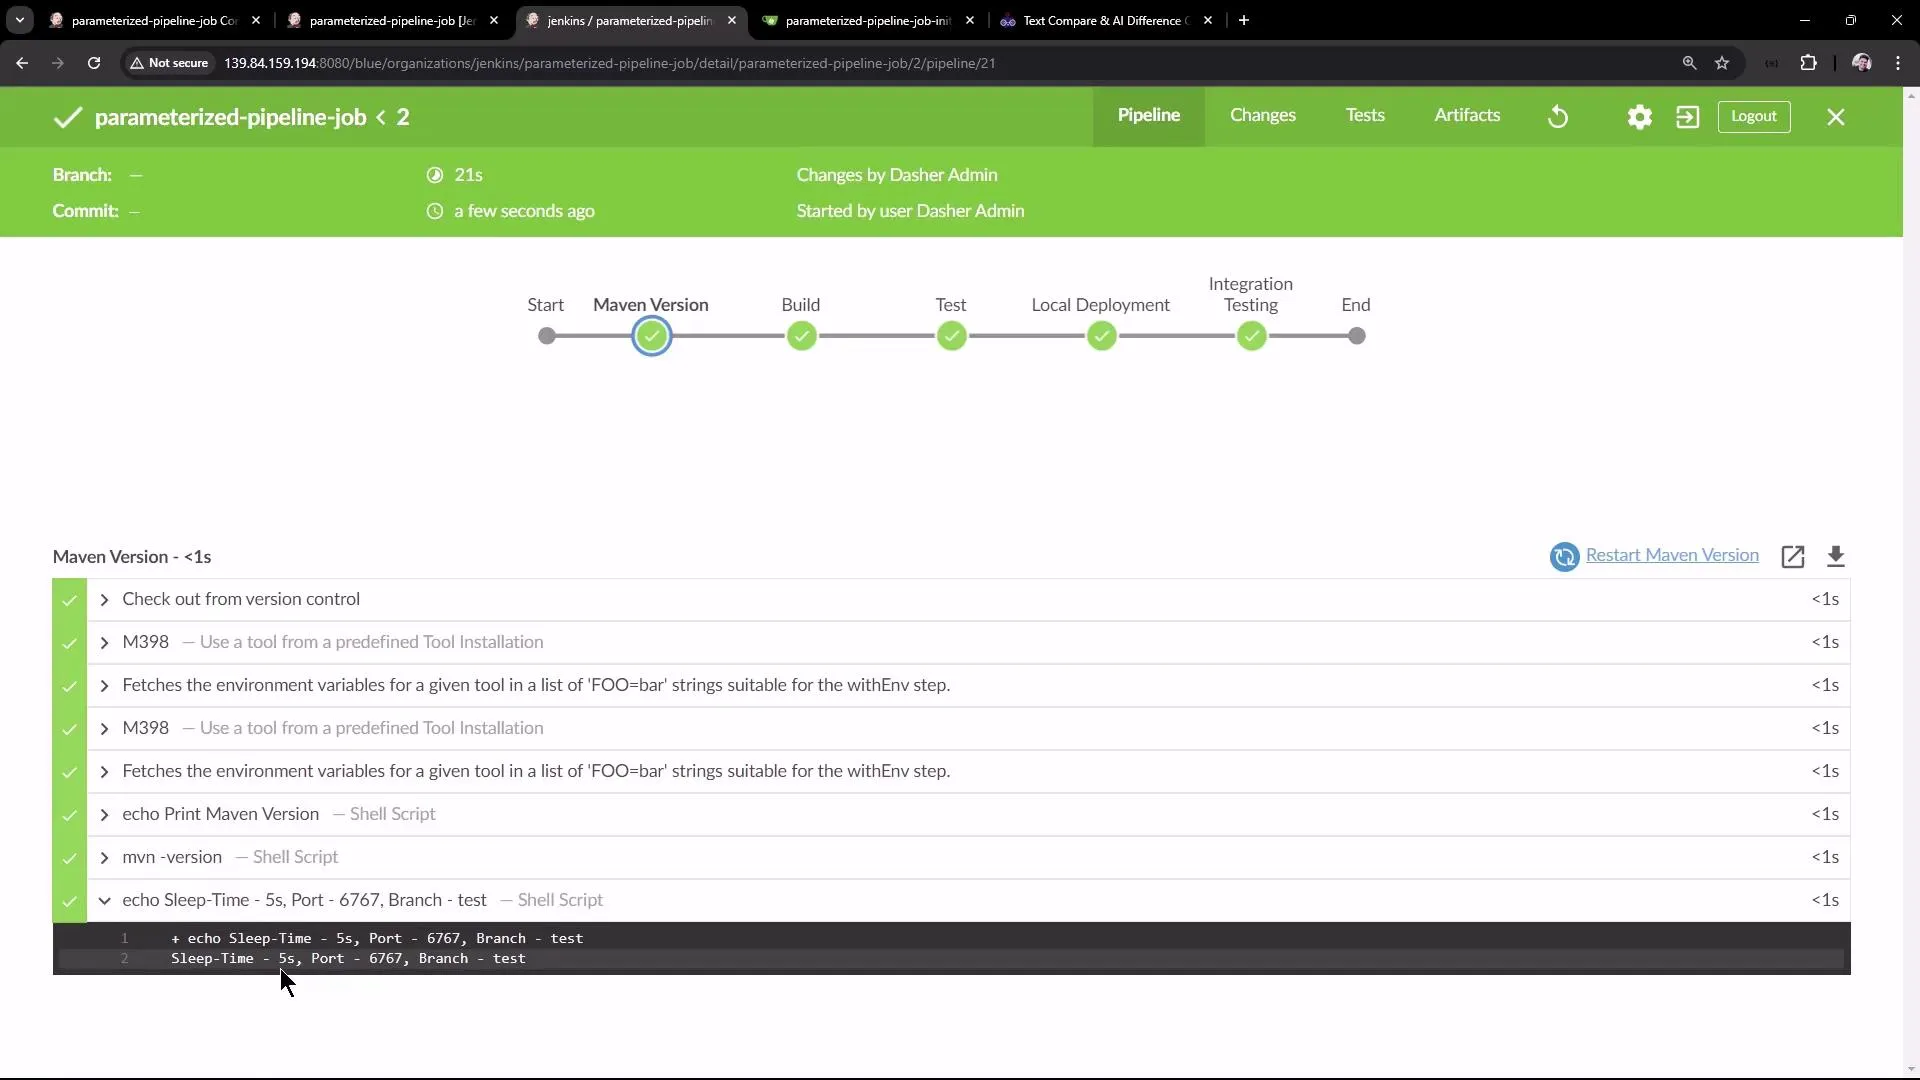
The logs will confirm that the parameters (sleep time, port, branch name) are correctly substituted, as shown below:
+ sleep 5s+ curl -s http://localhost:6767/helloHello, KodeKloud community!7. Customizing for the Main Branch
Edit the Jenkinsfile on the main branch to incorporate parameters during integration testing:
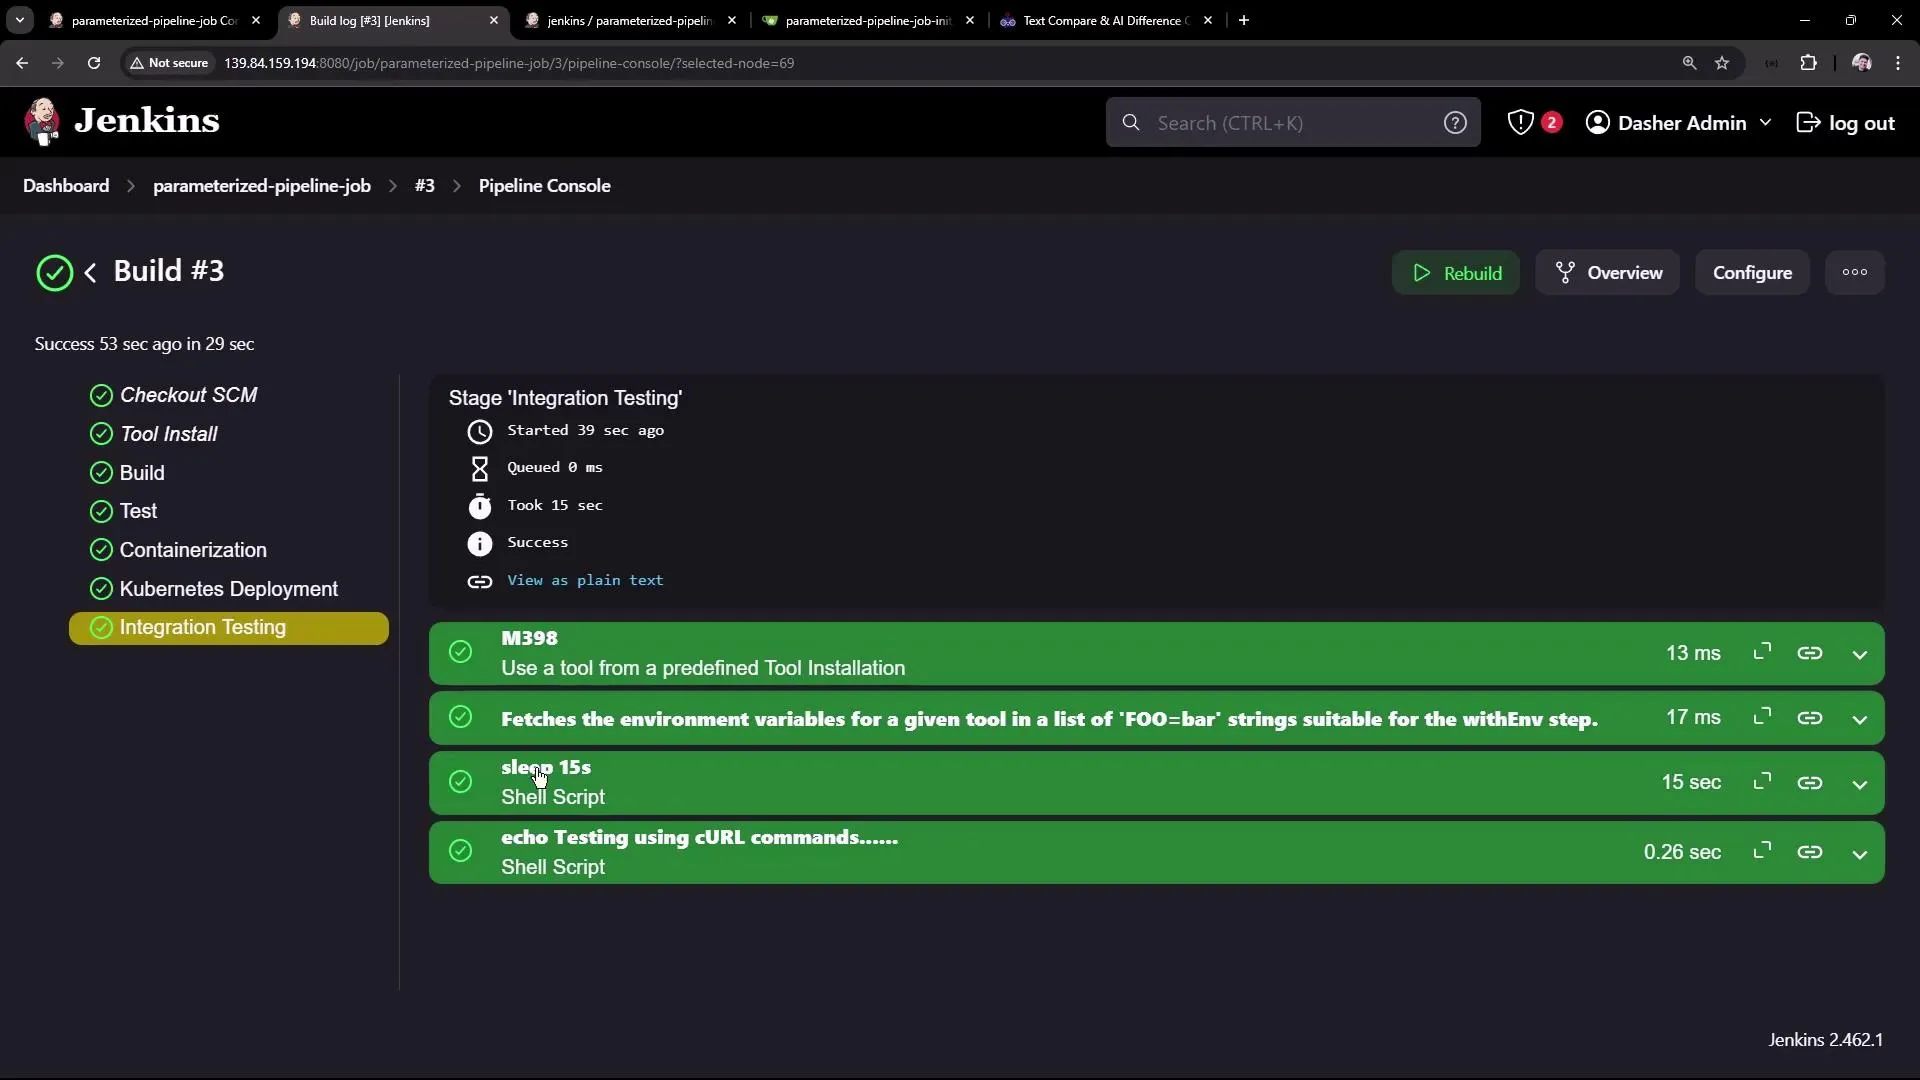
pipeline { agent any stages { stage('Test') { steps { sh 'mvn test' junit(testResults: 'target/surefire-reports/TEST-*.xml', keepProperties: true, keepTestNames: true) } } stage('Containerization') { steps { sh 'echo Docker Build Image..' sh 'echo Docker Tag Image....' sh 'echo Docker Push Image......' } } stage('Kubernetes Deployment') { steps { sh 'echo Deploy to Kubernetes using [GitOps with ArgoCD](https://learn.kodekloud.com/user/courses/gitops-with-argocd)' } } stage('Integration Testing') { steps { sh "sleep ${params.SLEEP_TIME}" sh 'echo Testing using CURL commands......' } } } tools { maven 'M398' }}Commit these changes and trigger a new build, selecting the main branch and an appropriate sleep time (for example, 15s). The build log will reflect the updated parameters, and the integration testing stage will pause for the specified duration before proceeding.
Ensure that you update all necessary areas in your Jenkinsfiles to reflect the new parameterized approach. Missing a reference may lead to build inconsistencies.
Conclusion
By utilizing parameters in your Jenkins pipelines, you can dynamically switch between branches and customize build options—such as sleep time and application port—with ease. This approach allows a single pipeline job to handle different workflows for test and main branches, enhancing the robustness and flexibility of your CI/CD process.
Thank you for reading this article.
Jenkins CLI Build a job
Learn to use the Jenkins CLI for building jobs from your shell, including downloading the CLI jar and executing commands.
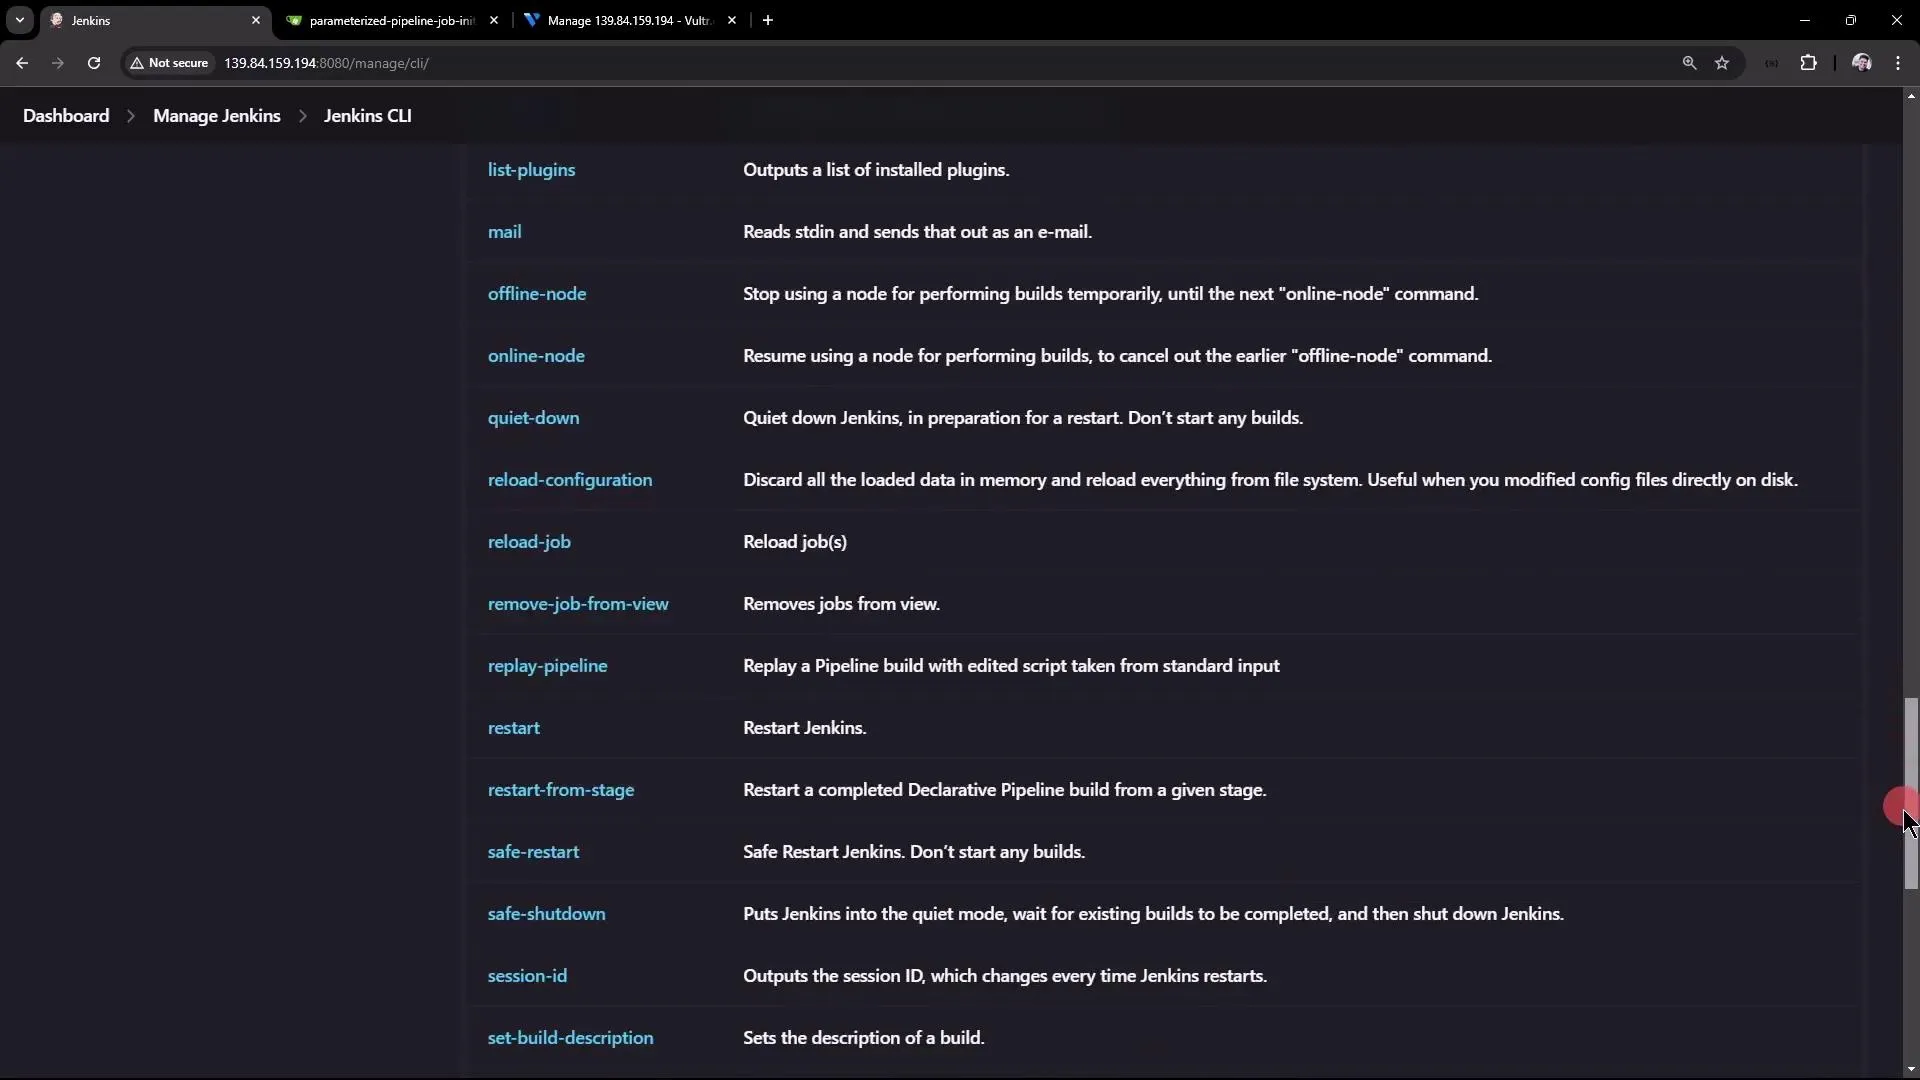
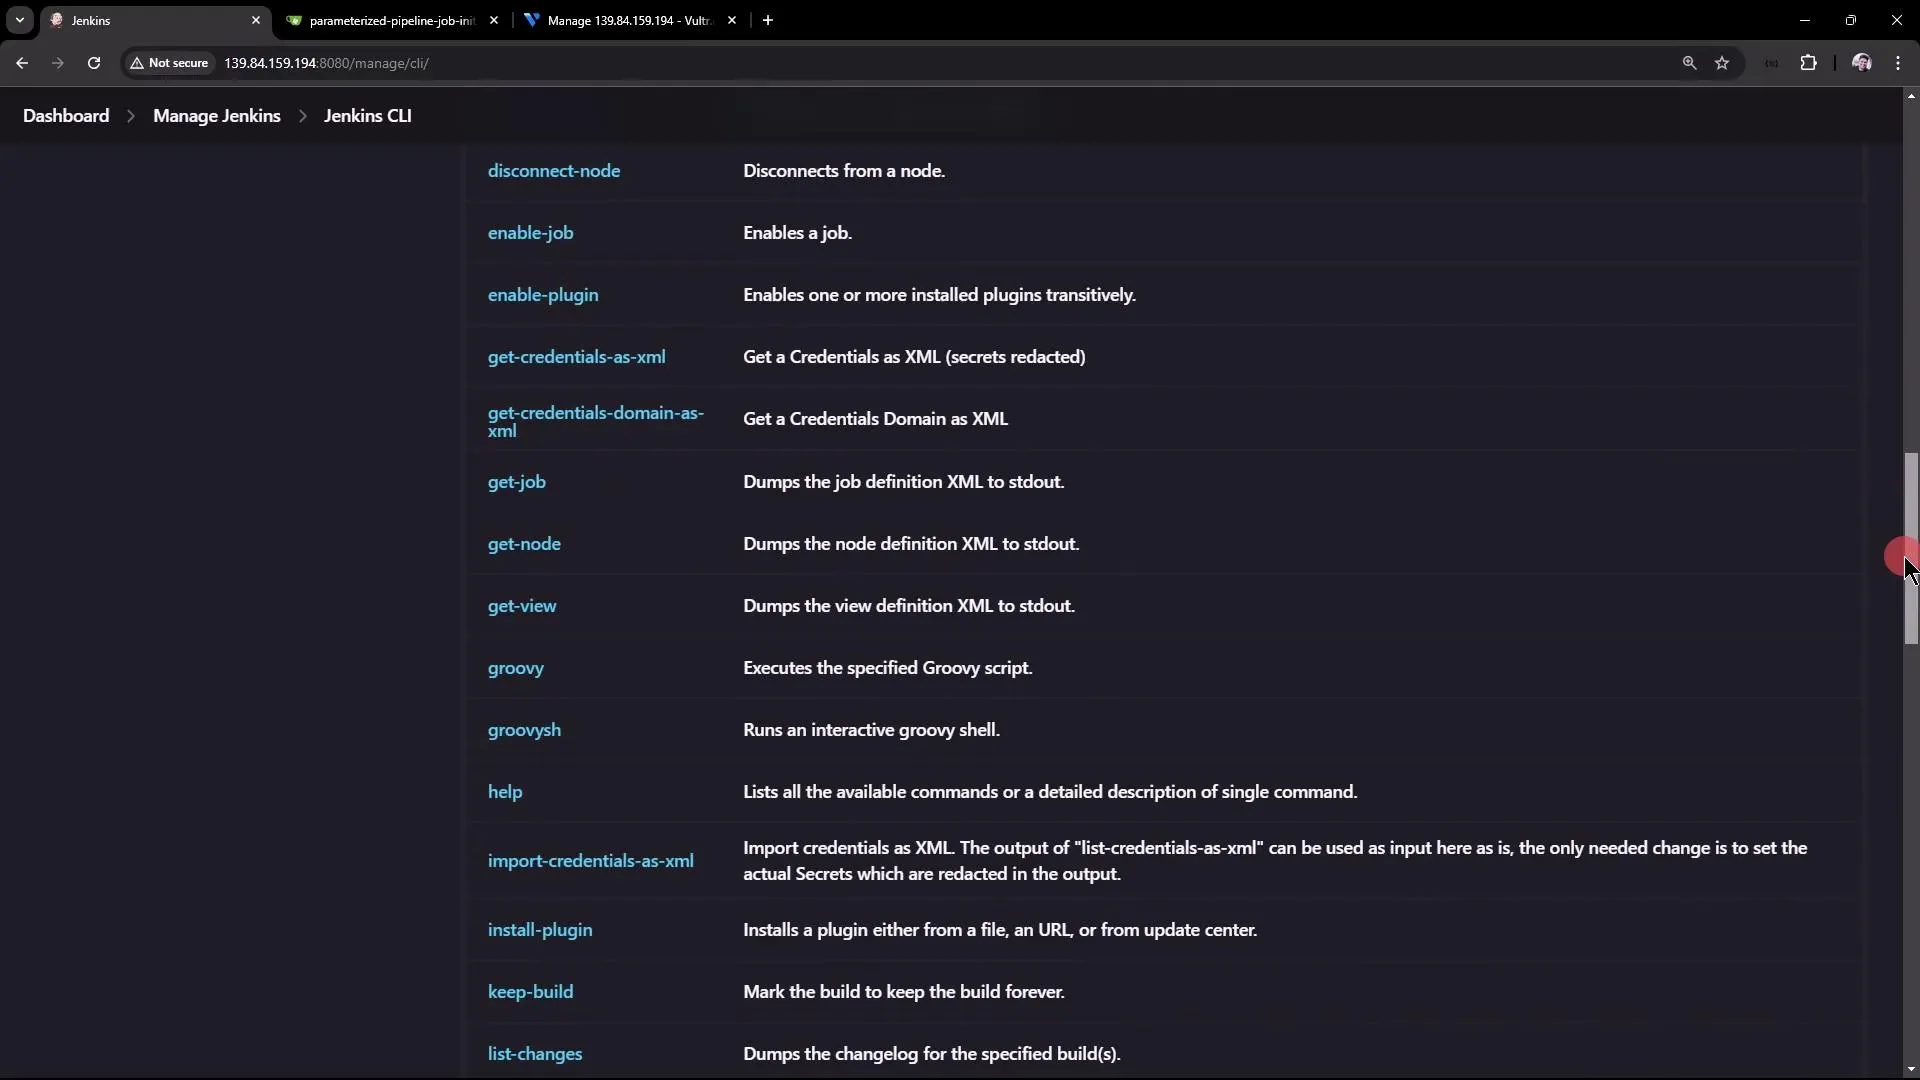
In this guide, you’ll learn how to use the Jenkins CLI to build a job from your shell. The Jenkins CLI jar file is downloadable directly from your Jenkins instance. Navigate to Manage Jenkins, scroll down to the Jenkins CLI section, and follow the provided instructions. For additional details, refer to the official Jenkins documentation.
You can start using the Jenkins CLI by downloading the CLI jar file from your Jenkins server. Simply copy the download URL and use it on your virtual machine.
!!! note “Explore CLI Commands” To explore available CLI commands, you can run the following command, which displays an overview of all commands and options:
java -jar jenkins-cli.jar -s http://139.84.159.194:8080/ helpThis command connects to your Jenkins instance at the specified URL using the downloaded jar file. The Jenkins CLI supports numerous commands similar to those available in the UI. If you’re unsure about a particular command, click it in the Jenkins UI to see additional examples and details.
For instance, to enable a job, the CLI documentation suggests using:
java -jar jenkins-cli.jar -s http://139.84.159.194:8080/ enable-job NAMEReplace NAME with the actual job name you wish to enable.
Similarly, to build a project and review its parameters, use:
java -jar jenkins-cli.jar -s http://139.84.159.194:8080/ build JOB [-c] [-f] [-p] [-r N] [-s] [-v] [-w]Downloading the Jenkins CLI
Download the Jenkins CLI jar file using wget. First, change to the root directory of your virtual machine and run:
wget http://139.84.159.194:8080/jnlpJars/jenkins-cli.jarThe output should resemble:
--2024-08-19 19:36:26--  http://139.84.159.194:8080/jnlpJars/jenkins-cli.jarResolving 139.84.159.194... connected.HTTP request sent, awaiting response... 200 OKLength: 3638838 (3.5M) [application/java-archive]Saving to: ‘jenkins-cli.jar’
jenkins-cli.jar        100%[===========================================>]   3.47M  --.-KB/s    in 0.009s
2024-08-19 19:36:26 (397 MB/s) - ‘jenkins-cli.jar’ saved [3638838/3638838]
After downloading, verify its presence with:
lsExpected output:
docker-compose.ymlgithub jenkins-cli.jarRunning Basic CLI Commands
Once you have the jar file, you can run commands directly from the terminal or copy commands from the Jenkins UI. For example, to display all available CLI options, run:
java -jar jenkins-cli.jar -s http://139.84.159.194:8080/ helpThis command shows usage options such as -s, -webSocket, -http, -ssh, and more.
A helpful command is who-am-i, which reports your current authentication status:
java -jar jenkins-cli.jar -s http://139.84.159.194:8080/ who-am-iSample output:
Authenticated as: anonymousAuthorities: anonymousAttempting to list jobs without the necessary permissions results in an error:
java -jar jenkins-cli.jar -s http://139.84.159.194:8080/ list-jobsOutput:
ERROR: anonymous is missing the Overall/Read permissionThis error occurs because you’re accessing Jenkins as an anonymous user who lacks the required permissions.
Authenticating with the Jenkins CLI
To access protected data, authenticate with your username and password (or API token) using the -auth parameter:
java -jar jenkins-cli.jar -s http://139.84.159.194:8080/ -auth admin:password list-jobsIf the credentials are valid and the user has required permissions, the command lists your Jenkins jobs:
ascii-build-jobascii-deploy-jobascii-test-jobGenerate ASCII Artworkhello-world-pipelinejenkins-hello-worldparameterized-pipeline-jobYou can also verify your authentication status:
java -jar jenkins-cli.jar -s http://139.84.159.194:8080/ -auth admin:password who-am-iOutput:
Authenticated as: adminAuthorities: authenticated!!! note “Authentication Tip” Always ensure you are using secure credentials. For improved security, consider using API tokens instead of plain-text passwords.
Building a Parameterized Pipeline Job
Building a project using the CLI is straightforward. The build command supports several options:
-c: Check for SCM changes before initiating the build.-f: Follow the build progress.-p: Pass build parameters in key-value format.-s: Wait until the build completes or aborts.-v: Display the console output.-w: Wait until the build begins.
For example, to build a parameterized pipeline job with a branch parameter, use:
java -jar jenkins-cli.jar -s http://139.84.159.194:8080/ -auth admin:password build parameterized-pipeline-job -f -p BRANCH_NAME=testThe command output may look like:
Started parameterized-pipeline-job #4Completed parameterized-pipeline-job #4 : SUCCESSIf you want to monitor the console output in real time, include the -v flag.
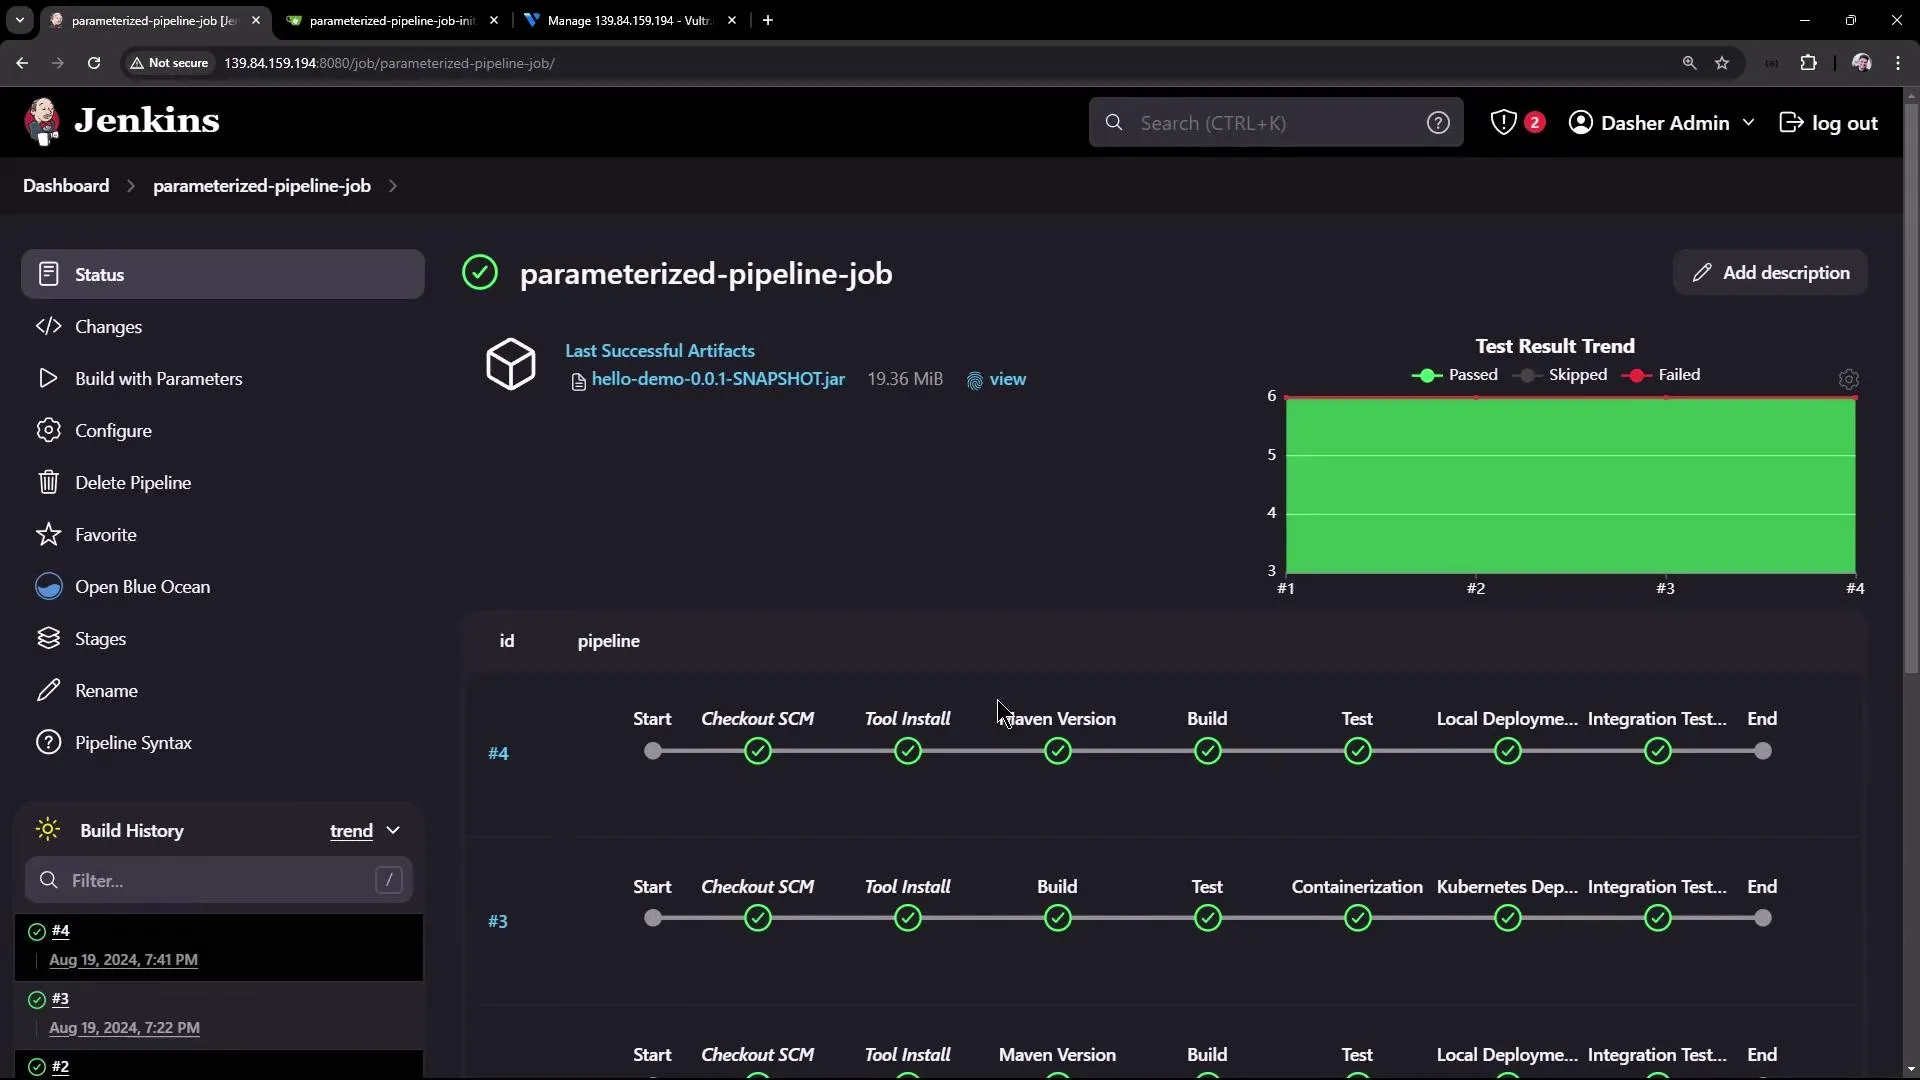
While the shell logs progress messages, you might see output similar to:
[INFO] Total time: 3.452 s[INFO] Finished at: 2024-08-19T19:42:29Z[INFO] ---------------------< com.kodekloud:hello-demo >---------------------[INFO] Building hello-demo 0.0.1-SNAPSHOT[INFO] from pom.xml[INFO] ------------------------------[ jar ]-------------------------------After the build process, additional stages (such as integration tests) will run with logs output directly in the terminal.
Summary of Commands
Below is a table summarizing the most commonly used Jenkins CLI commands:
| Command | Description | Example |
|---|---|---|
| List Jobs | Lists all jobs in Jenkins | java -jar jenkins-cli.jar -s http://139.84.159.194:8080/ -auth admin:password list-jobs |
| Who Am I | Displays your current authentication status | java -jar jenkins-cli.jar -s http://139.84.159.194:8080/ -auth admin:password who-am-i |
| Build Job with Parameter | Triggers a build for a parameterized pipeline job | java -jar jenkins-cli.jar -s http://139.84.159.194:8080/ -auth admin:password build parameterized-pipeline-job -f -p BRANCH_NAME=test |
In addition, you can run scripts or other CLI commands from your shell directory for further automation. For example, you might execute a shell script that calls:
curl -s http://localhost:6767/hellowhich returns:
Hello, KodeKloud community!This guide only scratches the surface of what you can achieve with the Jenkins CLI—there are many more commands to explore. Experiment with different commands to get full control over your Jenkins instance.
Thank you for reading this article!
Jenkins REST API Install a Plugin
This guide explains how to use the Jenkins REST API for tasks like installing plugins and triggering builds with parameters.
This guide provides detailed instructions on how to leverage the Jenkins REST API for various tasks, including installing a plugin. Jenkins offers a machine-consumable API in multiple formats such as XML, JSON, and even Python, allowing you to retrieve information, trigger builds with parameters, create jobs, and more.
Before diving into plugin installation, let’s explore some common API use cases.
Triggering a Build with Parameters
To trigger a build with parameters, you can use the curl command. When you build with parameters, ensure you use the buildWithParameters endpoint. The following example shows how to initiate a build with specific parameters using authentication via a token or a password:
curl JENKINS_URL/job/JOB_NAME/buildWithParameters \ --user USER:TOKEN \ --data id=123 --data verbosity=highHere are two examples for clarity:
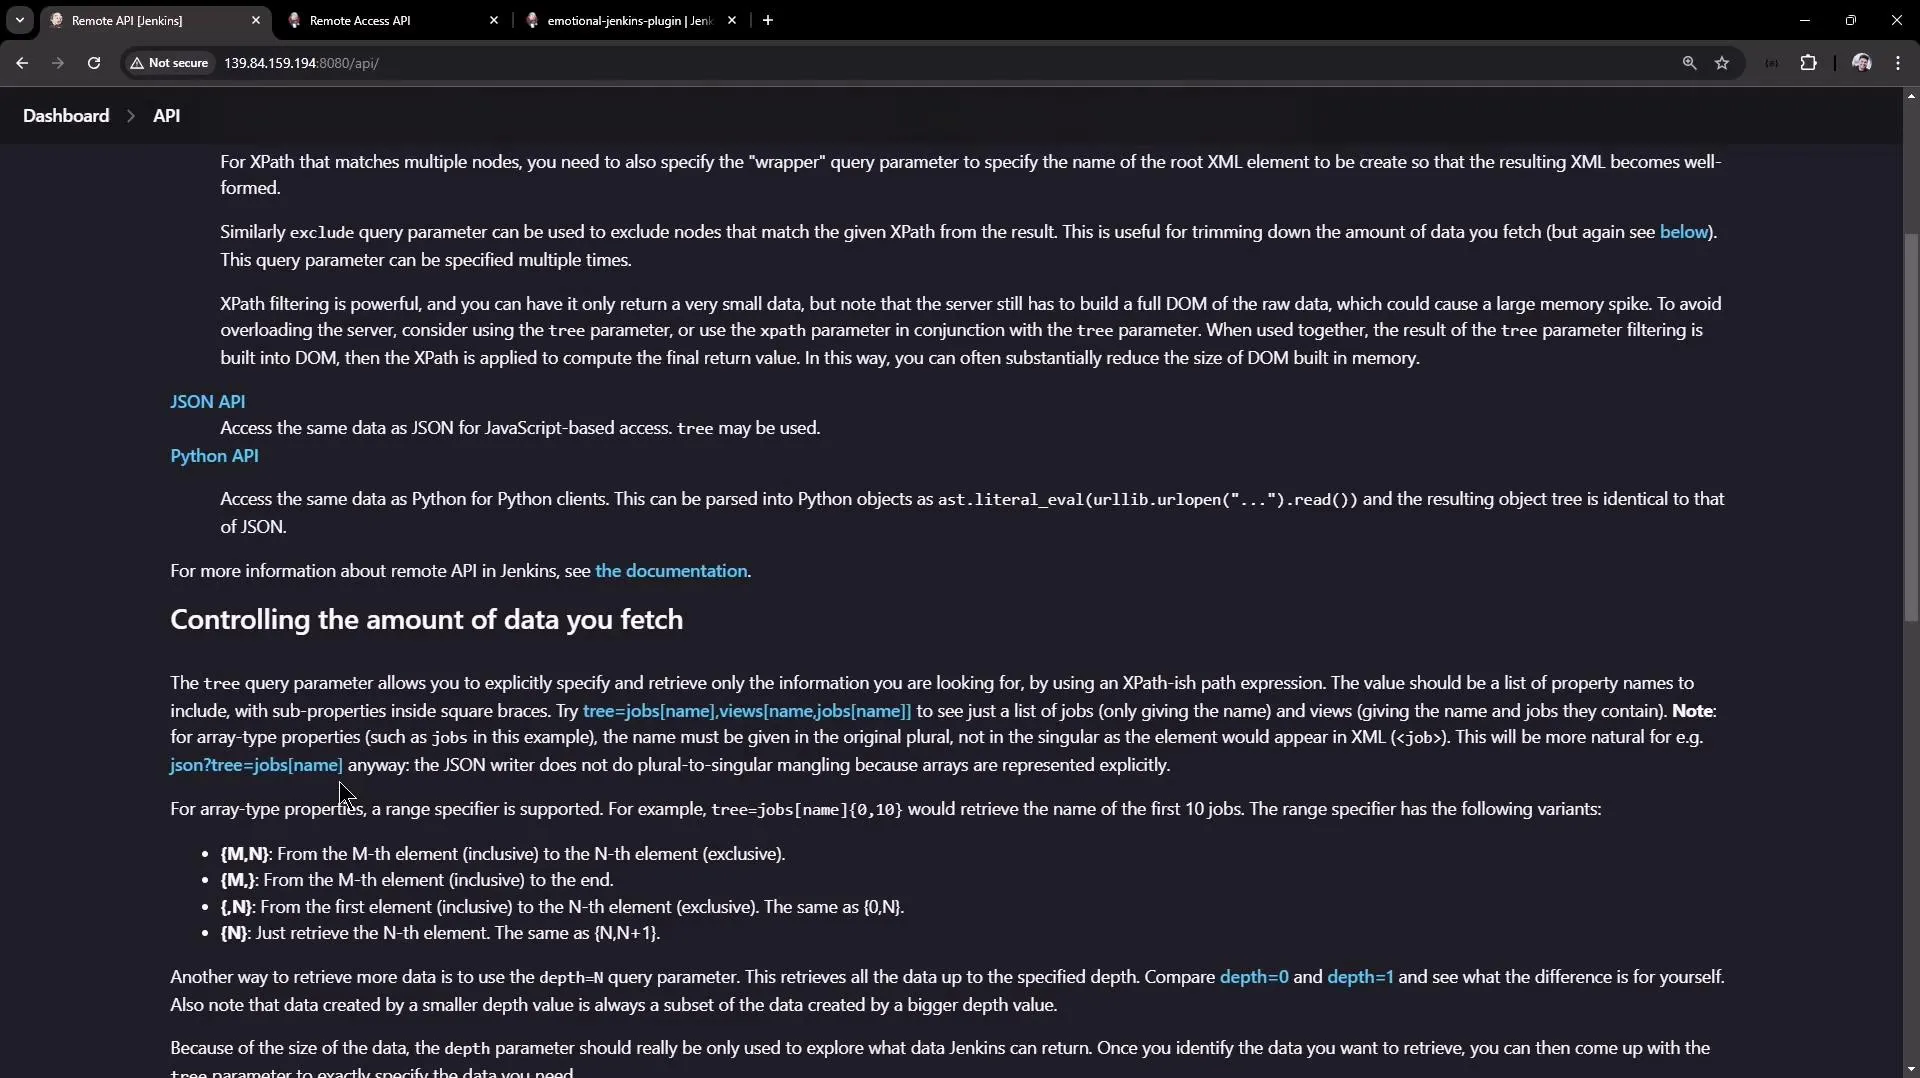
curl JENKINS_URL/job/JOB_NAME/buildWithParameters \ --user USER:TOKEN \ --data id=123 --data verbosity=highcurl JENKINS_URL/job/JOB_NAME/buildWithParameters \ --user USER:PASSWORD \ --form FILE_LOCATION_AS_SET_IN_JENKINS=@PATH_TO_FILEFor additional API details, visit your Jenkins dashboard and refer to the REST API documentation. You can control the amount of data returned by using query parameters. For instance, accessing the /api/json endpoint returns data in JSON format.
Retrieving Job Information via the REST API
Accessing the JSON API endpoint (e.g., JENKINS_URL/api/json?tree=jobs[name]) returns details about all jobs. Below is a sample JSON response displaying various project types:
{ "_class": "hudson.model.Hudson", "jobs": [ { "_class": "hudson.model.FreeStyleProject", "name": "ascii-build-job" }, { "_class": "hudson.model.FreeStyleProject", "name": "ascii-deploy-job" }, { "_class": "hudson.model.FreeStyleProject", "name": "ascii-test-job" }, { "_class": "hudson.model.FreeStyleProject", "name": "Generate ASCII Artwork" }, { "_class": "org.jenkinsci.plugins.workflow.job.WorkflowJob", "name": "hello-world-pipeline" }, { "_class": "org.jenkinsci.plugins.workflow.multibranch.WorkflowMultiBranchProject", "name": "jenkins-hello-world" }, { "_class": "org.jenkinsci.plugins.workflow.job.WorkflowJob", "name": "parameterized-pipeline-job" } ]}If you choose to filter the data and display only the job types without job names, the JSON output will appear as follows:
{ "_class": "hudson.model.Hudson", "jobs": [ { "_class": "hudson.model.FreeStyleProject" }, { "_class": "hudson.model.FreeStyleProject" }, { "_class": "hudson.model.FreeStyleProject" }, { "_class": "hudson.model.FreeStyleProject" }, { "_class": "org.jenkinsci.plugins.workflow.job.WorkflowJob" }, { "_class": "org.jenkinsci.plugins.workflow.multibranch.WorkflowMultiBranchProject" }, { "_class": "org.jenkinsci.plugins.workflow.job.WorkflowJob" } ]}Including the job name parameter brings back the names in the output:
{ "_class": "hudson.model.Hudson", "jobs": [ { "_class": "hudson.model.FreeStyleProject", "name": "ascii-build-job" }, { "_class": "hudson.model.FreeStyleProject", "name": "ascii-deploy-job" }, { "_class": "hudson.model.FreeStyleProject", "name": "ascii-test-job" }, { "_class": "hudson.model.FreeStyleProject", "name": "Generate ASCII Artwork" }, { "_class": "org.jenkinsci.plugins.workflow.job.WorkflowJob", "name": "hello-world-pipeline" }, { "_class": "org.jenkinsci.plugins.workflow.multibranch.WorkflowMultiBranchProject", "name": "jenkins-hello-world" }, { "_class": "org.jenkinsci.plugins.workflow.job.WorkflowJob", "name": "parameterized-pipeline-job" } ]}To access this data from the shell and pretty-print the JSON output, you can pipe the results to jq:
curl http://139.84.159.194:8080/api/json?tree=jobs[name] | jqIf you aren’t logged into Jenkins via your browser, you will be prompted for authentication. To get detailed information about a specific job, run:
curl -u admin:password http://139.84.159.194:8080/job/parameterized-pipeline-job/api/json | jqThis command returns extensive job details, including display name, full name, buildability, and build information:
{ "_class": "com.cloudbees.plugins.credentials.ViewCredentialsAction"},"description": "","displayName": "parameterized-pipeline-job","fullDisplayName": "parameterized-pipeline-job","fullName": "parameterized-pipeline-job","name": "parameterized-pipeline-job","url": "http://139.84.159.194:8080/job/parameterized-pipeline-job/","buildable": true,"builds": [ { "_class": "org.jenkinsci.plugins.workflow.job.WorkflowRun", "number": 5, "url": "http://139.84.159.194:8080/job/parameterized-pipeline-job/5/" }, { "_class": "org.jenkinsci.plugins.workflow.job.WorkflowRun", "number": 4, "url": "http://139.84.159.194:8080/job/parameterized-pipeline-job/4/" }]If your job contains parameters, you will also see a properties section that lists these. For example:
{ "nextBuildNumber": 6, "property": [ { "_class": "hudson.model.ParametersDefinitionProperty", "parameterDefinitions": [ { "_class": "hudson.model.StringParameterDefinition", "defaultParameterValue": { "_class": "hudson.model.StringParameterValue", "name": "BRANCH_NAME", "value": "main" }, "description": "The Git Branch on which the build and deployment happens", "name": "BRANCH_NAME", "type": "StringParameterDefinition" }, { "_class": "hudson.model.StringParameterDefinition", "defaultParameterValue": { "_class": "hudson.model.StringParameterValue", "name": "APP_PORT", "value": "6767" }, "description": "Select the application port on which integration tests should happen" } ] } ]}Building a Job via the REST API
To trigger a build for a parameterized job, ensure you are authenticated (using -u admin:password). Here’s a basic example that triggers a build:
curl -u admin:password http://139.84.159.194:8080/job/parameterized-pipeline-job/buildWithParameters -d BRANCH_NAME=test -d APP_PORT=6767By default, curl uses the GET method. In this case, you need to explicitly use the POST method with the -X POST flag:
curl -u admin:password -X POST http://139.84.159.194:8080/job/parameterized-pipeline-job/buildWithParameters -d BRANCH_NAME=test -d APP_PORT=6767If you are not logged into Jenkins via your browser, you may receive authentication errors. Ensure you provide valid credentials or use an API token to avoid such issues.
Some builds might require a valid Jenkins crumb (a security token to prevent CSRF attacks) unless you opt to use an API token. To generate or fetch an API token, navigate to your Jenkins user configuration page.
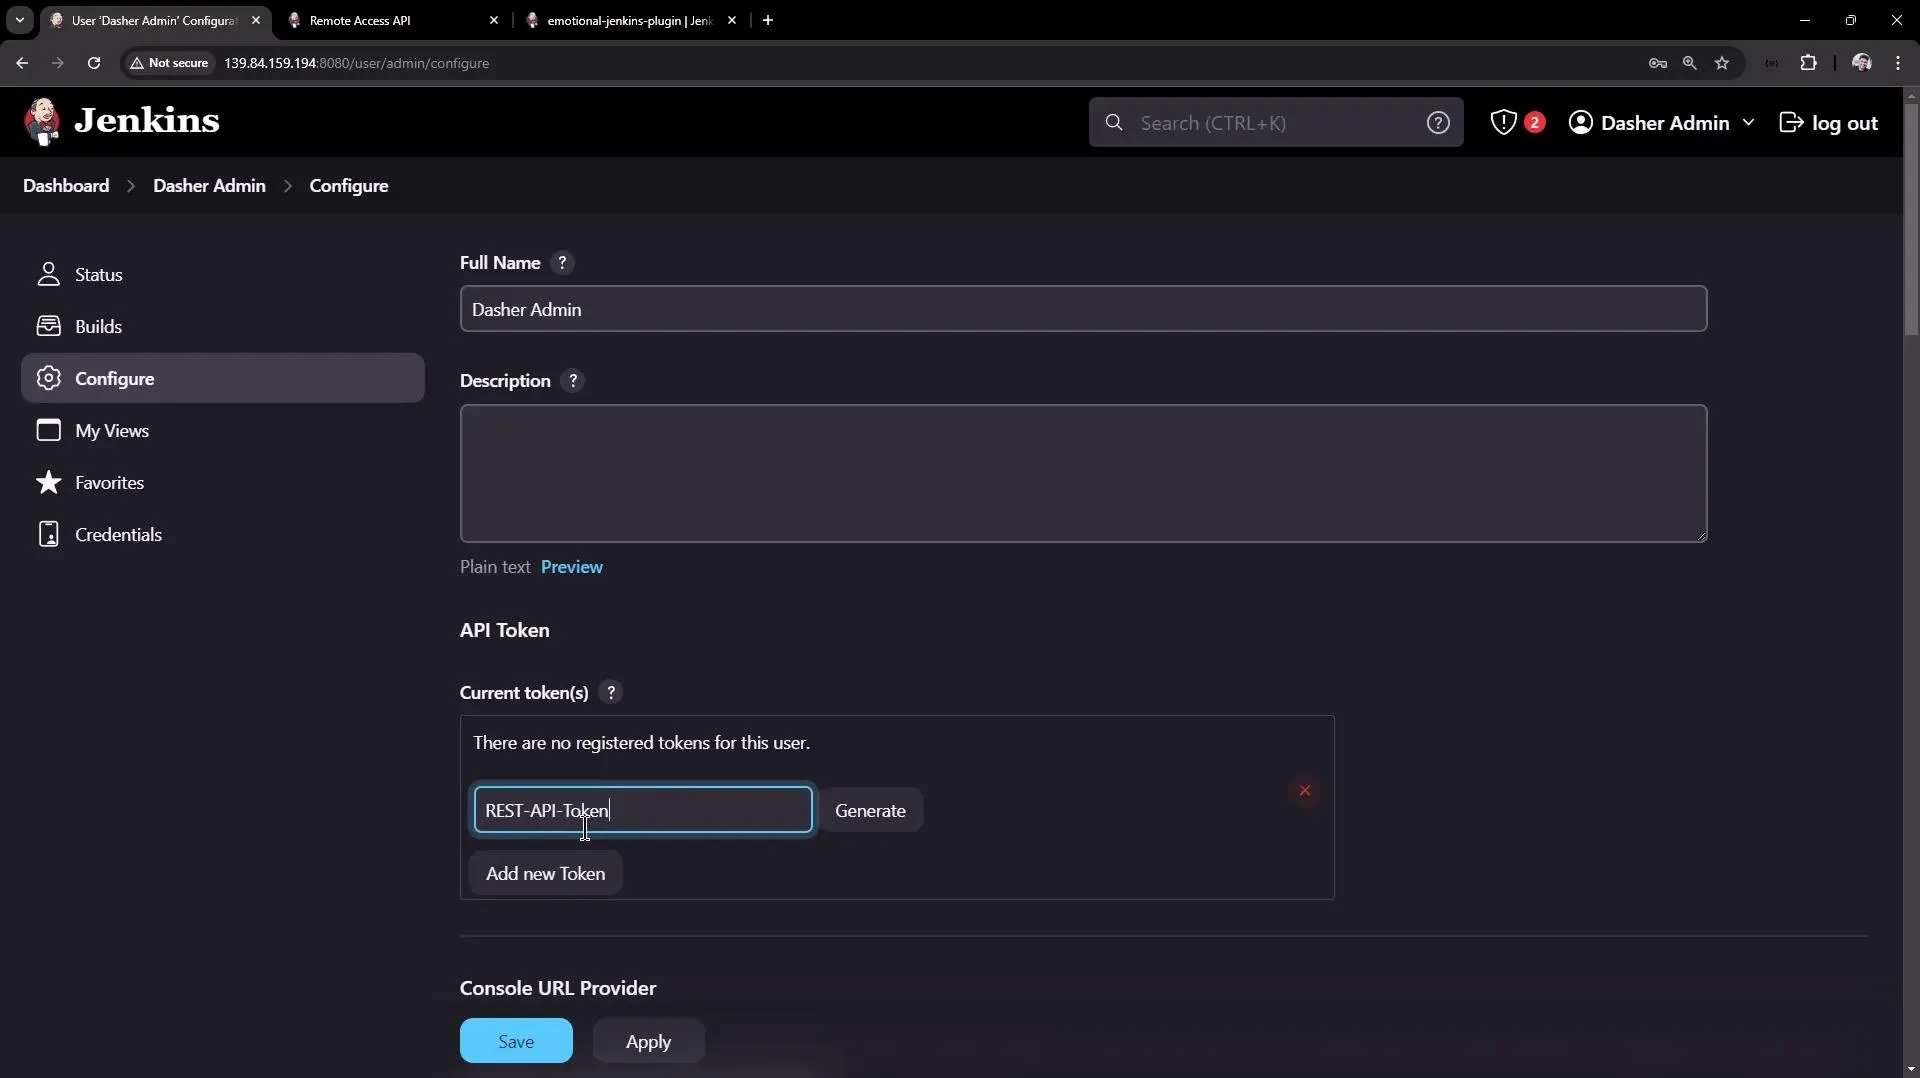
Once you have your API token, update your curl command as follows:
curl -u admin:110116b9f4f3f2698451306fd8fa7f26d6 -X POST http://139.84.159.194:8080/job/parameterized-pipeline-job/buildWithParameters -d BRANCH_NAME=test -d APP_PORT=6767When you trigger the build successfully, you will observe a new build initiated on the Jenkins dashboard. For example, build number six might now be in progress.
A build triggered via the Jenkins CLI might include additional log details (such as fetching Git information) that may not appear when using the REST API.
Installing a Plugin via the REST API
One of the powerful features of the Jenkins REST API is the ability to install plugins automatically. Similar to triggering a build, this action requires authentication and uses the POST method. The endpoint for installing necessary plugins is:
/pluginManager/installNecessaryPluginsWhen calling this endpoint, provide an XML payload and set the proper content type. The following example demonstrates how to install a plugin named “emotional-jenkins-plugin” with version 1.2. Note that the IP address has been replaced with localhost because the command runs on the Jenkins server:
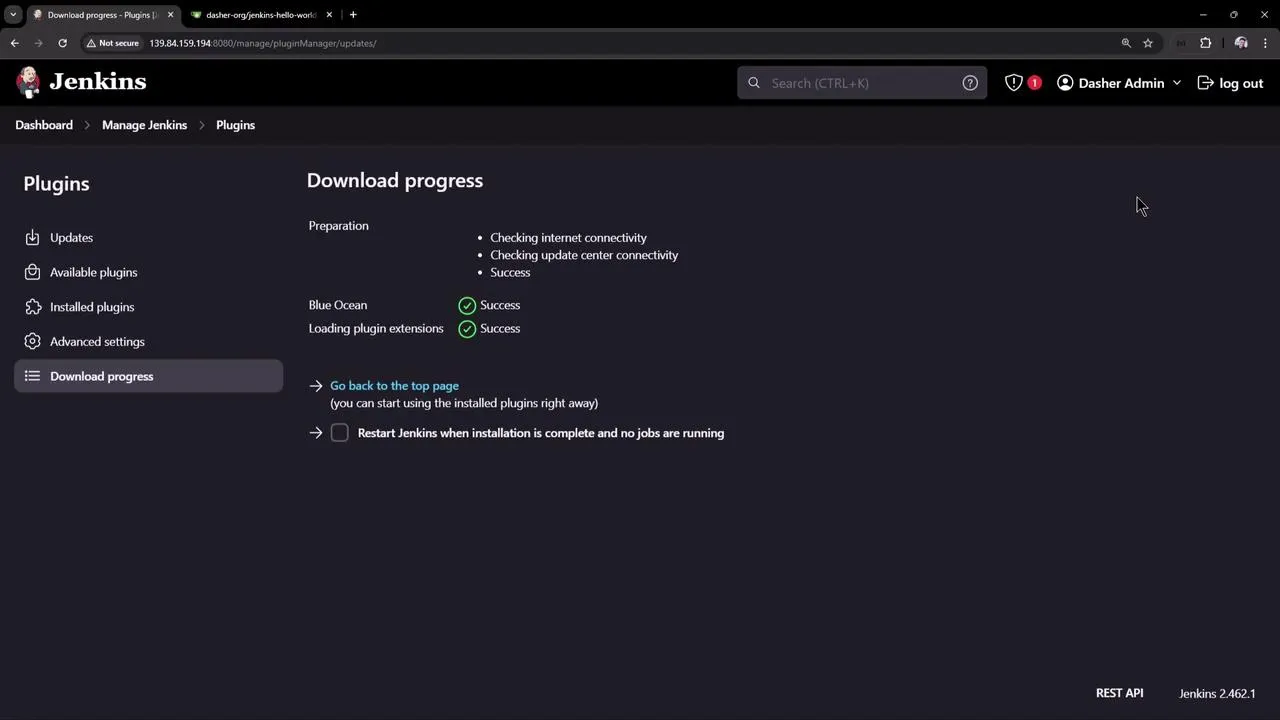
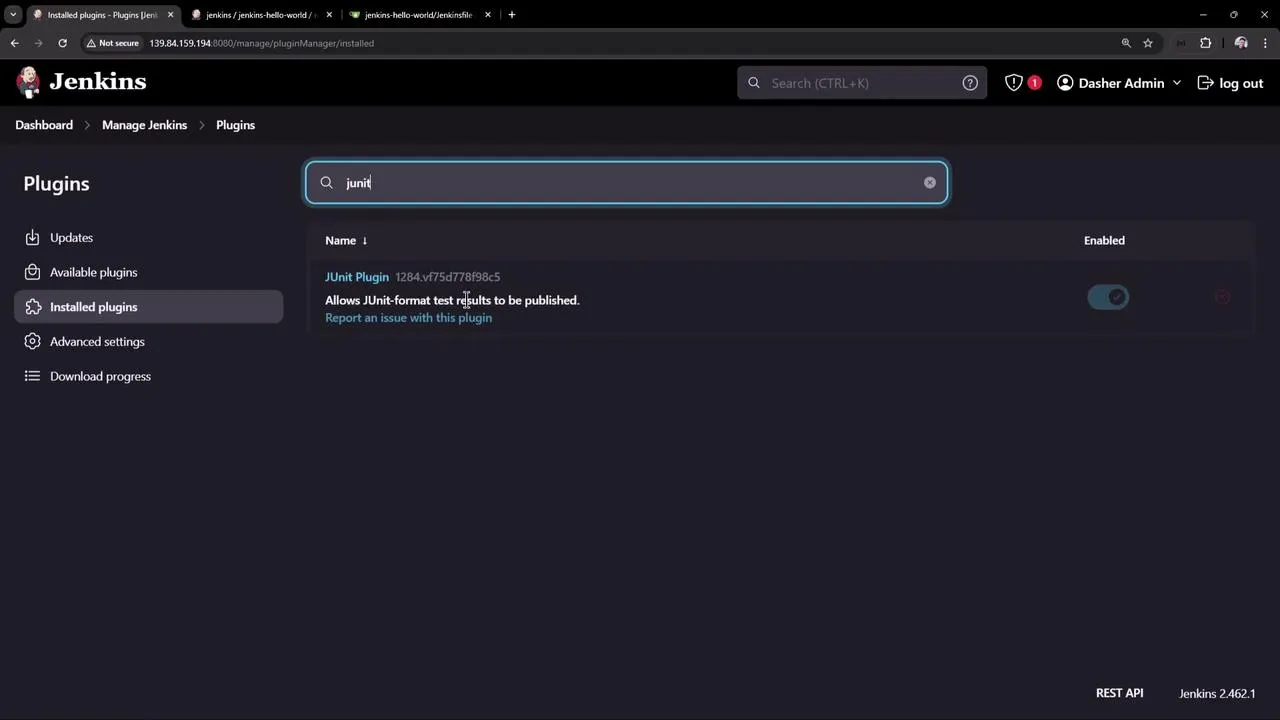
curl -u admin:1101616b94f4f3f2698451306fd8f8a7f26d6 \-X POST http://localhost:8080/pluginManager/installNecessaryPlugins \-H 'Content-Type: text/xml' \-d '<jenkins><install plugin="emotional-jenkins-plugin@1.2" /></jenkins>'To automate the installation of multiple plugins, list them within the XML payload. After execution, verify the installation by reviewing the “Manage Jenkins Plugins” section within the Jenkins UI.
This article demonstrated how to interact with the Jenkins REST API to:
- Retrieve job details
- Trigger builds with parameters
- Install plugins
Utilizing API tokens, the correct HTTP methods, and proper payload formats (JSON or XML) ensures your API calls are secure and effective.
For further information on Jenkins API usage:
Happy automating!