Kubernetes — Pods, ReplicaSets & Deployments
Tutorial-style: YAML anatomy, first Pod from a file, ReplicaSet HA, Deployments, rollouts, strategies, daily kubectl
Before you start
- You have a cluster with at least one Ready node (
kubectl get nodes). - You are in a terminal in an empty folder where you can save small YAML files (for example
lesson-pods/).
Lesson A — YAML building blocks (2 minutes)
Kubernetes object files are usually YAML. Almost every resource has four top-level keys:
| Field | Meaning |
|---|---|
apiVersion | Which API group/version (e.g. v1 for Pod, apps/v1 for Deployment). |
kind | Object type: Pod, ReplicaSet, Deployment, Service, … |
metadata | name, namespace, labels, … |
spec | Desired state — what you want running. |
Indentation matters. Child keys must be indented more than their parent; siblings must line up. One wrong space often produces error converting YAML to JSON.
Mini example (not Kubernetes — just YAML shape):
App: Name: demo Ports: - 80 - 443Lesson B — Your first Pod from a file
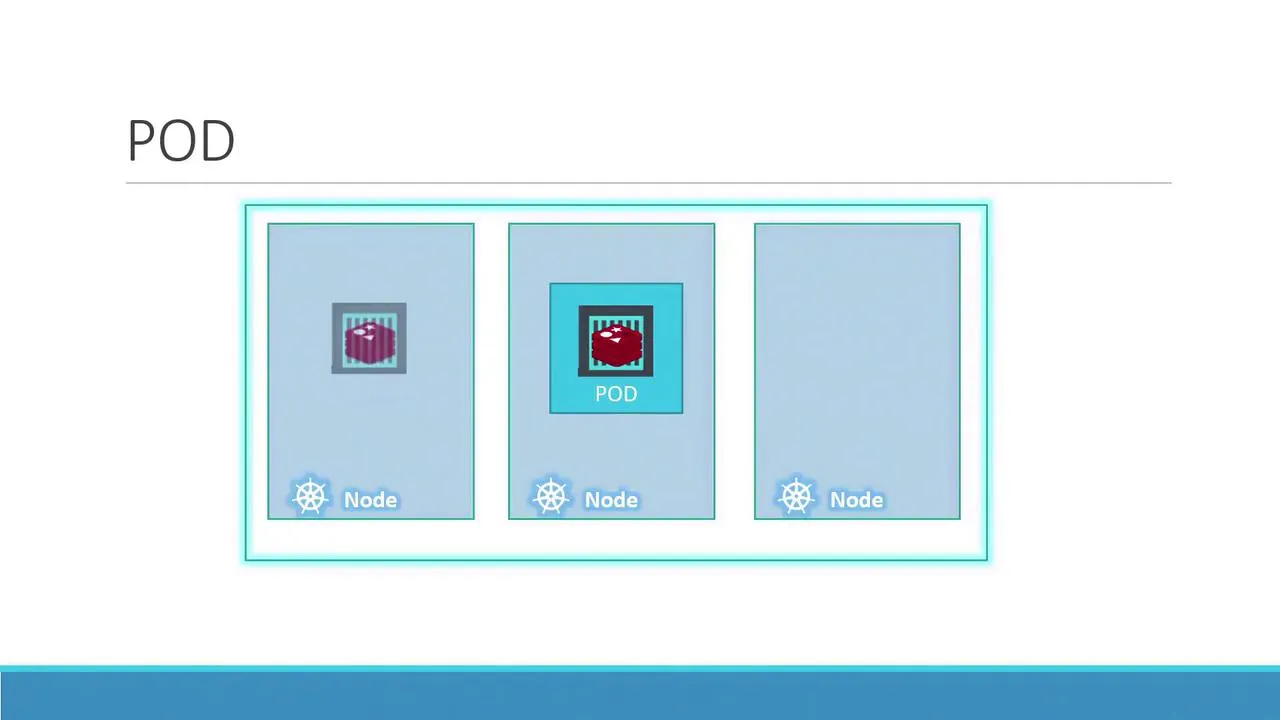
B.1 — What is a Pod?
A Pod is the smallest unit you deploy. Usually one app container per pod; sometimes a main app + a sidecar. Containers in the same pod share network (localhost) and volumes.
You scale by adding more pods, not by cramming unrelated apps into one pod.
B.2 — Write the manifest
Create pod-definition.yaml:
apiVersion: v1kind: Podmetadata: name: myapp-pod labels: app: myapp type: front-endspec: containers: - name: nginx-container image: nginx:1.25-alpine ports: - containerPort: 80B.3 — Create and verify (follow in order)
Step 1 — create
kubectl apply -f pod-definition.yamlStep 2 — list pods
kubectl get podsExpect a row with READY 1/1 and STATUS Running after a short ContainerCreating phase.
Step 3 — details and logs
kubectl describe pod myapp-podkubectl logs myapp-pod -c nginx-containerStep 4 — clean up (optional)
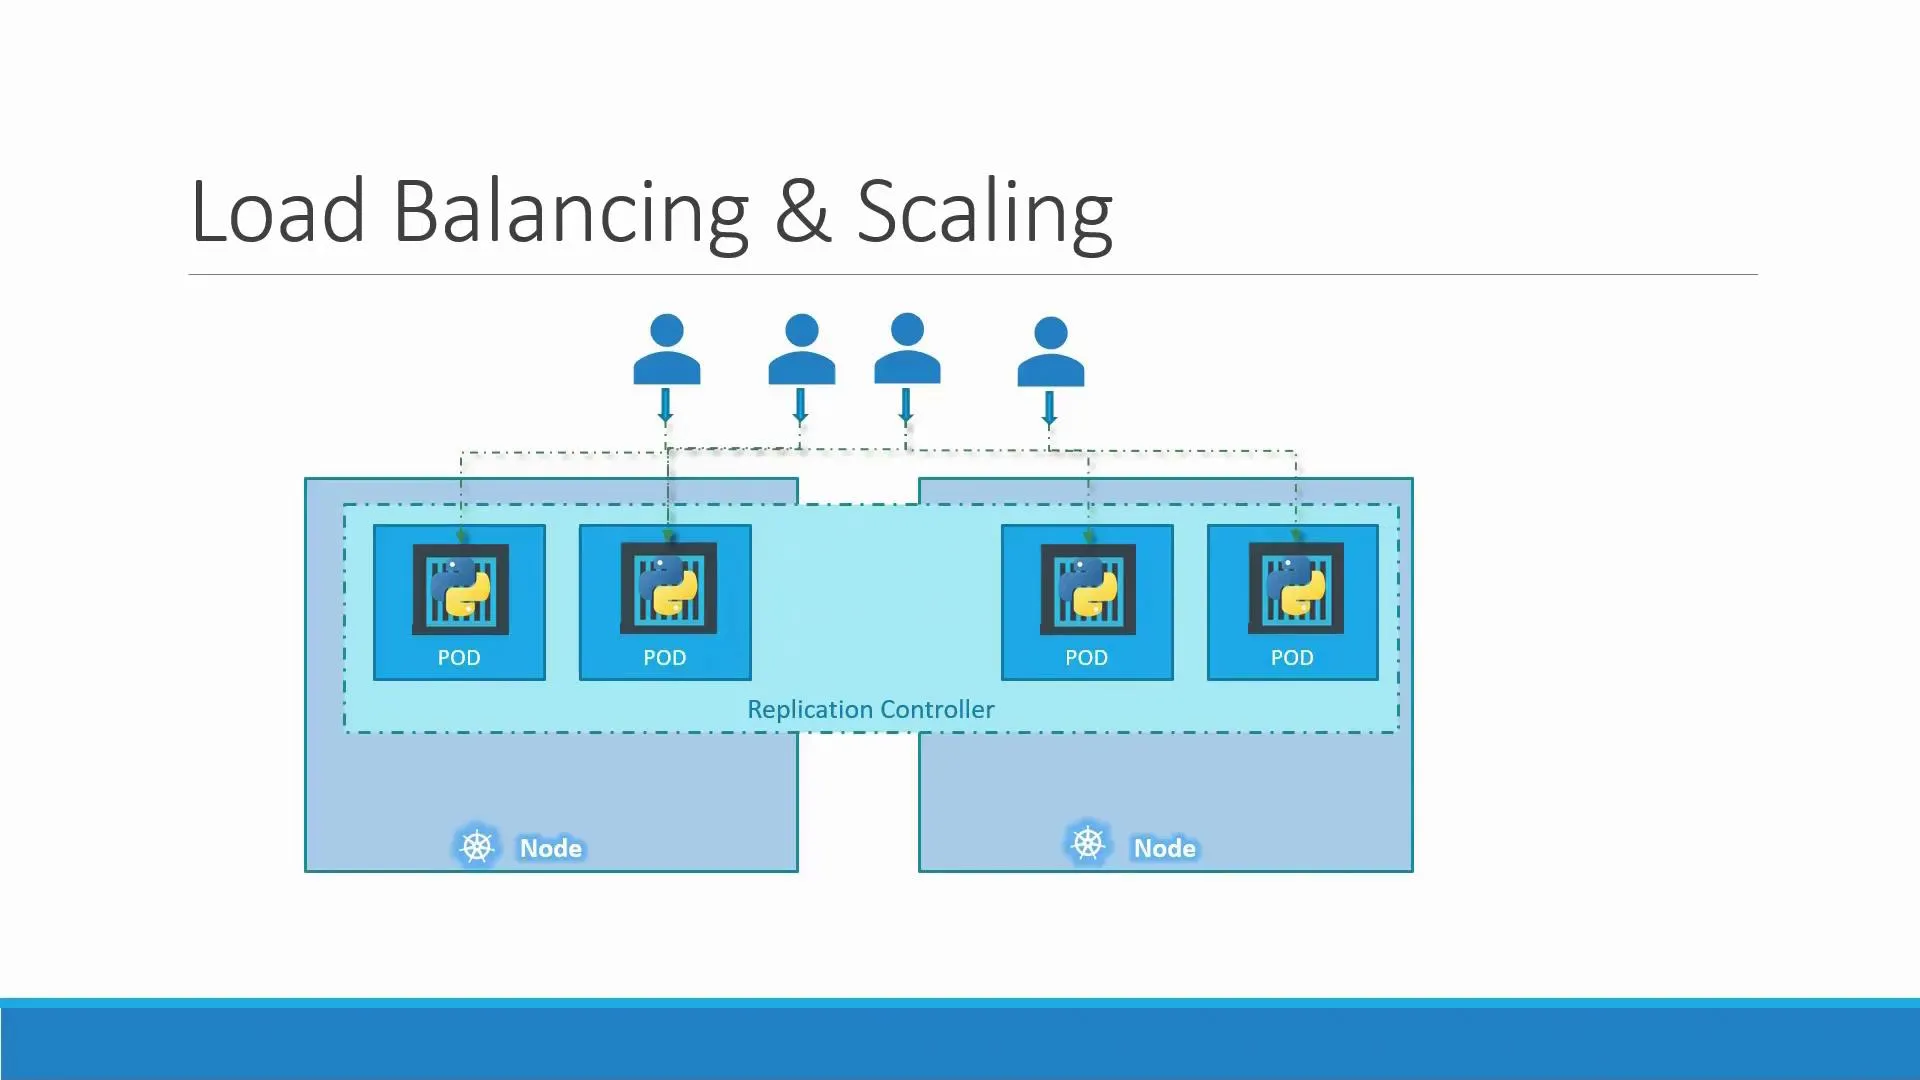
kubectl delete pod myapp-podLesson C — ReplicaSet (keep N copies running)
If one pod dies, users should not wait for you to notice. A ReplicaSet keeps replicas matching spec.replicas by watching labels that match its selector.
C.1 — Write replicaset.yaml
apiVersion: apps/v1kind: ReplicaSetmetadata: name: myapp-rsspec: replicas: 3 selector: matchLabels: app: myapp template: metadata: labels: app: myapp spec: containers: - name: nginx image: nginx:1.25-alpine ports: - containerPort: 80Check: template.metadata.labels must include every key in selector.matchLabels.
C.2 — Apply and verify
kubectl apply -f replicaset.yamlkubectl get replicasetkubectl get pods -l app=myappYou should see three pods.
C.3 — Prove self-healing
Pick one pod name from kubectl get pods and delete it:
kubectl delete pod POD_NAMEkubectl get pods -wA new pod name appears; the ReplicaSet recreated it.
C.4 — Clean up
kubectl delete replicaset myapp-rsLesson D — Deployment (how you run apps in real life)
A Deployment manages ReplicaSets for you: rolling updates, history, rollback, scaling. For stateless apps, prefer Deployment over a bare Pod.
D.1 — Write deployment.yaml
apiVersion: apps/v1kind: Deploymentmetadata: name: myappspec: replicas: 3 selector: matchLabels: app: myapp template: metadata: labels: app: myapp spec: containers: - name: nginx image: nginx:1.25-alpine ports: - containerPort: 80D.2 — Create and watch rollout
kubectl apply -f deployment.yamlkubectl rollout status deployment/myappkubectl get deploy,rs,pods -l app=myappYou will see a ReplicaSet with a hash suffix (the Deployment owns it).
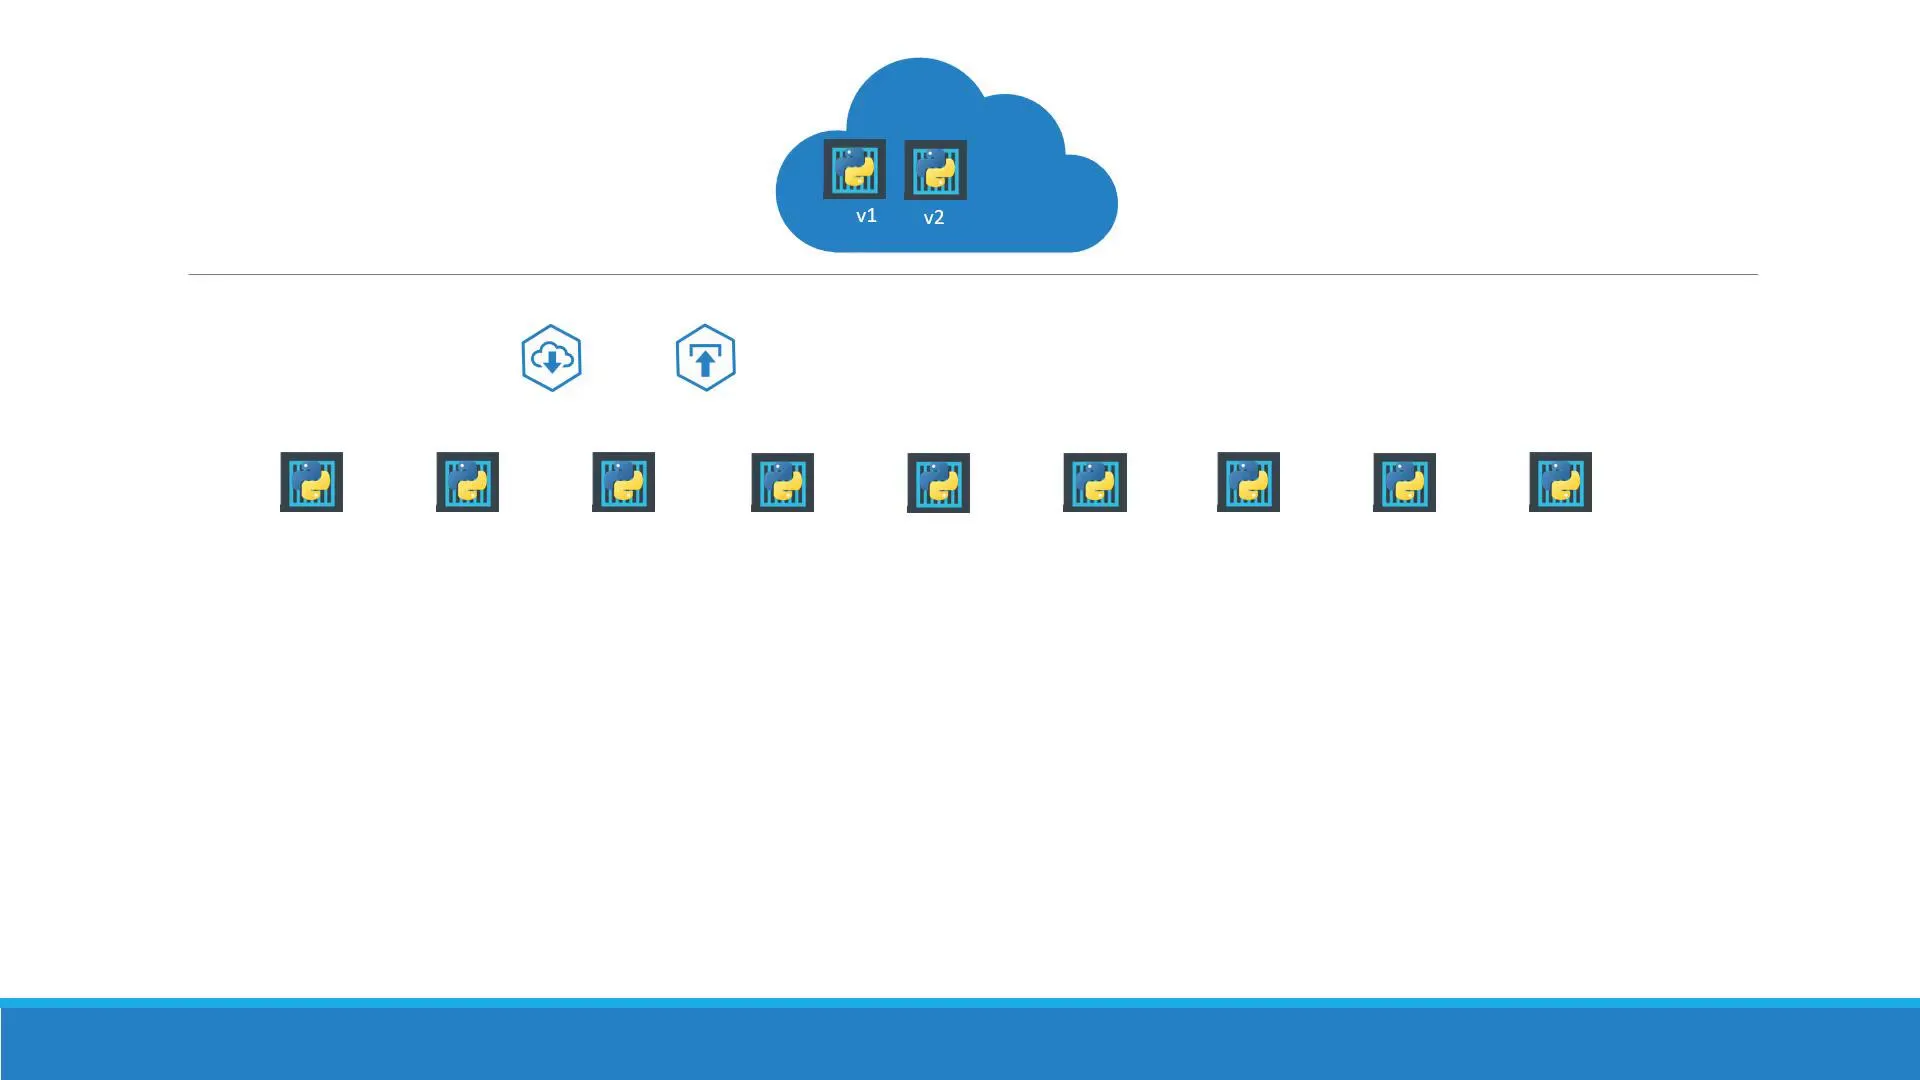
D.3 — Update the app (new rollout)
Option 1 — edit YAML (change image tag to nginx:1.27-alpine), then:
kubectl apply -f deployment.yamlkubectl rollout status deployment/myappOption 2 — imperative one-liner
kubectl set image deployment/myapp nginx=nginx:1.27-alpine --recordkubectl rollout status deployment/myappD.4 — History and rollback
kubectl rollout history deployment/myappkubectl rollout undo deployment/myappkubectl rollout history deployment/myappLesson E — Deployment strategies (exam + real design)
Kubernetes supports two common patterns on Deployments:
| Strategy | What happens | Downtime? |
|---|---|---|
| RollingUpdate (default) | New pods come up gradually; old scaled down in parallel. | Designed for no surge beyond maxUnavailable. |
| Recreate | Old pods terminated first, then new ones created. | Yes — gap while nothing runs. |
Set explicitly if you need Recreate (some stateful migrations):
spec: strategy: type: RollingUpdate rollingUpdate: maxUnavailable: 1 maxSurge: 1Use kubectl explain deployment.spec.strategy for all fields.
Reference — create / apply / scale / pause (daily commands)
| Task | Command |
|---|---|
| First-time create | kubectl create -f file.yaml |
| Ongoing updates | kubectl apply -f file.yaml |
| Safe dry run | kubectl apply -f file.yaml --dry-run=client |
| See diff vs live | kubectl diff -f file.yaml |
| Scale | kubectl scale deployment myapp --replicas=5 |
| Pause / resume rollouts | kubectl rollout pause deployment/myapp then resume |
| Inspect failure | kubectl describe deployment myapp |
What’s next
Open Networking & Services: stable IPs/DNS for pods, ClusterIP, NodePort, and how to debug Endpoints.