Kubernetes — Networking & Services
Tutorial-style: pod IPs, why Services exist, ClusterIP vs NodePort vs LoadBalancer, verify with describe/endpoints, port-forward
What you will learn
- Why pod IPs are a bad contract between components.
- How a Service fixes that with a stable VIP + DNS name.
- When to use ClusterIP, NodePort, and LoadBalancer.
- How to prove traffic flows with
kubectl describe, Endpoints, and port-forward.
Lesson A — Pod IPs change; Services do not
Each Pod gets an address on the cluster pod network (often 10.244.x.x or similar). When the pod restarts, that IP changes. If your front-end hard-codes the back-end pod IP, it will break after the next restart.
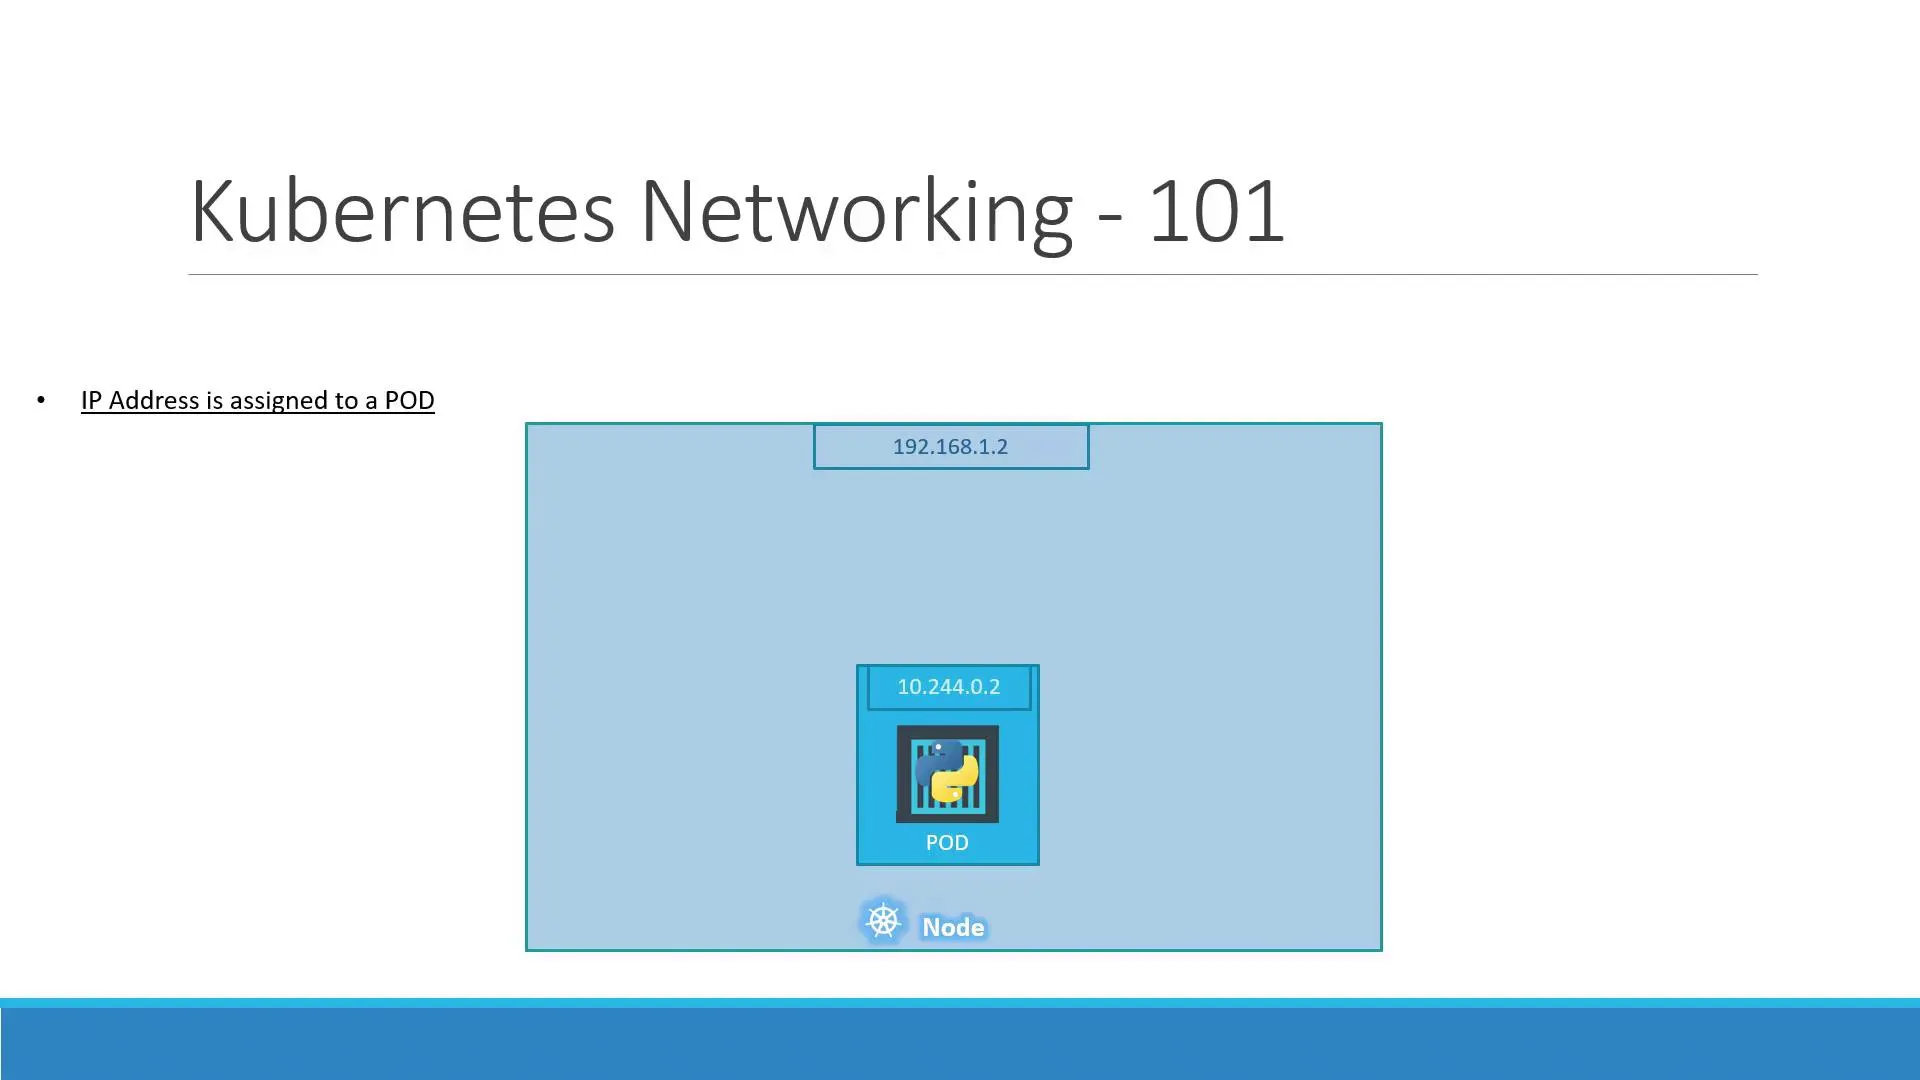
Rule for revision: apps talk to Services (or Ingress), not to raw pod IPs.
On multi-node clusters, a CNI plugin (Calico, Cilium, Flannel, …) gives each node a slice of pod IPs and routes traffic so every pod can reach every other pod without NAT breaking the model.
Lesson B — What a Service does
A Service is its own object. It has:
- Selectors — labels that pick which Pods are backends.
- Ports — usually
port(Service) →targetPort(container). - Type — how that Service is reached.
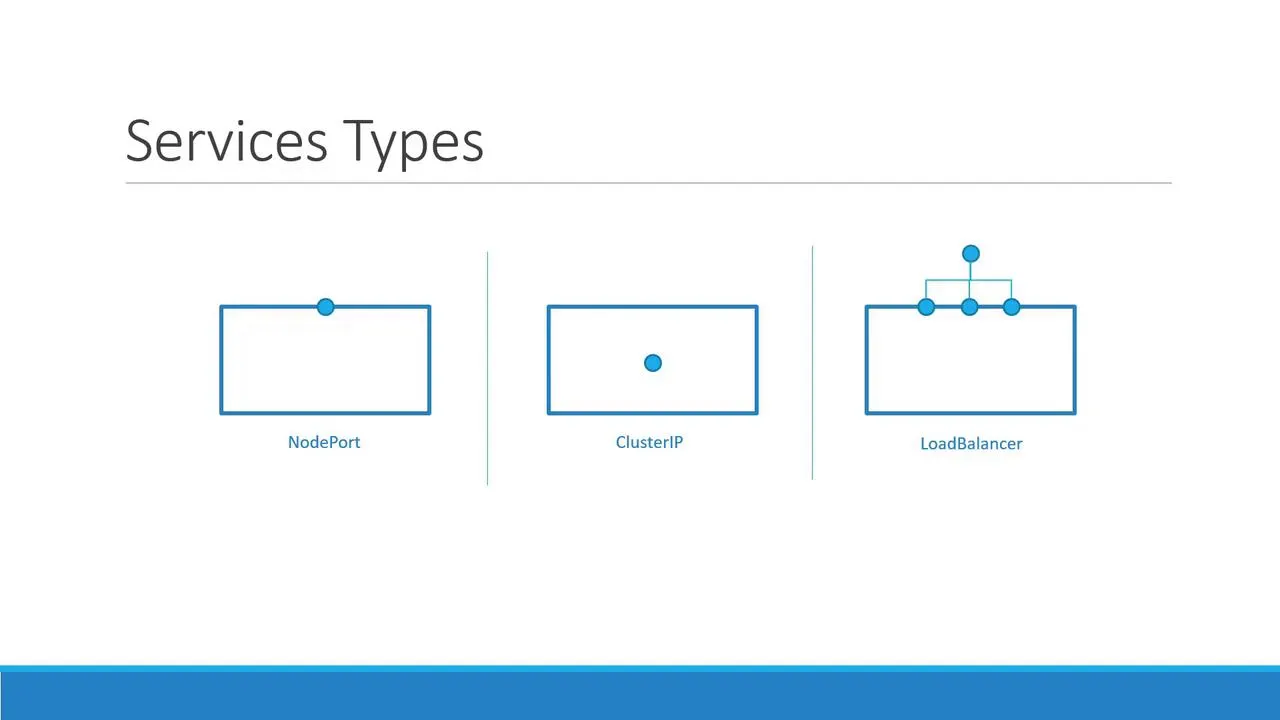
| Type | Who can reach it | Typical use |
|---|---|---|
| ClusterIP | Only inside the cluster | Internal APIs, databases, Redis, “backend” tiers. |
| NodePort | From outside using NodeIP:nodePort (high port range) | Labs, quick demos, bare metal without a cloud LB. |
| LoadBalancer | Internet via cloud load balancer (when supported) | Public web apps on EKS/GKE/AKS. |
Lesson C — ClusterIP (internal only)
C.1 — Example manifest
Save as backend-service.yaml (labels must match your pods):
apiVersion: v1kind: Servicemetadata: name: backendspec: type: ClusterIP ports: - port: 80 targetPort: 80 selector: app: votes tier: backendC.2 — Apply and inspect
kubectl apply -f backend-service.yamlkubectl get svc backendkubectl describe svc backendkubectl get endpoints backend -o wideSuccess checklist:
Endpointslists pod IPs and ports.- If Endpoints is empty, either no pods match the selector, or pods are not Ready.
C.3 — DNS name (inside the cluster)
From another pod in the same namespace:
http://backendhttp://backend.default.svc.cluster.localLesson D — NodePort (reach the app from outside)
D.1 — Example manifest
Save as myapp-nodeport.yaml:
apiVersion: v1kind: Servicemetadata: name: myappspec: type: NodePort selector: app: myapp ports: - port: 80 targetPort: 80 nodePort: 30008nodePort must stay in 30000–32767 if you set it yourself; omit it and Kubernetes picks one for you.
D.2 — Apply
kubectl apply -f myapp-nodeport.yamlkubectl get svc myappD.3 — How to open it (depends on your cluster)
- Minikube:
minikube service myapp --url - Kind / Docker Desktop: often
localhostwith port-forward (next lesson). - Cloud / real nodes:
http://NODE_EXTERNAL_IP:nodePort
Lesson E — LoadBalancer (one line)
On supported clouds, type: LoadBalancer allocates an external IP or hostname. Until EXTERNAL-IP leaves <pending>, wait and re-run kubectl get svc.
Lesson F — Debug without exposing the app
From your laptop, tunnel to a ClusterIP Service:
kubectl port-forward svc/backend 8080:80Then open http://localhost:8080 in a browser or curl it.
Lesson G — Command cheat sheet for “it’s broken”
kubectl get pods -l app=myapp -o widekubectl get svckubectl describe svc myappkubectl get endpoints myapp -o yamlWhat’s next
- Full stack example: Example voting app note (Redis + DB + worker + two UIs).
- Production depth: operational Kubernetes note (Ingress, probes, limits, failures).